|
In the Spring of 2021, we drove down South to the Bristol area for a 3 week visit with family. In Autumn of the previous year, Cal had worked in Bristol on a contract with his dad, and had planned on putting the van through its MOT (yearly roadworthy test) while he was down South. After failing the MOT, Cal had to abandon the van down South.
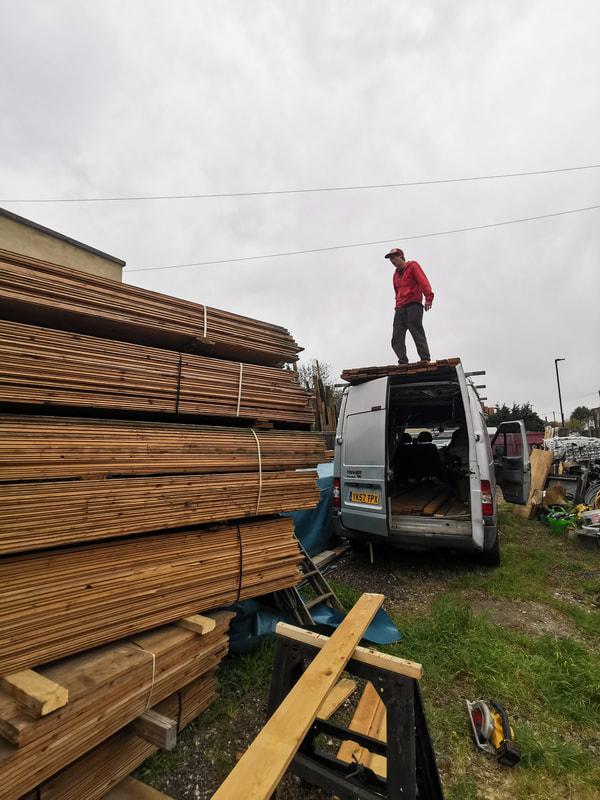
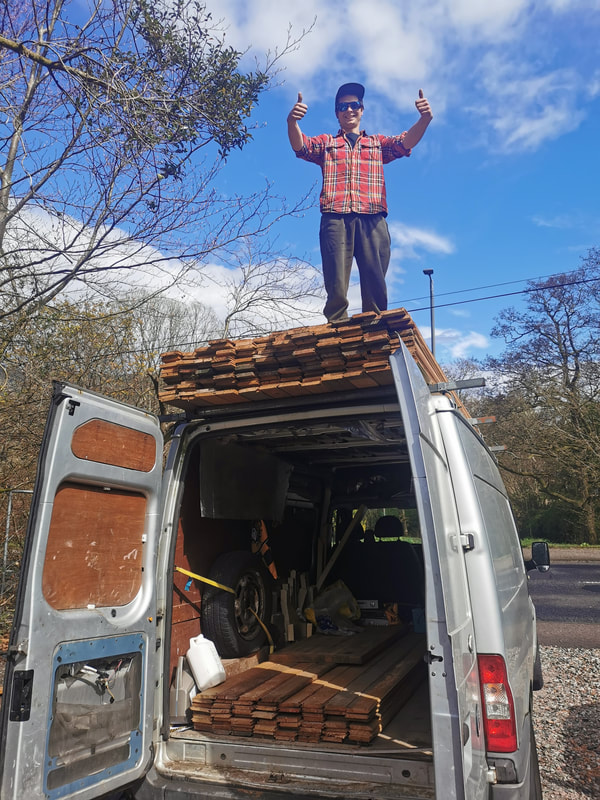
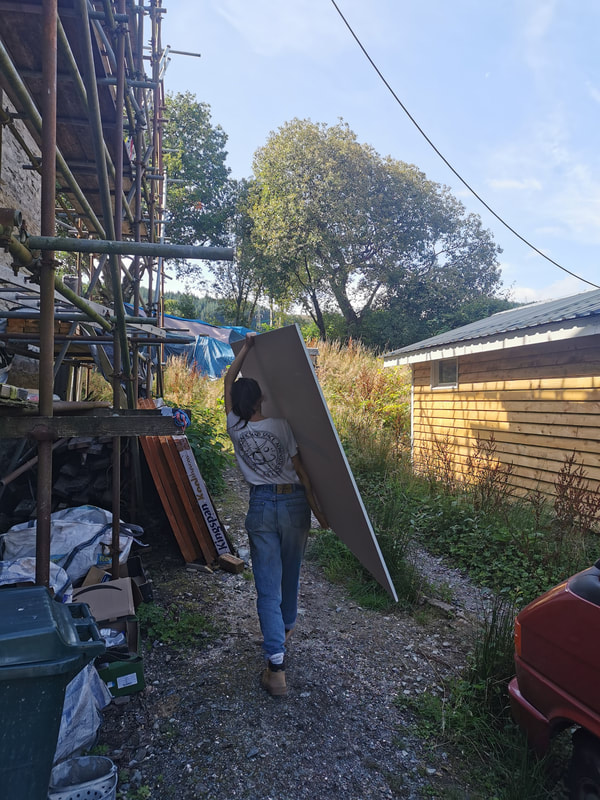
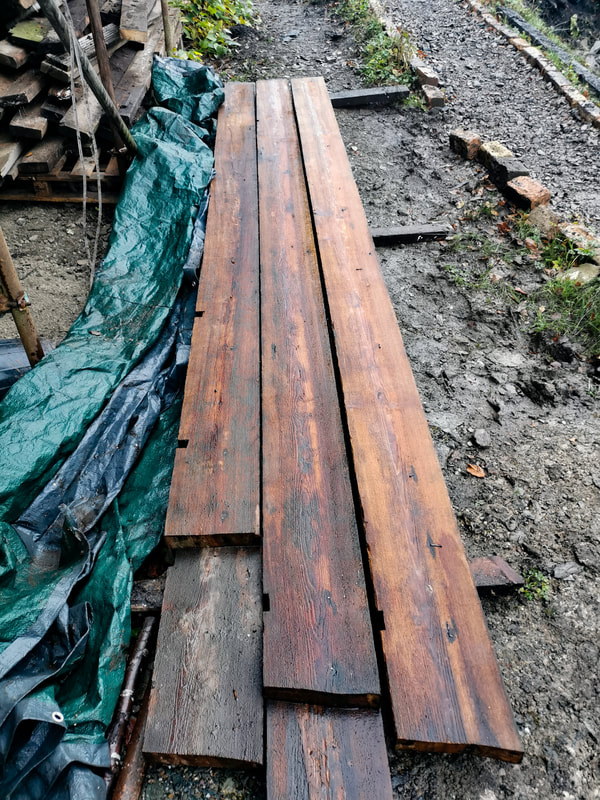
This was the deal of a lifetime! In recent years, reclaimed floorboards have become increasingly trendy - for good reason. They are much thicker than the floorboards being made these days, and the old pine was traditionally slow grown - a better quality than you would find today. They last a lifetime, and if your boards ever look tattered and worn, a quick sand and oil will bring them back to life. As people have started realising the true value of these boards, they have gone up in price - some reclaimed boards can go for more than a brand new floor. At a minimum, we had expected reclaimed boards - without any refurbishment - probably naily and in poor condition, to go for between £20-25/sqm. With a brand new MOT, we went straight to London to pick up our flooring. We found out these boards had previously been used as racking in an old carpet factory - which meant they were barely worn, and they only had one or two nails in either end - rather than every 600mm, as one would expect from old floorboards.
With heafty fines for overloading a vehicle, we decided it was worth making two trips. The extra tank of fuel was well worth it - as we were saving thousands on our flooring budget (note, this was well before the fuel crisis). We made the second trip fun, by stopping by Hull on our way home, to visit family.
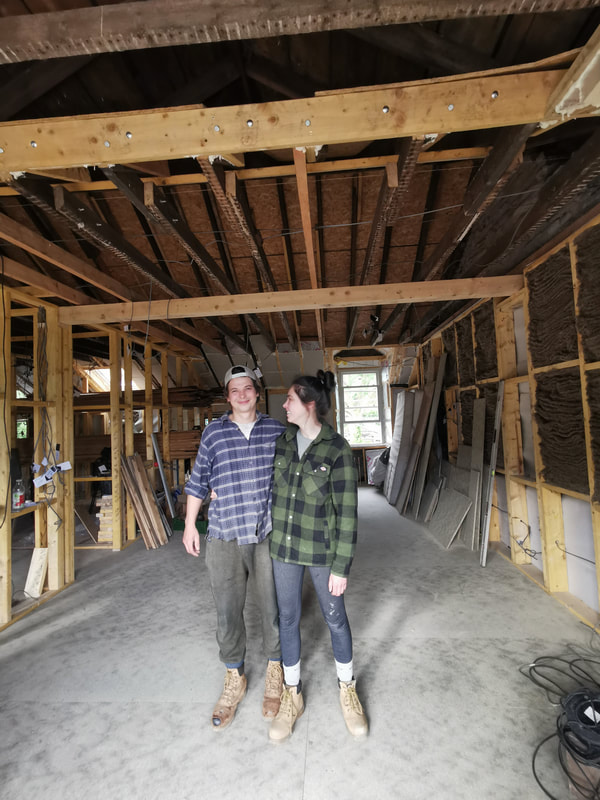
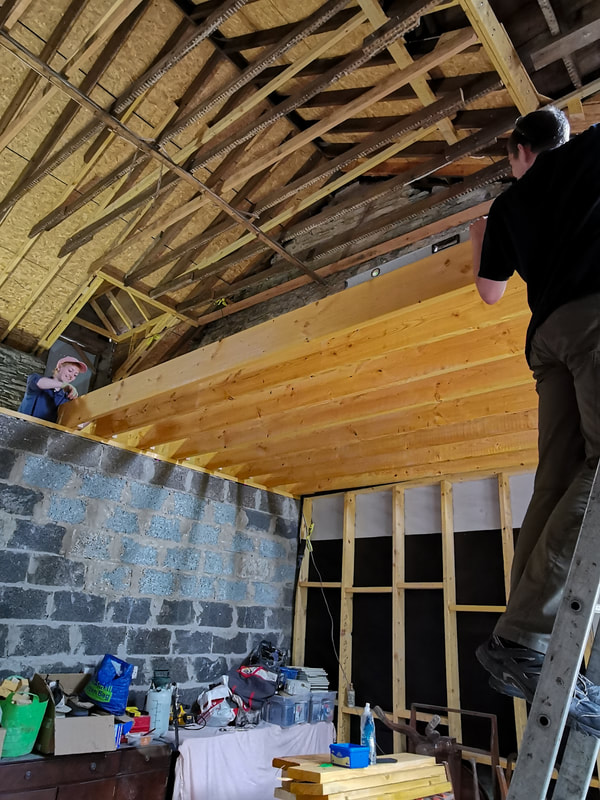
I was surprised by how monumental this progress felt. For the first time in the years we had owned Jameswood, we could finally walk around upstairs without the fear of falling through the floor. The visual progress that the flooring contributed to was immense. Even with stud walls still open, the flooring made the house feel homely.
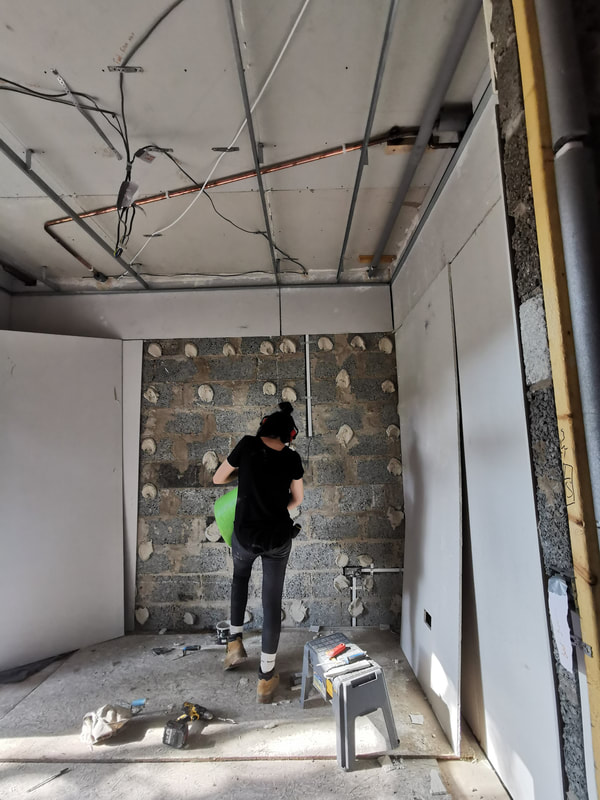
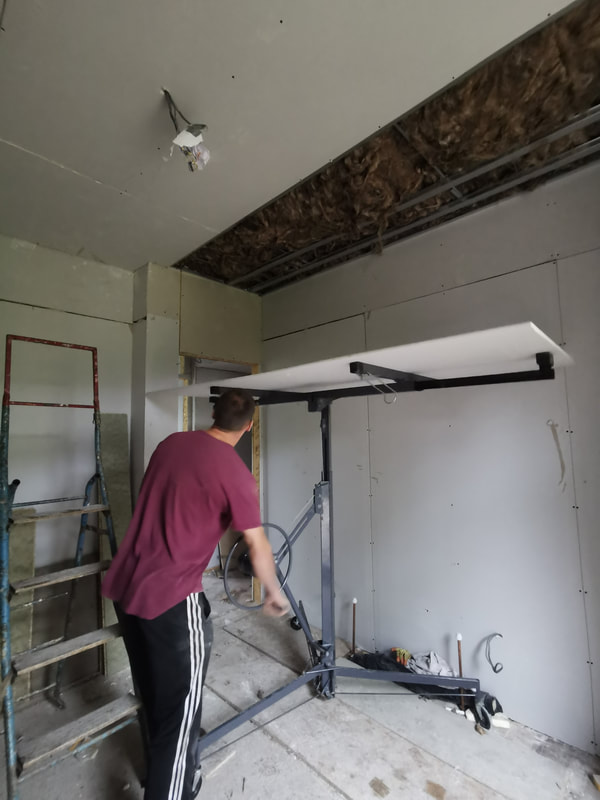
Once the flooring was all in, it was time to move on to plasterboarding. With Cal working on clients’ carpentry projects to bring in some much needed cashflow, I took on this task with the help of our workaway volunteers. I Youtubed how to install the boards, taught my team, and we got to work. This was dusty, heavy work, but many hands make light work, and in another 6 weeks, we had managed to plasterboard the house. A neighbour, who we had leant some scaffolding to, offered us a plasterboard lift, which helped immensely with the ceiling boards. By the end of the summer, I was able to lift a whole sheet of plasterboard by myself - something that I had struggled to do at the start of this project. With plasterboard in, the house was really starting to look like a finished space. There was lots left to do, but we were starting to see a light at the end of the tunnel.
It was a sereal moment in the project, where at the beginning of the summer we didn’t have floors and stud walls stood skeleton-like in each apartment - we now had finished floors and rooms forming in our home.
3 Comments
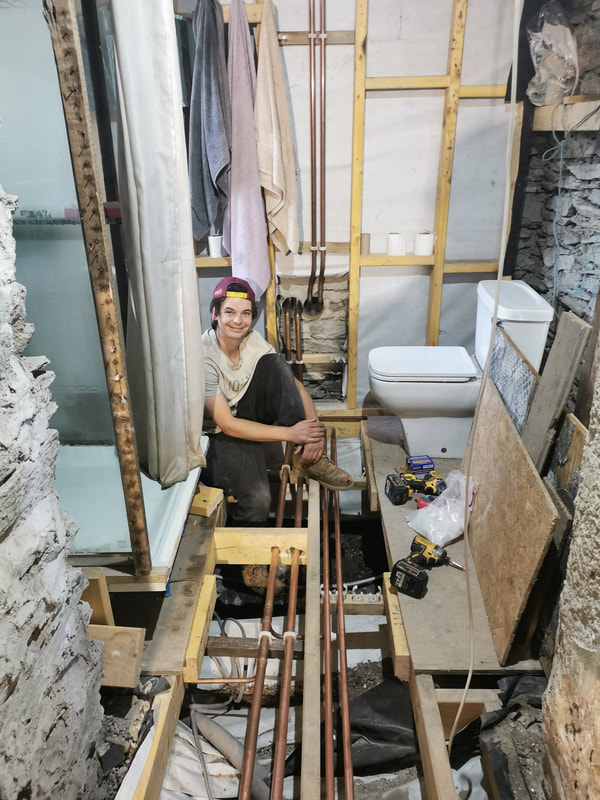
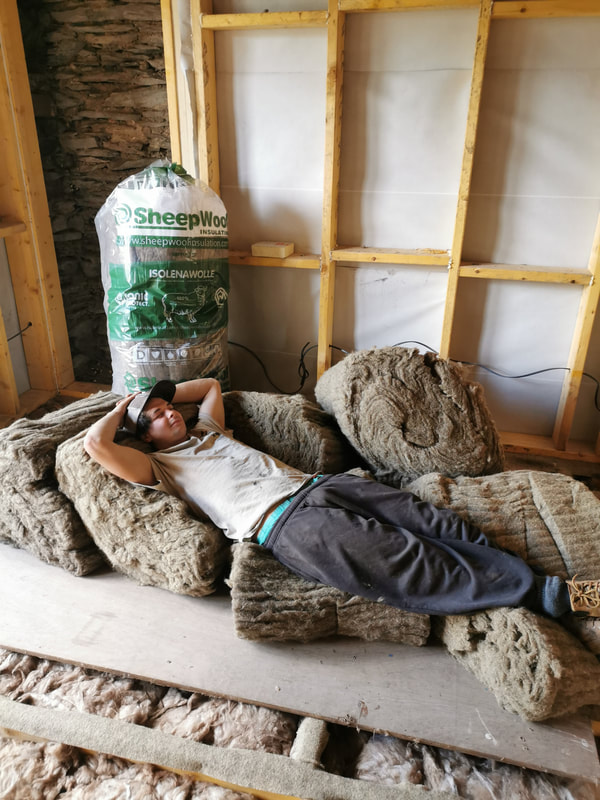
We were finally wind and water tight, just in time for the new year. After our windows were in, Cal and I both took on winter jobs - doing some tree planting and seasonal picking to rebuild funds for the project. As winter became spring, we decided to divide an conquer - a strategy we would use for the whole summer, only again working on projects together in late Autumn. Cal had two main goals during this time. He was in charge of first-fix plumbing and electrics, as well as bringing in more income for the project. While he got underway with these tasks, it would be my job to insulate the house, lay flooring throughout, and plasterboard our walls, with the help of our incredible volunteers. 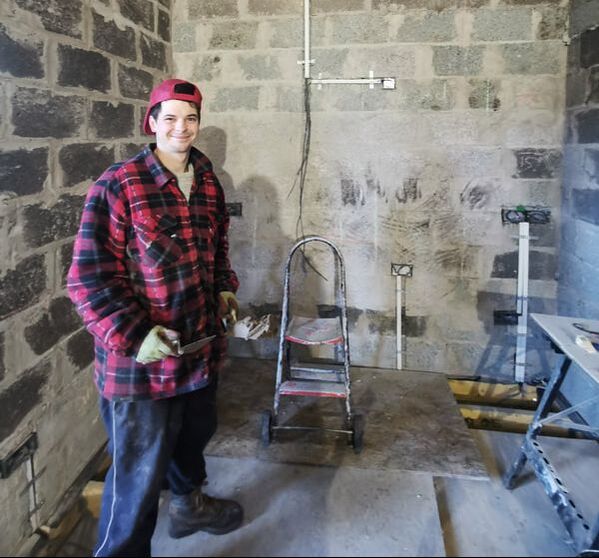 Cal beginning his first-fix wiring journey. Insulating Our Home As Cal got on with first fix plumbing and electrics, I made it my mission to insulate our home. This part of our project was key to our sustainable renovation’s success. Jameswood is an old Victorian home, and like 91% of the UK’s traditionally built, solid-walled homes - she has never had wall insulation (1) - and like 32% of all British homes, the building had such a small layer of loft insulation included, that by British standards, the home was considered to be uninsulated (1). For our home to be efficient, and ready for life in the 21st century, we were going to wrap the building in a continuous layer of insulation - under the floors, in the walls and of course, in the ceilings. But there were some factors we had to consider when choosing how to insulate this property. Traditionally built homes are made of solid stone walls, with an air gap between this, and the inner layer of lathe and plaster that encloses the living space. The stone walls are designed to get damp in rainy conditions, and with the help of ventilation blocks in the crawl space, air flow gaps in the eaves and the air gap between the outer and inner layer of the walls, the walls will breath and dry out in dry weather conditions. It’s essential that this process is unimpeded by the insulation we put in our home (2).
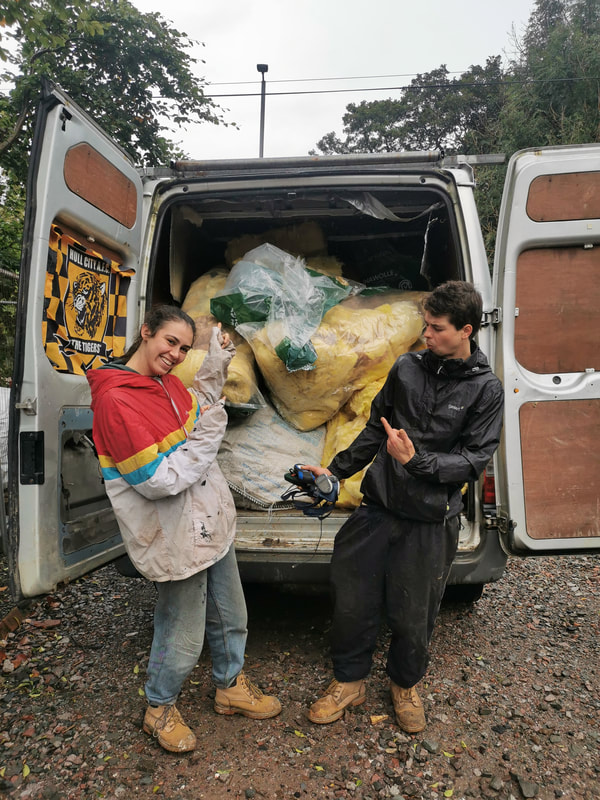
Unfortunately, SheepWool insulation is expensive. In terms of costs, it is comparable to Kingspan - which has also become an expensive way of insulating a home, and is far more expensive that Glass wool insulation. We decided to be strategic about its use in our home, because we just didn’t have the cash to insulate our entire home in the material.
In the roof space and under the floor, we used glasswool insulation, some of which was salvaged from a friends renovation project. We used Kingspan sparingly - it was used around window and door reveals, where room was tight, and we needed a highly efficient, thin insulating material - for these, we managed to get second-hand boards for many of the spaces, and “seconds” - rejected boards with small defects, for the rest.
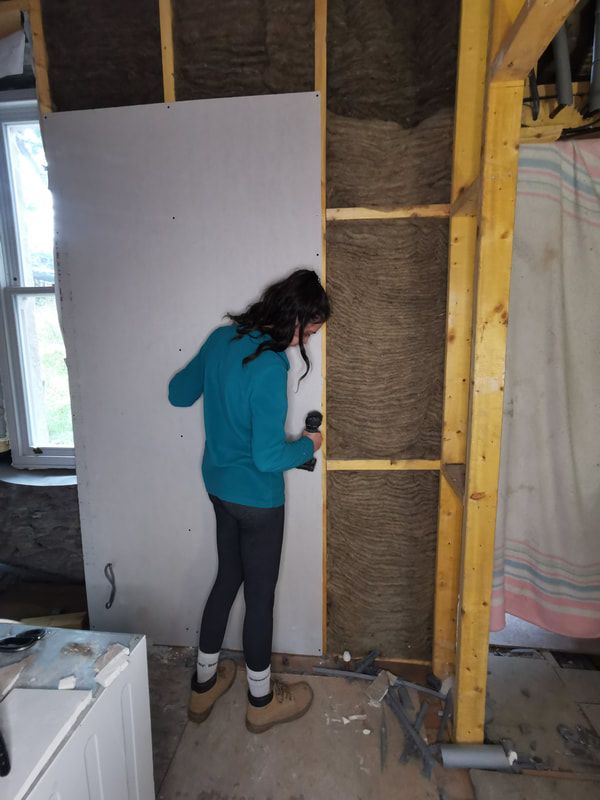
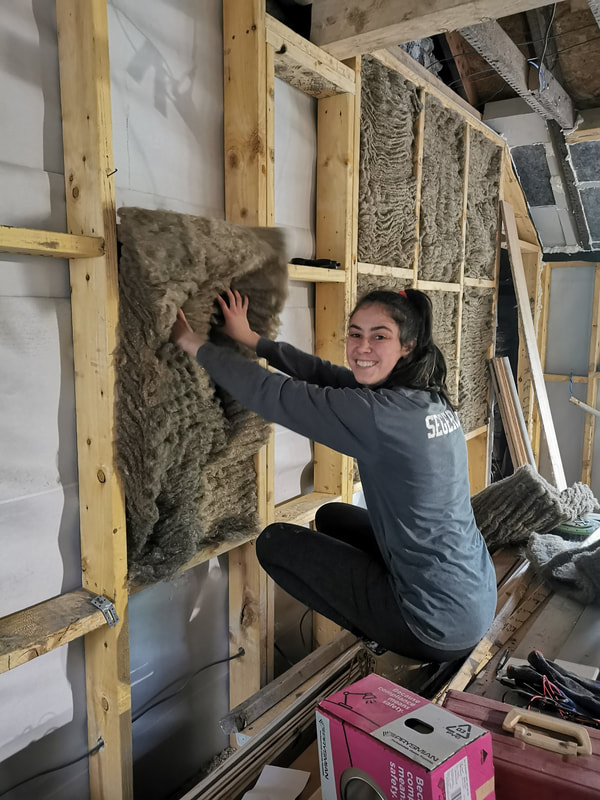
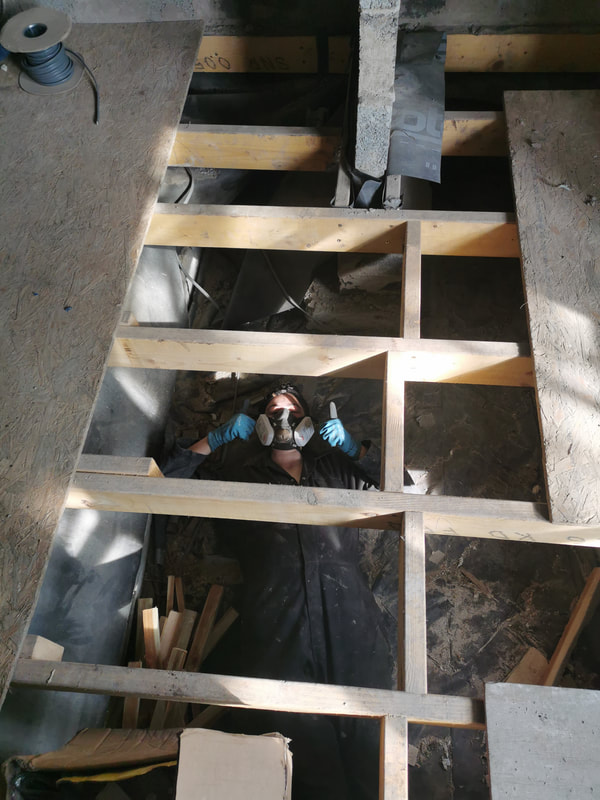
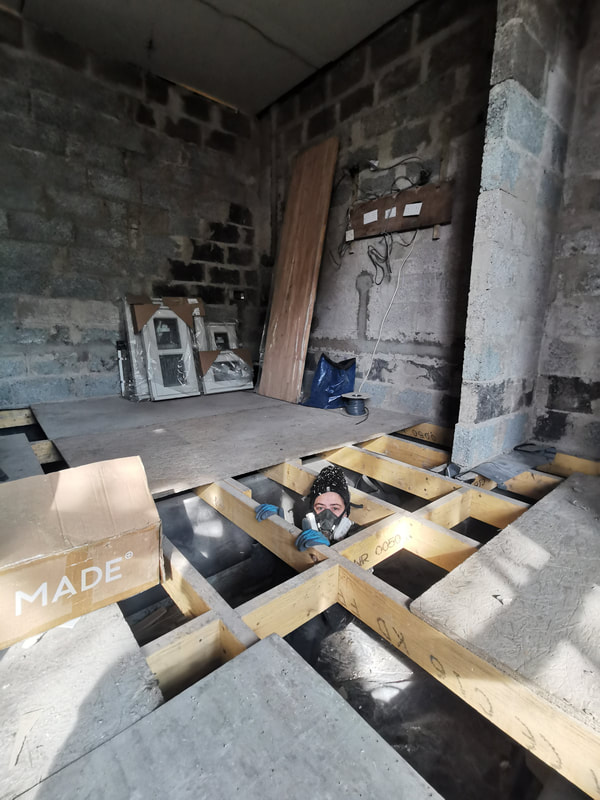
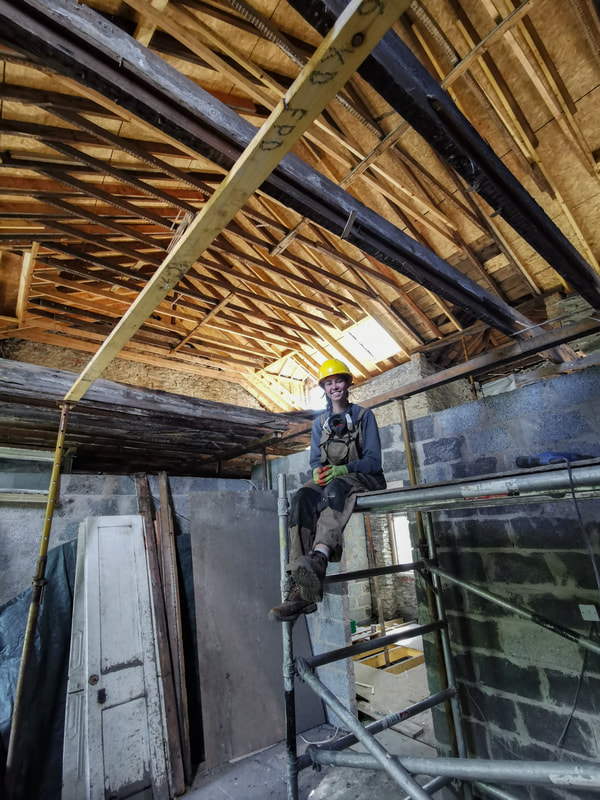
With an insulation plan in place, I got to insulating! Working with the Sheep Wool insulation was a dream! It has a sweet grass smell to it, it was easy to cut and install, and it was safe to work with - no PPE required! Unfortunately, the same couldn’t be said of our glass wool and Kingspan insulation. They were itchy and dusty to work with (always wear a proper face mask when working with this material!) and worming my way under the floor, and crawling around in the attic wasn’t the most fun job I’ve had to do in our renovation - but we quickly saw progress, and in no time at all, we had an insulated home! An exciting milestone for our project!
With an energy crisis AND and climate crisis in our midst, it’s increasingly important that we insulate our homes.
Putting wall insulation into a Victorian can be a bit tricky, and can require taking plaster down, reframing walls, and replastering large spaces. It’s not a practical solutions for everyone to tackle. However, there are some easy places to make your home more effiicient. Check your loft - it should have about 300mm of insulation. If it doesn’t, topping up your insulation is a very quick, easy and inexpensive way of increasing the energy efficiency of your home. You could make savings that cover the cost of this upgrade in as little as a year (5)! If you’re taking up flooring while doing renovations, consider putting underfloor insulation in as well. This job could save up to 10-20% extra on your energy bills (6). Make sure your insulation creates a continuous envelope, with no gaps. A gap in your insulation can dramatically decrease its energy efficiency - it’s like putting on a jacket in the winter, but refusing to zip it up - you’ll get cold! Check out your local government’s website for energy improvement grants. Right now, the Scottish government will cover the costs of putting insulation in your home! If you don’t own your home, make your landlord aware of these grants and ask that they make these important energy improvements. 1. https://assets.publishing.service.gov.uk/government/uploads/system/uploads/attachment_data/file/970064/Detailed_Release_-_HEE_stats_18_Mar_2021_FINAL.pdf 2. https://www.thepebbletrust.org/sustainablerenovation.asp 3.https://www.swinter.com/party-walls/choosing-insulation-for-carbon-value-why-more-is-not-always-better-part-1/ 4. https://www.sheepwoolinsulation.com/ 5. https://friendsoftheearth.uk/climate/saving-energy-home-heating-and-insulation 6. https://www.edfenergy.com/heating/advice/complete-guide-floor-insulation I last posted on this blog over a year ago - and since then, I’ve had a number of concerned emails from readers, asking if we’re okay, and if the house is okay? The silence has been a sign of good things! The fact of the matter is… blog posts take a LONG time to write, and so does building a house! This blog has taken a seat on the backburner for the sake of progress on Jameswood. Now, I am taking a few weeks away from the house to visit family and friends in Canada, for the first time since the start of the pandemic. With a bit of extra time while I'm here, I thought I would sit down and update you on our house! So what have we managed to get done over the past year? Let's go back to December 2020, and fill you in! December 2020 2020 brought with it one of the most exciting and memorable Christmas’ I’ve experienced. We were finally completing the momentous step of getting Jameswood wind and water tight - with the addition of our beautiful new windows!!! This was a HUGE deal for us. They could easily cost more than we initially paid for one of our apartments, and they were likely to completely drain funds for the project. Even with these facts looming over us, we wanted to make a good choice for our home.We didn’t want the cheapest windows we could find - we wanted something that would add value to our home, help bring the original character back to our Victorian property, and importantly, choose windows that would last - so that we didn’t have to make this very large purchase again any time soon. It was for these reasons that we decided it was important for us that we put timber framed windows into our home. Unlike UPVC, which have a life expectancy of between 15 - 30 years, timber framed windows can last a lifetime, if taken care of properly. Though most of Jameswood’s windows had been broken by vandals, and damaged beyond repair, we actually still had three windows left, that were original to our home. With a good sand and paint, these remaining three 120-year old windows have become a beautiful feature on our new shed - and a testament to why we chose timber frames for our home. 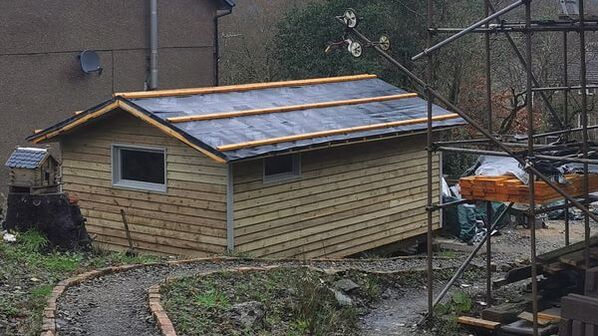 Jameswoods original timber windows, reused for our brand new shed (built shortly after getting our windows in, in January 2021) The key to making timber windows last is maintenance. Everyone seems to be afraid of this word these days. UPVC, as well as numerous other parts of our home, are marketed as maintenance-free. But let’s rephrase that, and say it as it is: they’re unmaintainable. They can’t be fixed. When they get discoloured and brittle from the sun… that’s that. If a piece of the frame breaks, you have to buy a brand new window. And the old one ends up in landfill. Timber windows, in contrast, will last a lifetime. If a section of window does get damaged, you can replace a piece of the frame, instead of the whole window. As long as the windows protective paint coating is maintained, the window should stay in good working order. We decided we would much rather paint our windows with a high quality coating every ten years, instead of replace them every 15-30. Once we had re-framed our perspective, the additional cost of timber windows felt a lot less daunting. After lots of careful research, we finally chose a company, style, and completed the very daunting task of putting down a deposit and ordering our windows.
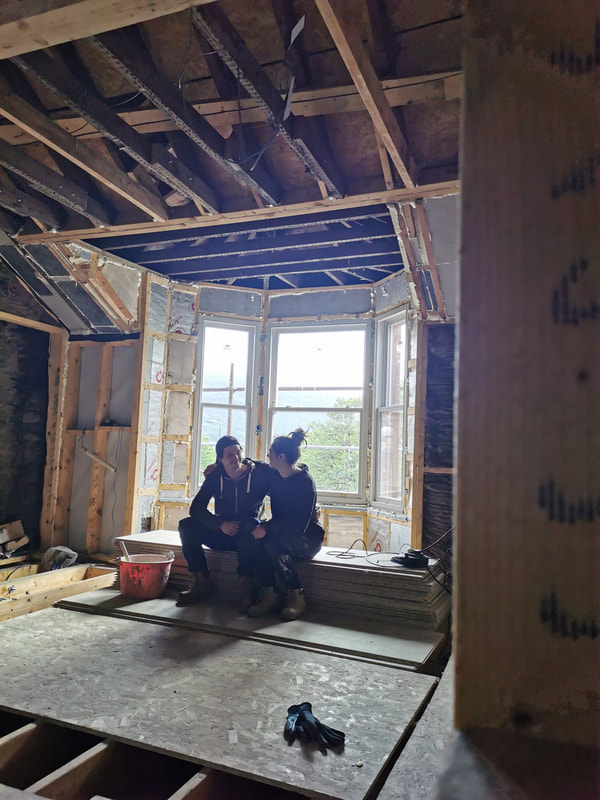
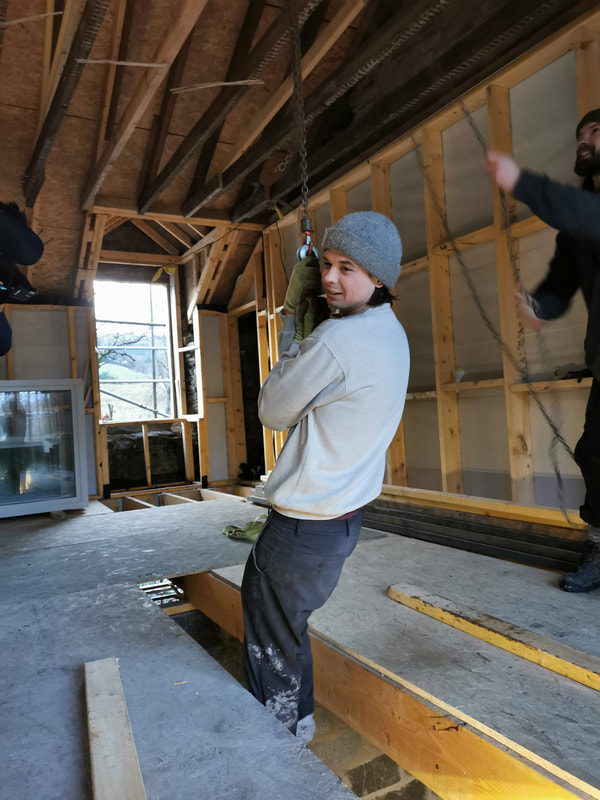
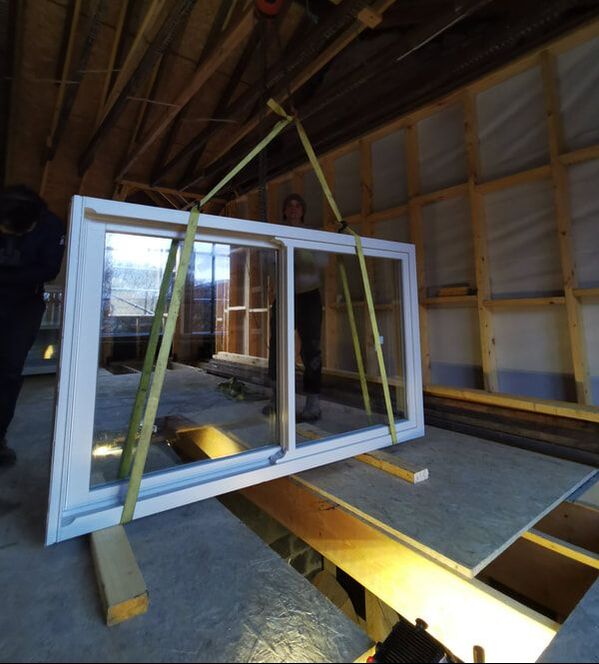
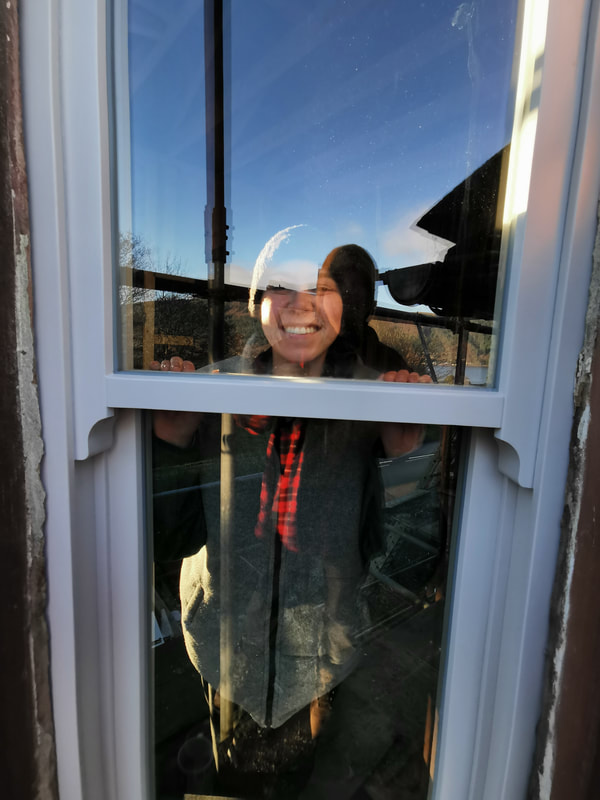
Days before Christmas, with our bank account drained, but our spirits high, we got the best Christmas gift we could ever imagine. We received an exciting delivery of brand new, beautifully built and finished timber windows. 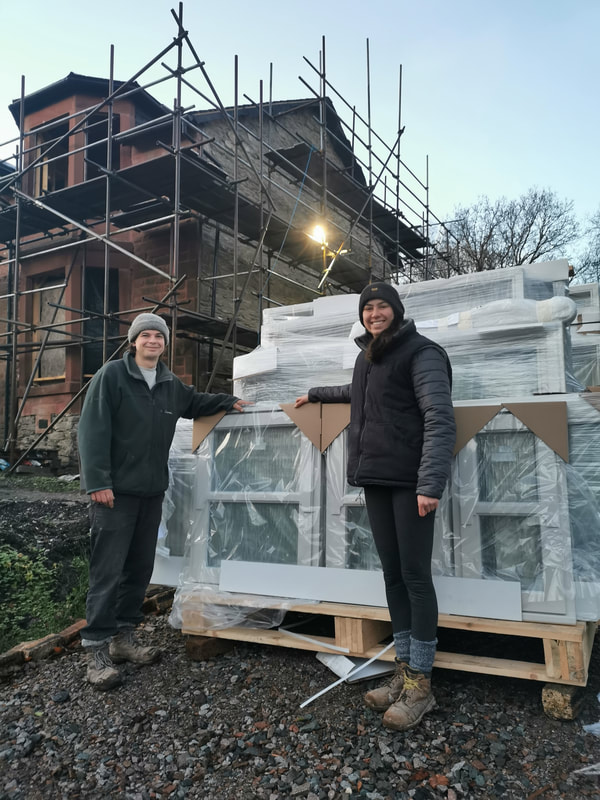 Grinning ear to ear, we were so happy to receive delivery of our windows days before Christmas. With extreme care, we started unpacking and moving our delivery into the house. We were so thankful to have great friends help with this task - with bay window openings that are taller than us, some of our timber windows were extremely heavy. At this time, we didn't have any flooring upstairs, just temporary boards laid over joists. Even more problematic was the fact that there was no proper stairway to access this upper floor. We had been getting up to this area via ladder. With no way of safely carrying these huge windows up a ladder, Cal set up a block and tackle from the roof rafters, and - inch by inch - we pulled our precious cargo up to the second floor.
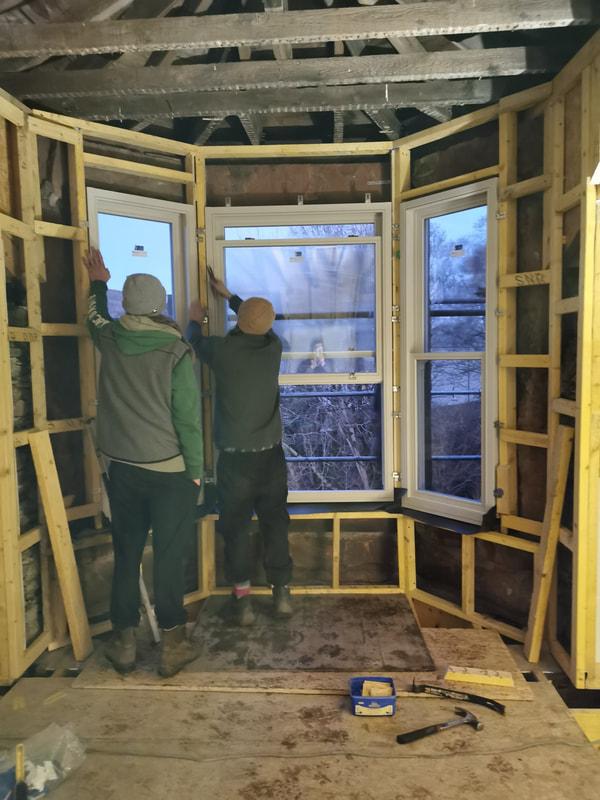
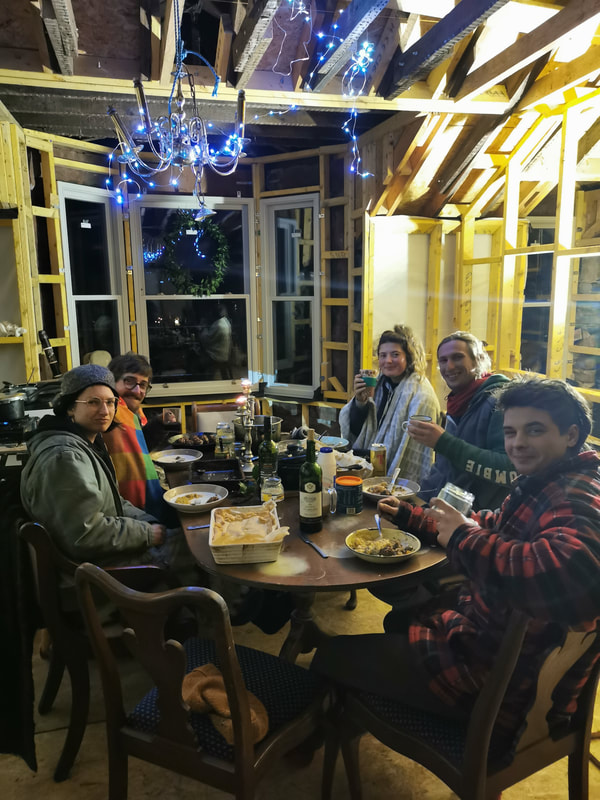
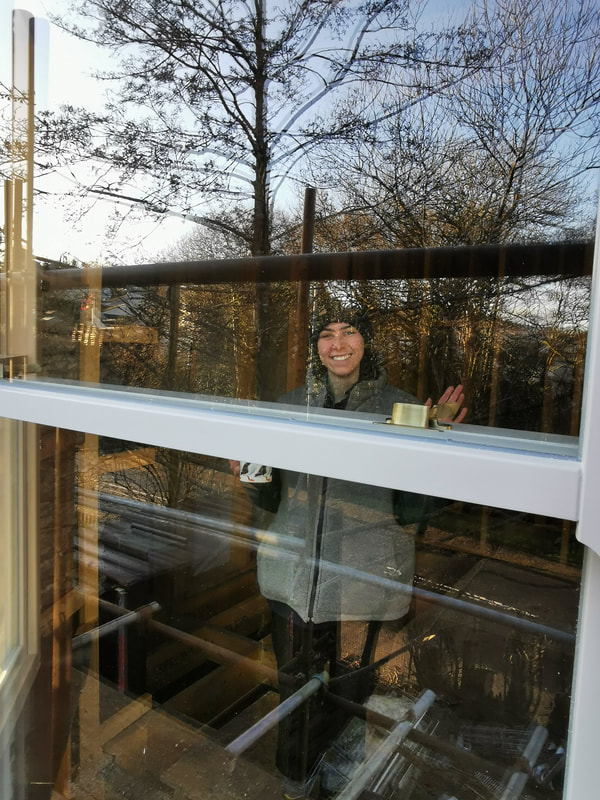
Over the next few days, with the help of our incredible friends, we closed out the windy and rainy December air, window by window. By Christmas, we had all the upstairs windows installed, and we were able to enjoy a... still cold, but wind-free Christmas with friends in our future living room!
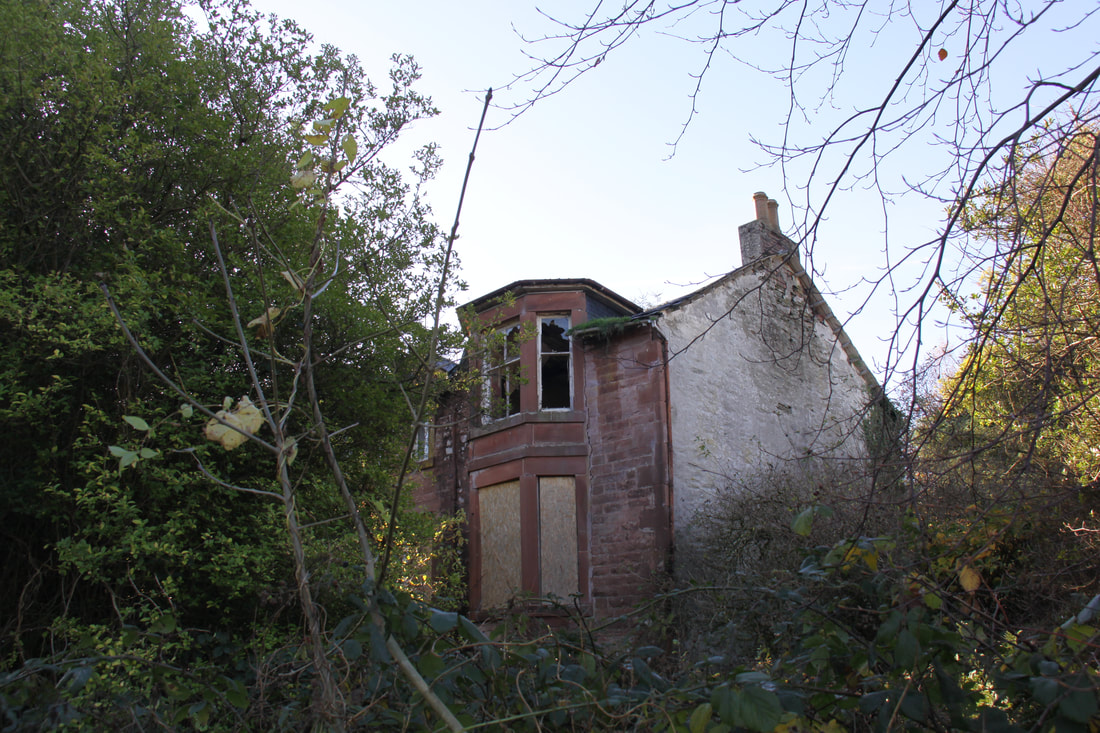
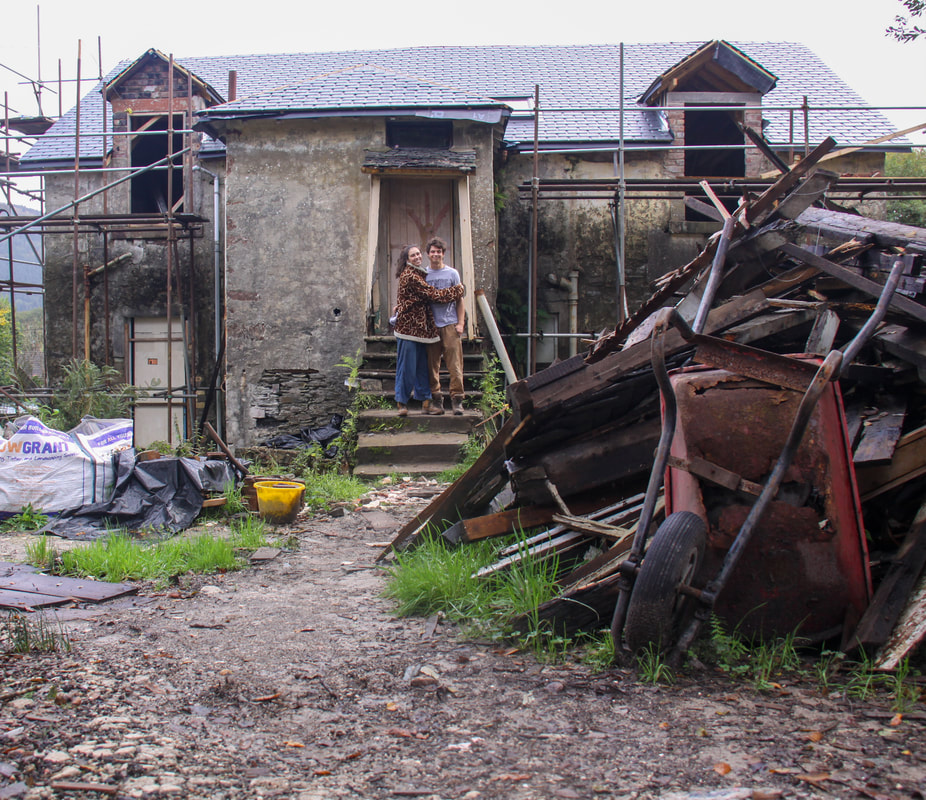
As each window was installed, Jameswood started to come to life. She was looking more and more like a real-people house! I kept stopping and staring as we pulled into the driveway, or came home from a walk, and were greeted to a building that was really starting to look beautiful.
We couldn’t have been happier with the company we found to design and build our windows. Bereco makes high-quality timber framed windows from slow grown, sustainably forested timber. They offer free online design consultations, so that you can speak with an expert, and get the correct style window for your price point. We chose their traditional sash windows, though they also offer contemporary styles. They even matched the horn detail from our original windows, which was an exciting feature for us, that would help us restore the building to its original beauty and character. For transparency’s sake, we DID receive a discount on our windows, for sharing them with our audience on Instagram. But I can whole-heartedly recommend this brand. Their windows are such high-quality, stunning pieces. Their company is responsible to the environment and infinitely helpful. Their windows have truly been an investment that has added beauty and value to our home. We were finally wind and water tight, just in time for the new year, and Cal and I couldn't be happier.
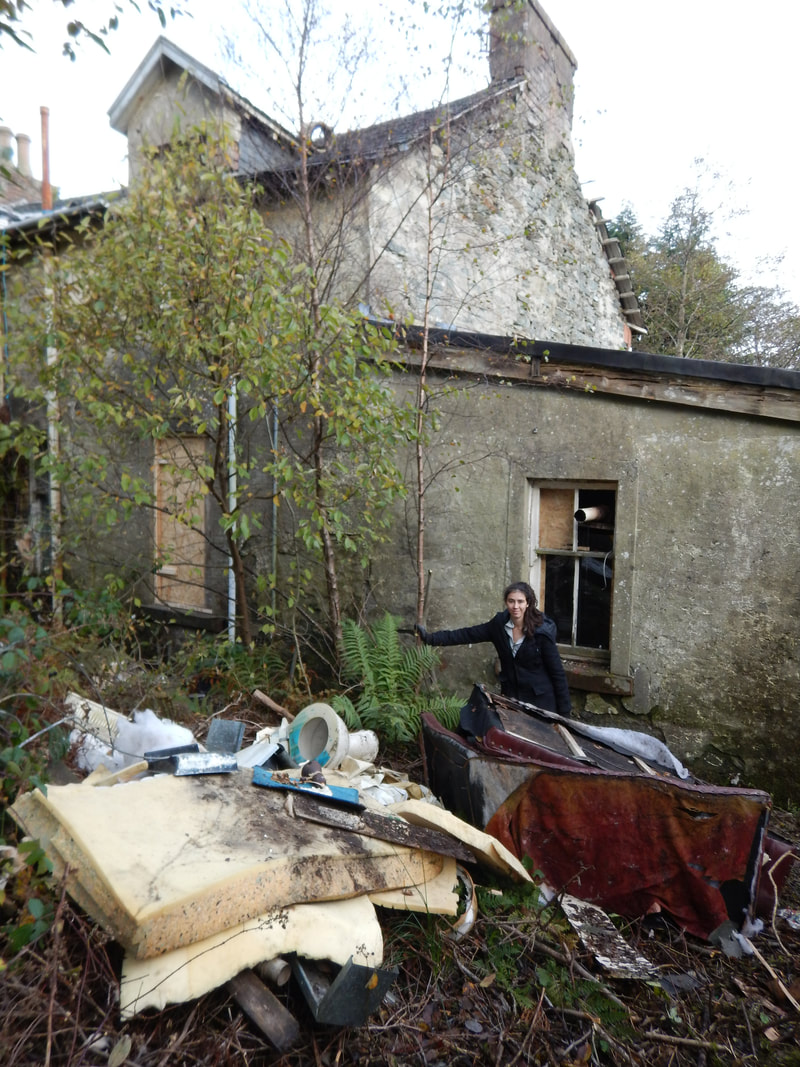
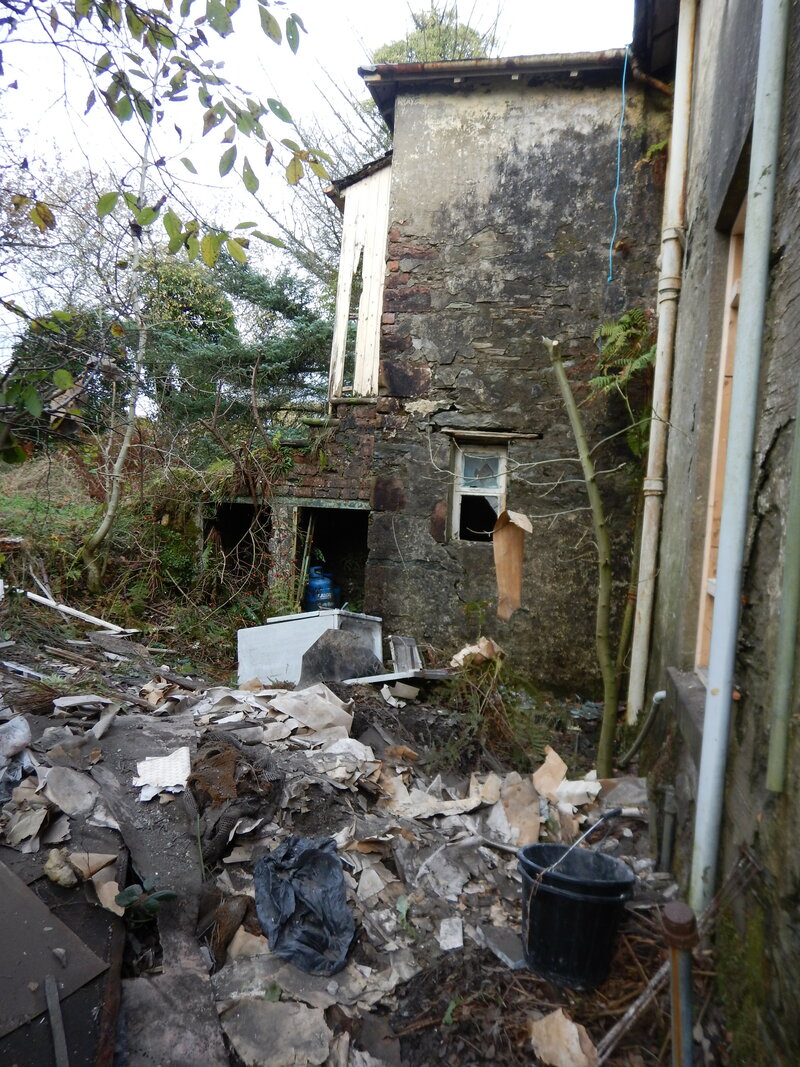
When we first arrived at Jameswood and slowly started to peel back her crumbling, waterlogged plaster walls, we uncovered a devastating amount of wood rot inside our home.  A dangerously rotten floor engulfed a chair left in our derelict home. We were careful to save as much timber as we could, but the majority of the original structure was unsalvageable. The lengths that could be kept still needed to be cut at the ends, and with such a small number of full length timbers left to reuse, we decided not to put them back into Jameswood. Almost all the timbers in the house had been affected by, or in close proximity to wet and dry rot. We didn’t want to run the risk of bringing these destructive fungi back into our home.
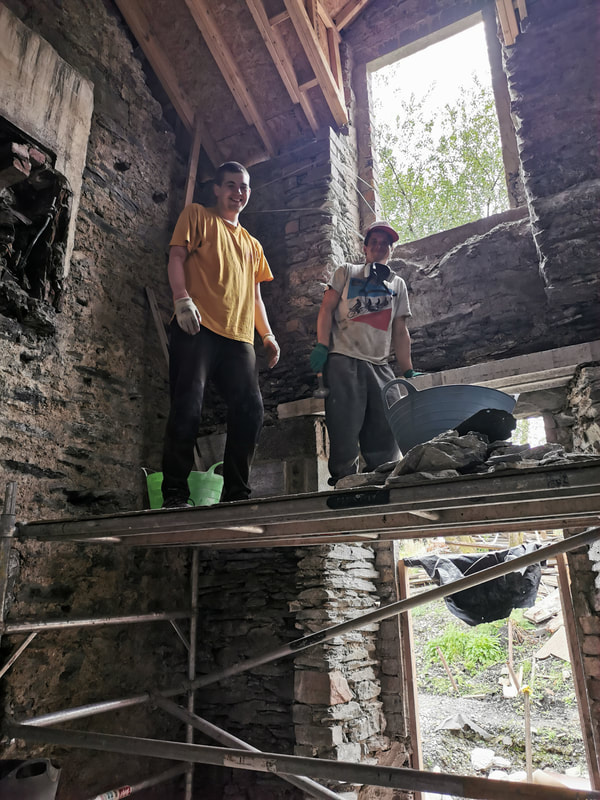
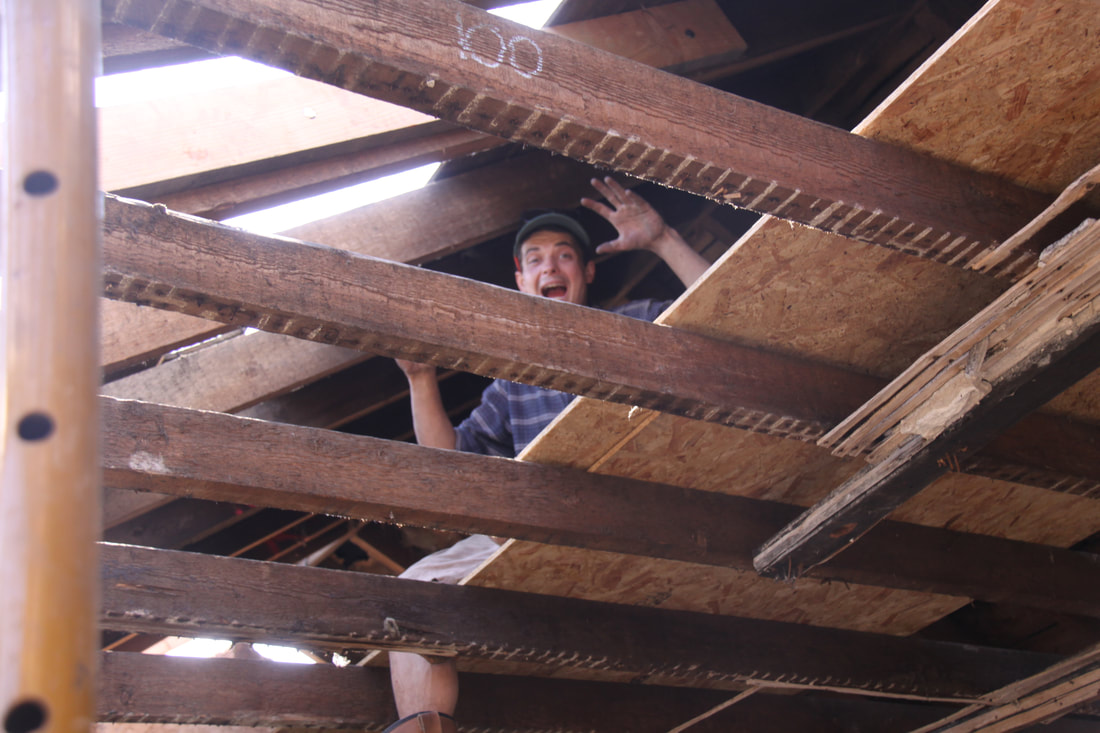
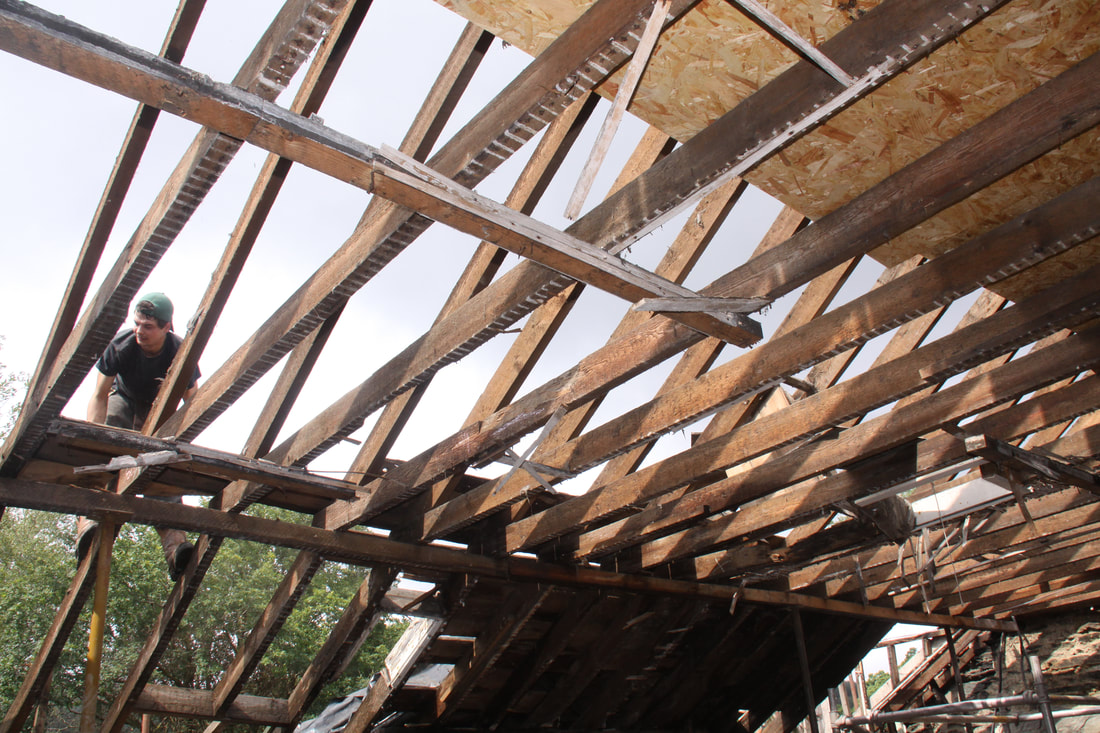
 An overwhelming pile of timber that was pulled out of our home. Later sorted into burn and salvage piles. With nearly the whole house cleared and back to its bare bones, the upper floor was the final element that needed to be removed from the building. Unfortunately, this is easier said than done. The upper floor is an important structural element in a two-storey stone building. The big, heavy floor joists are embedded in the front and back walls of the building, and help provide “lateral support”. Without this support, the external walls of the building run the risk of bellying outwards, or in extreme cases, collapsing. Thankfully, our structural engineer was quite certain that we could use our wrap-around scaffolding as a temporary brace for our home. Once we had braced the front and back walls, we embarked on the nerve-wracking task of carefully removing the 8m long timbers that hung 3m above our heads. 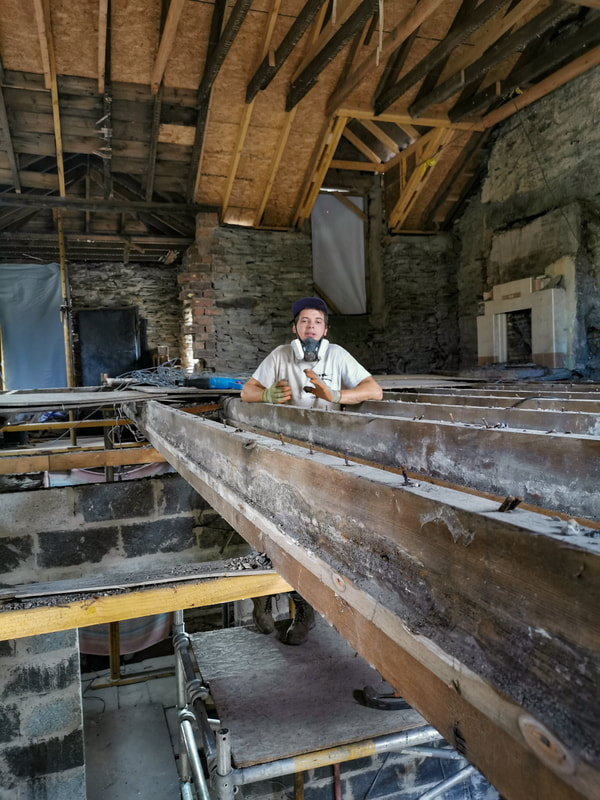 Cal briefing our rag-tag building team before we took down our first floor joist.
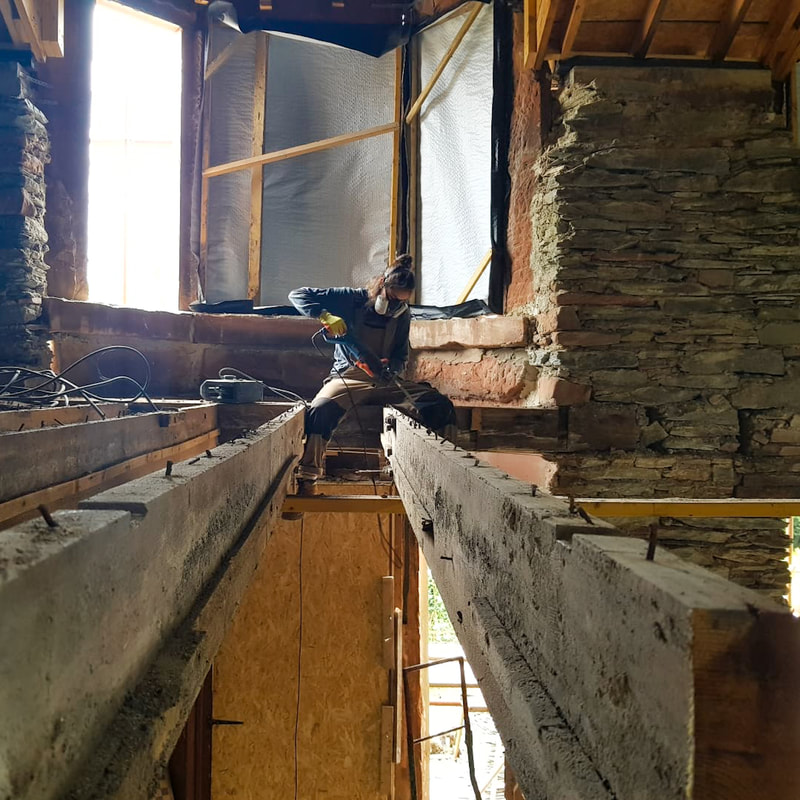
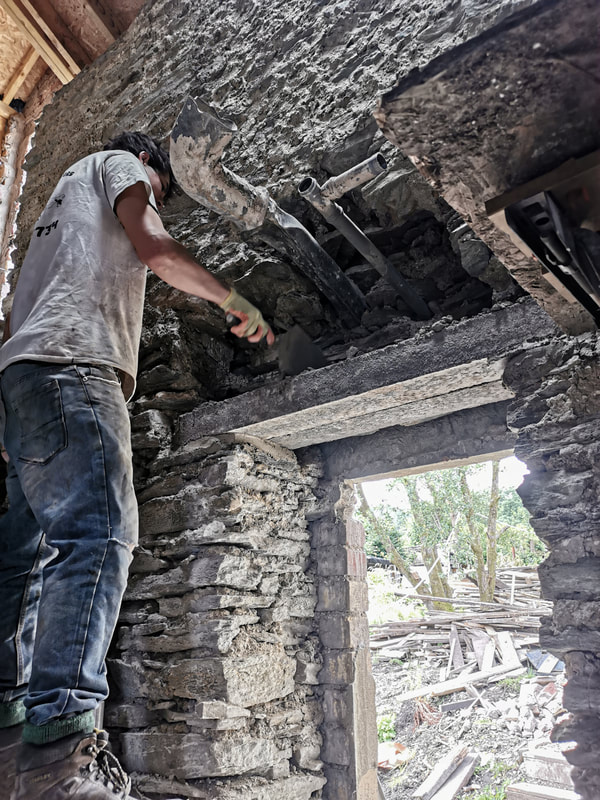
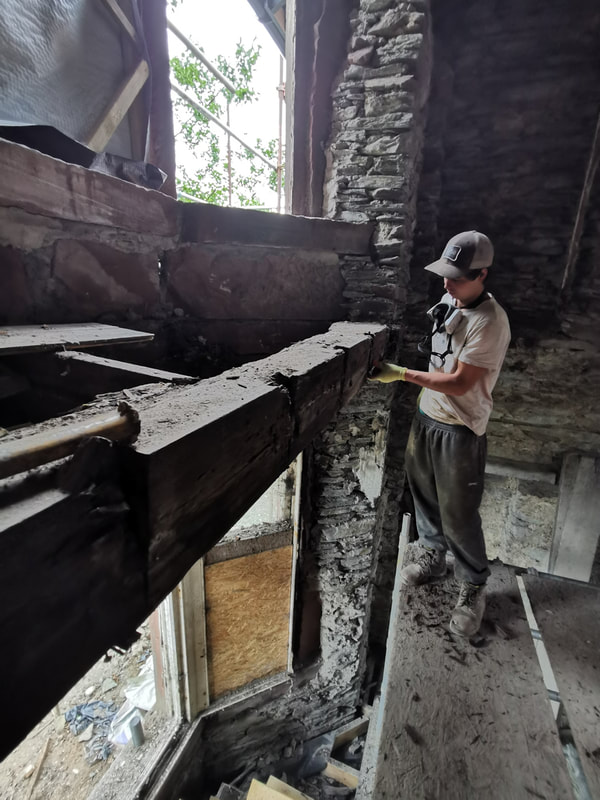
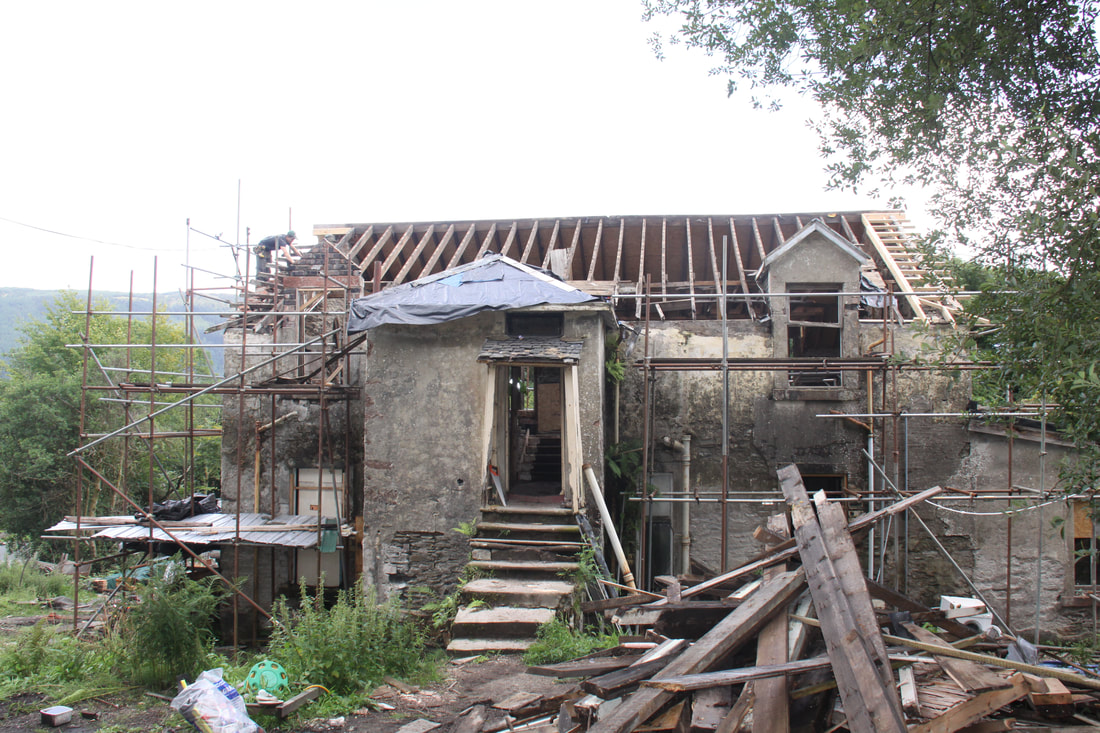
 Very pleased with progress! It was fun to see the roof structure from down at ground level. With that out of the way, I really believed that we must be passed the most nerve wracking pieces of this restoration. Over the past year, we had managed to literally lift our roof off of Jameswood’s walls AND play a giant game of Jenga with our bay window. Surely we had to be on to normal, low-risk building work! Of course, I was wrong. Before we could frame the house, we also had some lintels and a bressummer beam to replace. For those of you who, like myself, had never heard of a lintel before the restoration of Jameswood, it’s a structural element that holds up the wall above a window or door opening. My question was, what’s supposed to hold up the wall when you take the lintel out, to put the new one in?
Thankfully, there’s a tool for that! Cal was able to replace all of the lintels with relative ease, and after seeing him do the first one, I was left with less worry as well. A bressummer beam is a structural element that spans across a bay window, and supports the upper floor of a house. With our upper floor removed, it seemed like a good time to replace our beam, which had severe rot at one end. The problem is, this beam is nearly half a meter thick, and went nearly a meter into the wall in either direction. The sheer size of the beam meant that it had become a huge component of our front wall, and we really didn’t know how we were going to safely get this thing down.
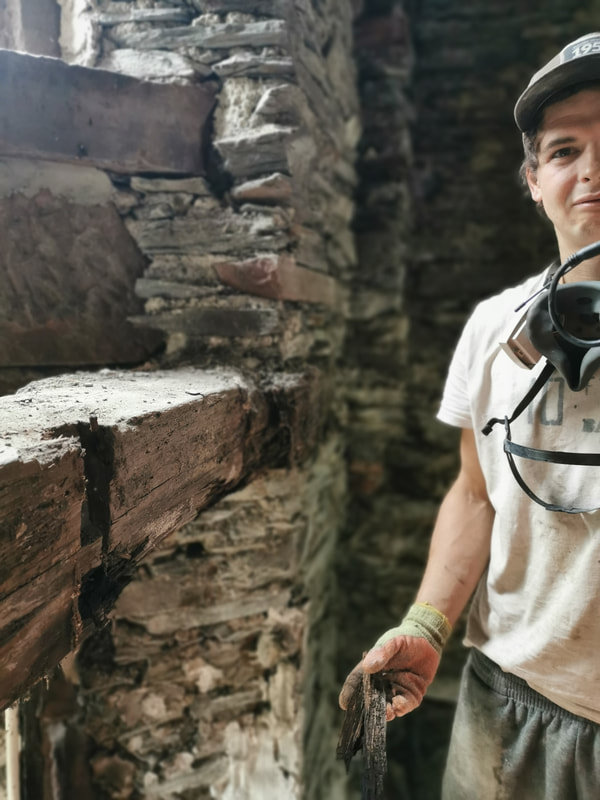
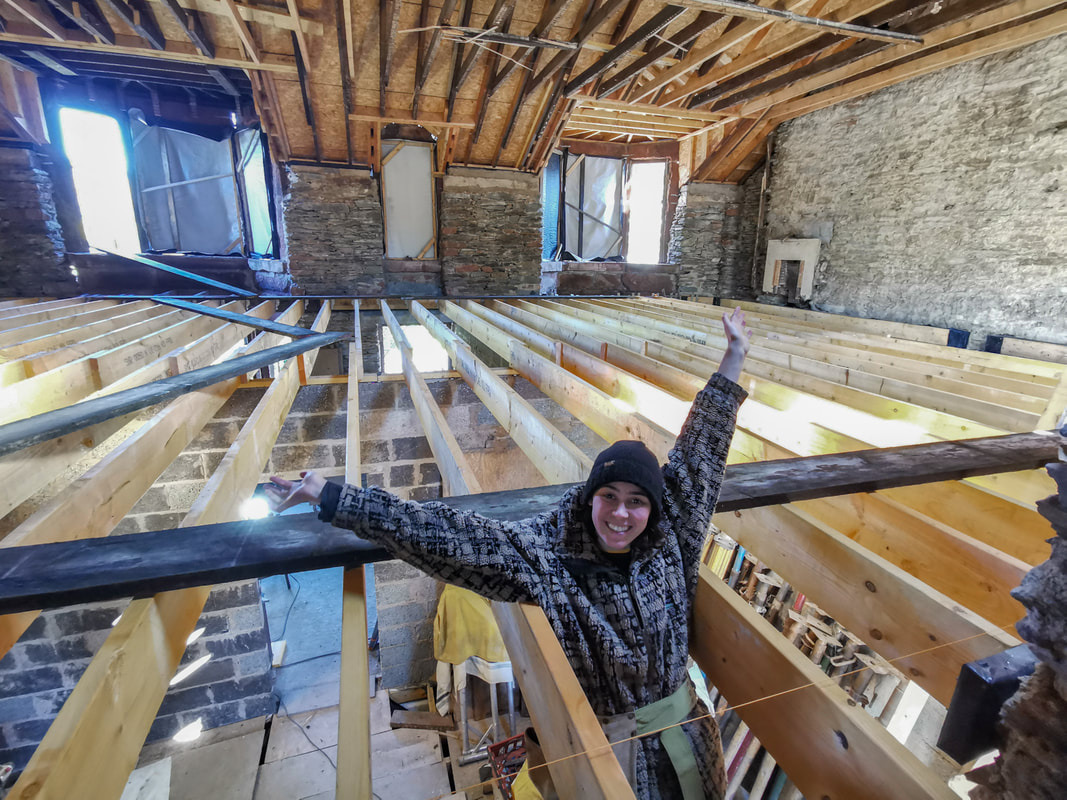
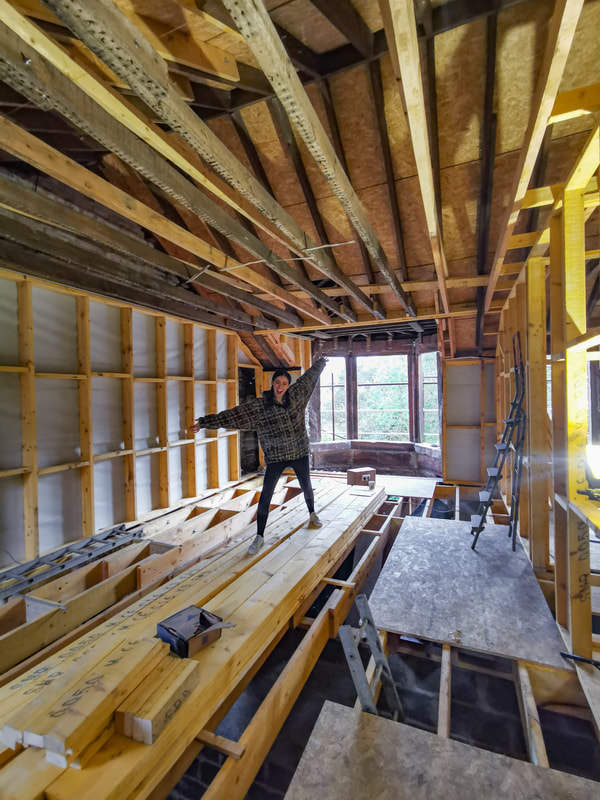
Cal decided there was no way we had enough man-power to lower the beam down as a whole. His solution: We would prop the walls at either end of the beam, and pull out the stones around it to separate the beam from the wall. We would put two props at the centre of the beam and then CHAINSAW the beam in half. The two halves would then balance on either props, until Cal and Gab pulled them out of the walls and lowered them to the floor. We didn’t know if the boys could lift even half a bressummer beam, and a balancing act that involved a chainsaw (at heights) sounded like a terrible idea. I strongly objected, but with no other idea to offer the group, Cal’s idea prevailed. 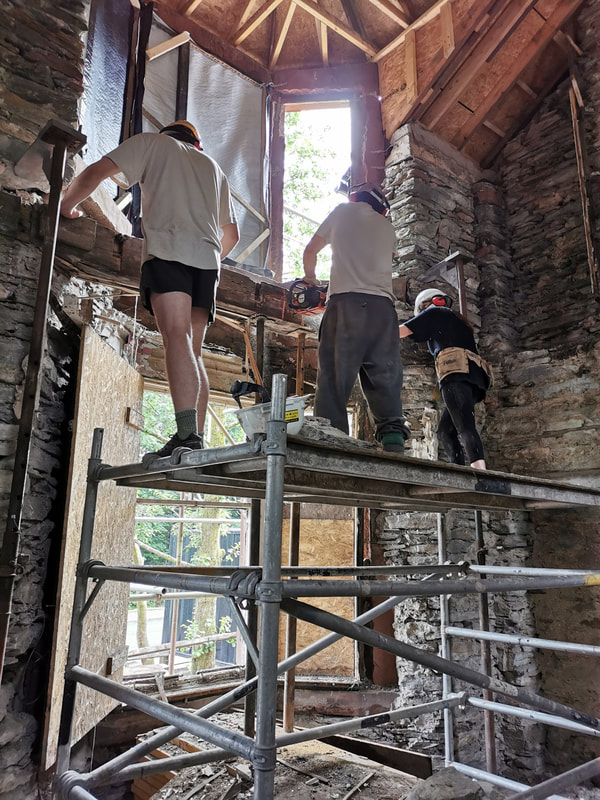 Cal's plan in action...just as described. I was behind the camera...very unwilling to involve myself in chainsawing at heights. Before the work commenced, I asked our friend Carrie, who was on hand to help, whether she thought the plan would work. She simply shrugged and said, “Today might be the day that this house finally comes crashing to the ground,” before calmly taking her place at the centre of the action, holding the prop in place for the bressummer beam to balance on. It all went surprisingly well. The beam balanced, the chainsaw only cut wood, the chunky pieces of timber were slowly lowered to the ground, and the surrounding wall stayed in its place! By the end of the day, a new steel beam spanned across the bay window, and we were all celebrating Jameswood’s (and our own) survival. 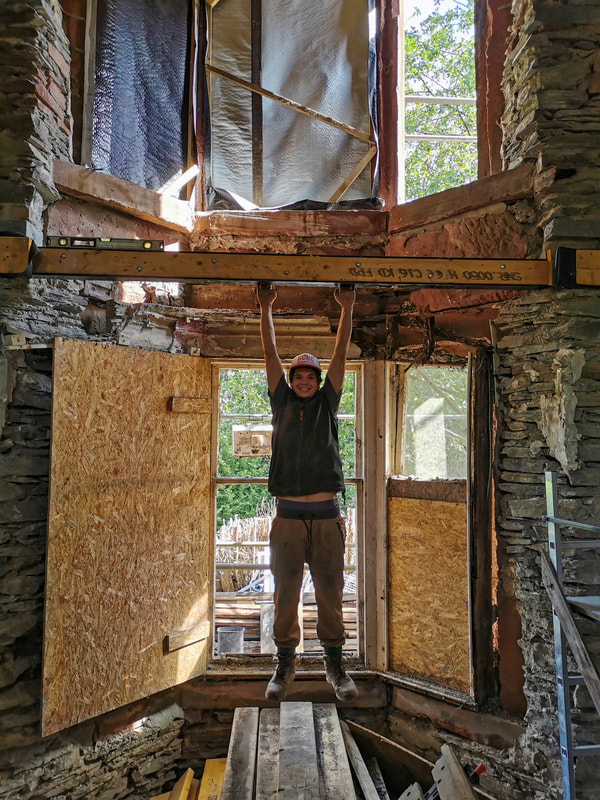 A very happy Cal testing out the new bressumer beam and showing off all his in-tact limbs. The visual progress that ensued was so satisfying. Cal, a framer by trade, was finally able to use his skills, and a new upper floor was thrown up in less than a day. Cal set a sheet of OSB down on the joists, and for the first time, I excitedly twirled on my 2.88 sqm dance-floor, in our future living room.
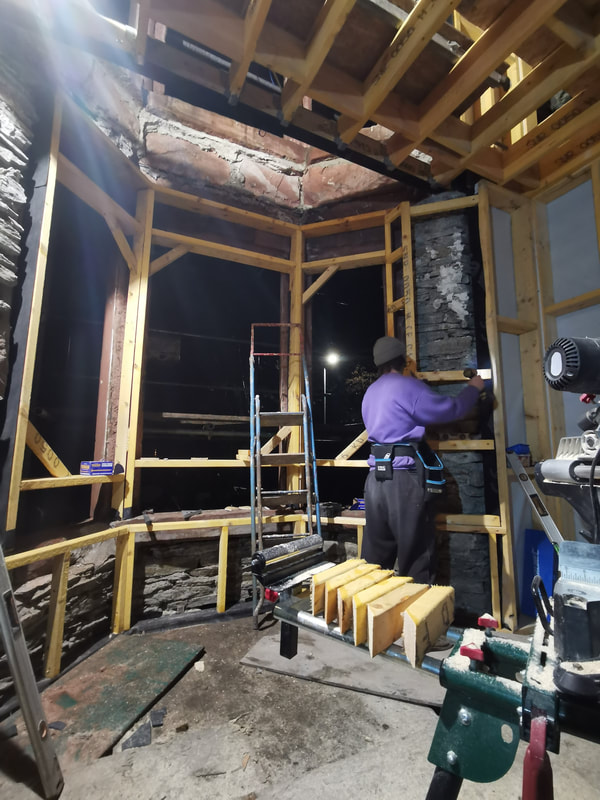
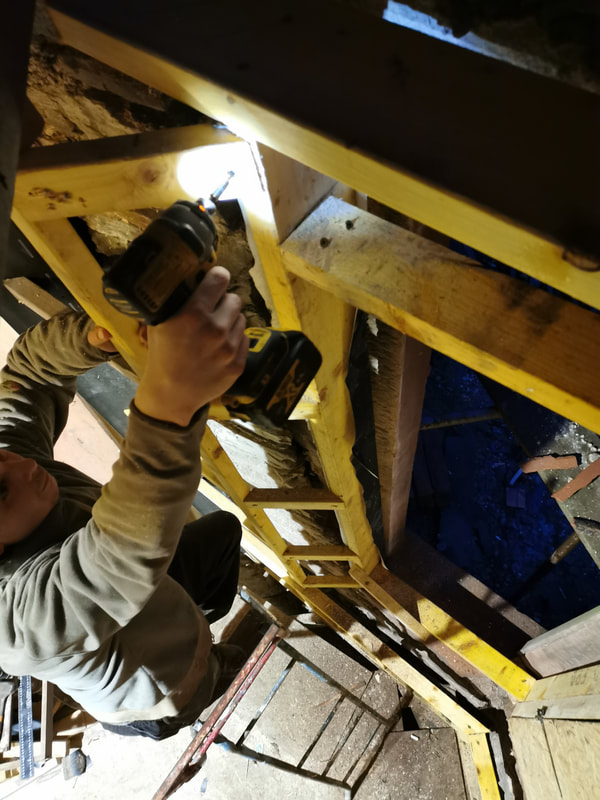
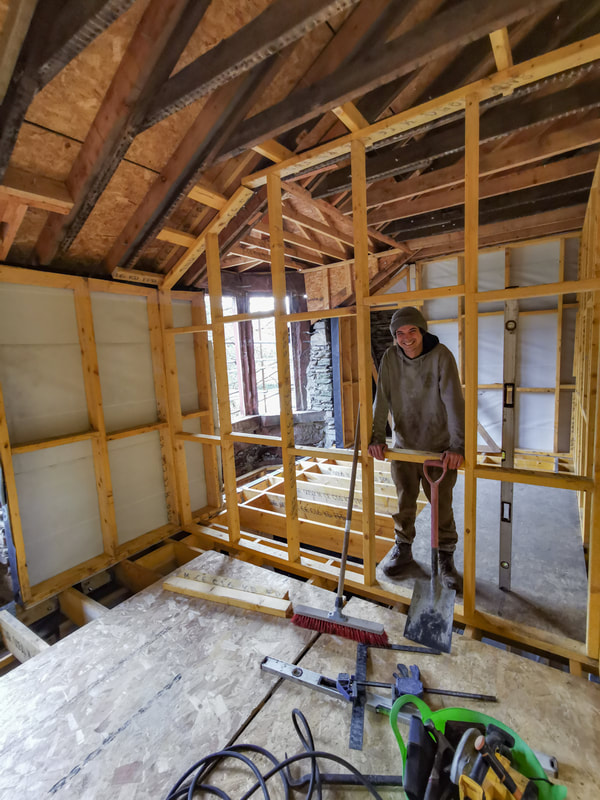
I pretended to sit in our bathtub and walk around our bed as we carefully mapped out the final dimensions of our home. After teaching me how to make a stud wall, we found a beautiful rhythm, cutting, *pop-popping and wrapping walls. In a matter of weeks, a real-life house – with rooms and hallways, appeared around us. *I have nicknamed our first fix nail gun the pop-pop and the second-fix gun the pip-pop
I joked that the place was starting to look too normal now, and as visitors were given a tour of the place, I found myself pulling out my phone to show them how messed up the room they were standing in used to be. It was a nice feeling. Restoring Jameswood was starting to feel like less of a pipe-dream and more of a reality, but as walls appear, new challenges face us. Clearing out and shoring up an old building is tough, time consuming work, but it doesn’t cost much money. In order to carry on with the project, we would have to get Jameswood wind and water-tight once and for all – which would require one of the largest investments in our restoration: windows! And our goal was to get them in before Christmas! Thank you for joining us as we restore Jameswood Villa! Sincerely, Claire (and Cal) Before we begin this post, I wanted to let you all know that we are now on Youtube! We filmed a house tour back in 2018 when we first bought the house! Now we have posted it so that we can all look back on how far we've come! I'll be posting an updated house tour in the weeks to come (I promise, our camera work has come a lnog way!) But for now, you can check the video out and subscribe by clicking HERE! When we first got to Jameswood, the house was an absolute disaster. With so much seemingly wrong with the building, it was hard to know where to start. We quickly decided a structural engineer's survey of the house would be needed - in order to find out exactly what was wrong with the building, and how to fix it! Commissioning this report was one of the best starting points we had for tackling our renovation. For self builders who are interested: Ours cost about 500 pounds and was really worth every penny. If you are ever taking on a restoration or investing in property of any kind, I would highly recommend getting a structural survey done to the house!
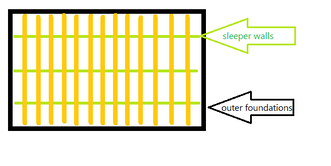
When our report came back to us, it obviously didn't say that Jameswood had a clean bill of health. The structural engineer had even gone as far as to say that it would be easier to knock her down and start over. Thankfully, however, our structural report did find one thing that wasn't wrong with our home: her main foundations. Our engineer told us that the main foundations were sturdy, and built onto solid, unmoving ground, (With no evidence of any rivers running underneath it…!) But, unfortunately, this could only be said for our main foundations. Our engineer was worried about our sleeper walls. Sleeper walls are a set of foundations that run parallel to each other, from gable-end to gable-end, every few meters below a building. They are separate from the outer foundations, which uphold the solid stone walls of a home.
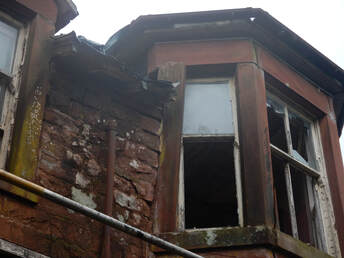
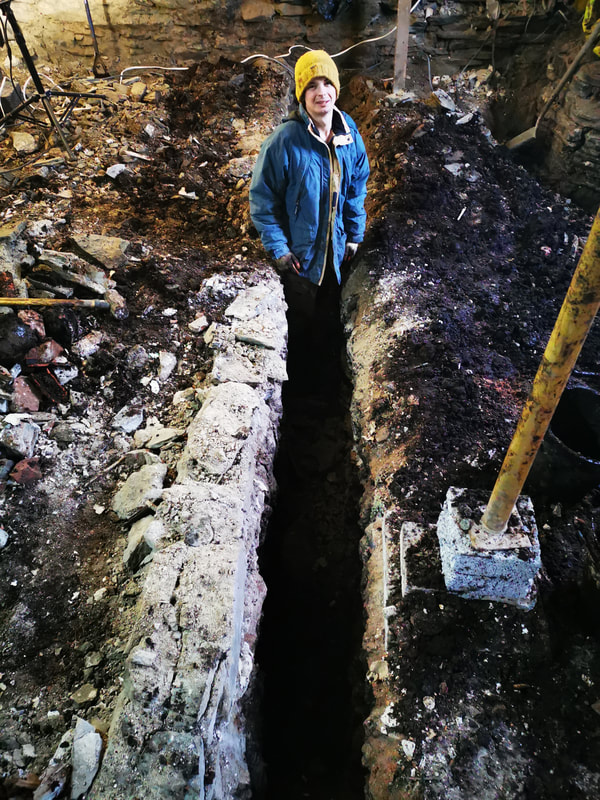
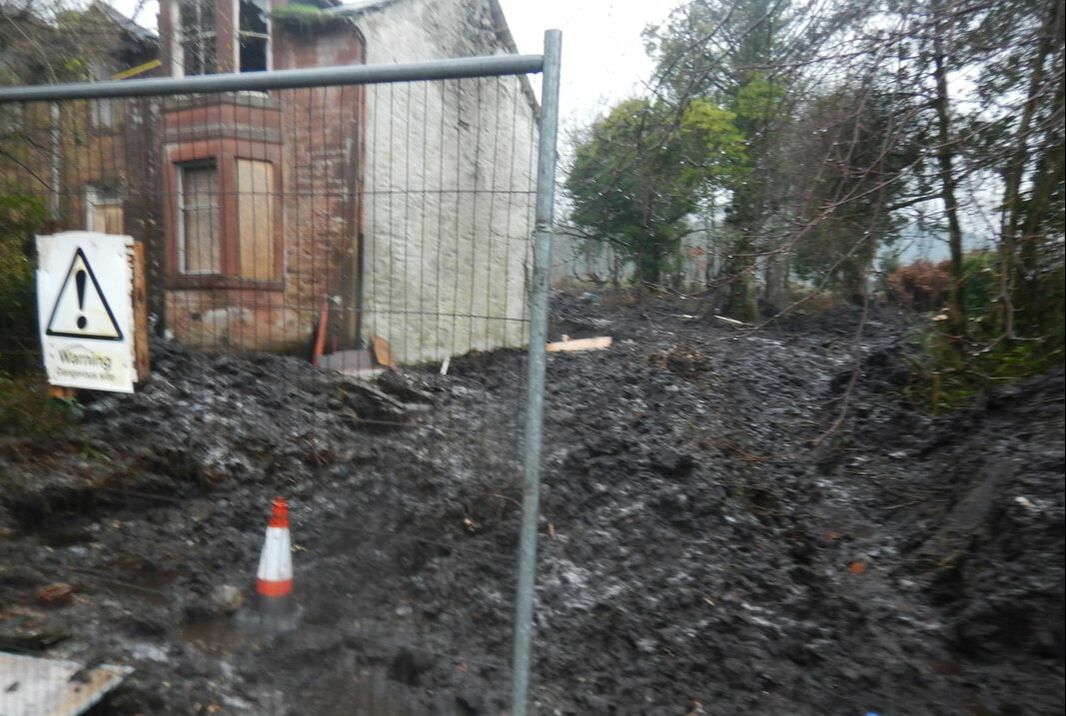
The sleeper walls hold up the ground floor joists in a suspended floor system. In the Victorian era, it was not uncommon for the sleeper walls to consist of a few feet of stone wall sat on top of the surface soil. This was unlike the deeper outer wall foundations, which would be dug into the ground and sat on a firmer layer of ground far below the surface soil. At Jameswood, the surface soil our sleeper walls sat on is particularly…squidgy… for lack of a better word! Over time, the weight of the ground floor compacted the muddy surface soil beneath the sleeper walls, and the floor slowly started to sink. 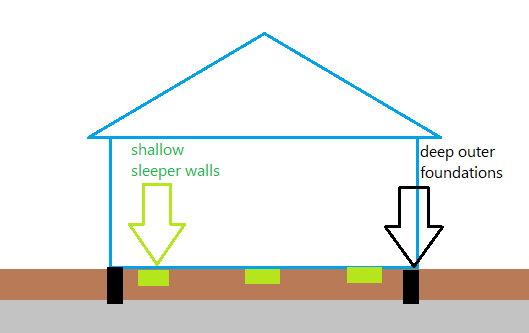 As it turns out, this problem was one of the reasons for the partial collapse of the bay window! As the roof was left unrepaired, and timber started to rot, the trusses were bending under their own weight. This problem was compacted by the sinking floor, which meant the roof was no longer receiving any structural support from the walls below! The roof eventually bent out of place, and pushed out stones in the bay window! Before we could add any new timber framing into the building, we would need to replace the shallow sleeper walls with deep concrete foundations. 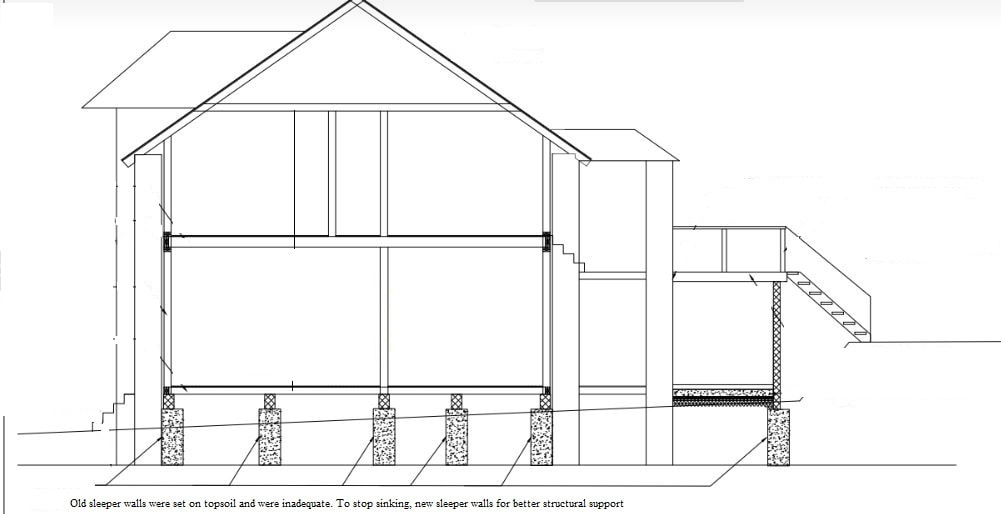 "Old sleeper walls were set on topsoil and were inadequate. To stop sinking, new sleeper walls will be constructed for better support." A digger would usually excavate trench foundations, but there was no way we were getting one in through the doorways, and we wouldn’t want heavy machinery disturbing the outer foundations. We had no choice but to hand-dig our new foundations. Unlike many parts of our project, we didn't have anyone to help us with this task. It was the winter months, and it was far too cold to host friends and family. From test holes, we knew that the firm till we would be setting our foundations onto was about one meter below the grounds surface. Wheel-barrow by wheel-barrow, we set out to dig long, deep trenches inside our home. 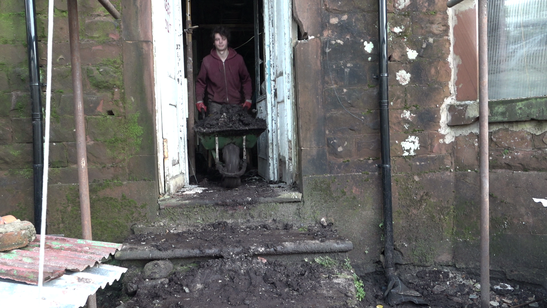 Wheel-barrow by wheel-barrow, we set out to dig our foundations by hand.
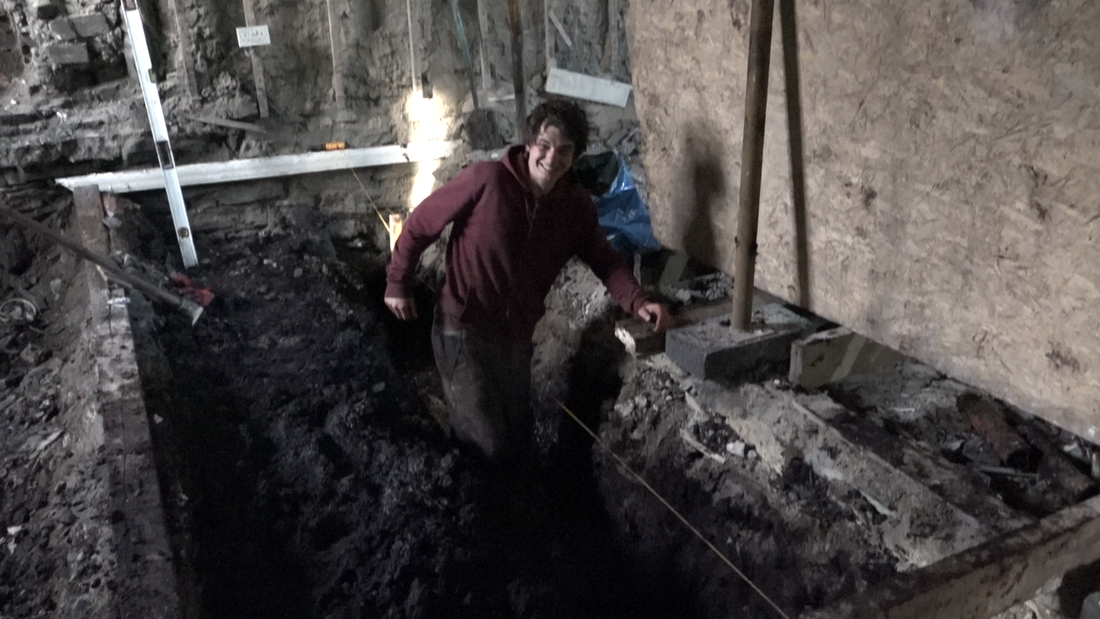 He still managed to keep a smile on his face! Cal and I took turns digging and wheel-barrowing mud out of the building. Admittedly, Cal would take on the digging job as the trench went deeper, and allow me the more satisfying task of digging the first few feet of trench, where the mud was drier and you were stood at wheel-barrow height while working. 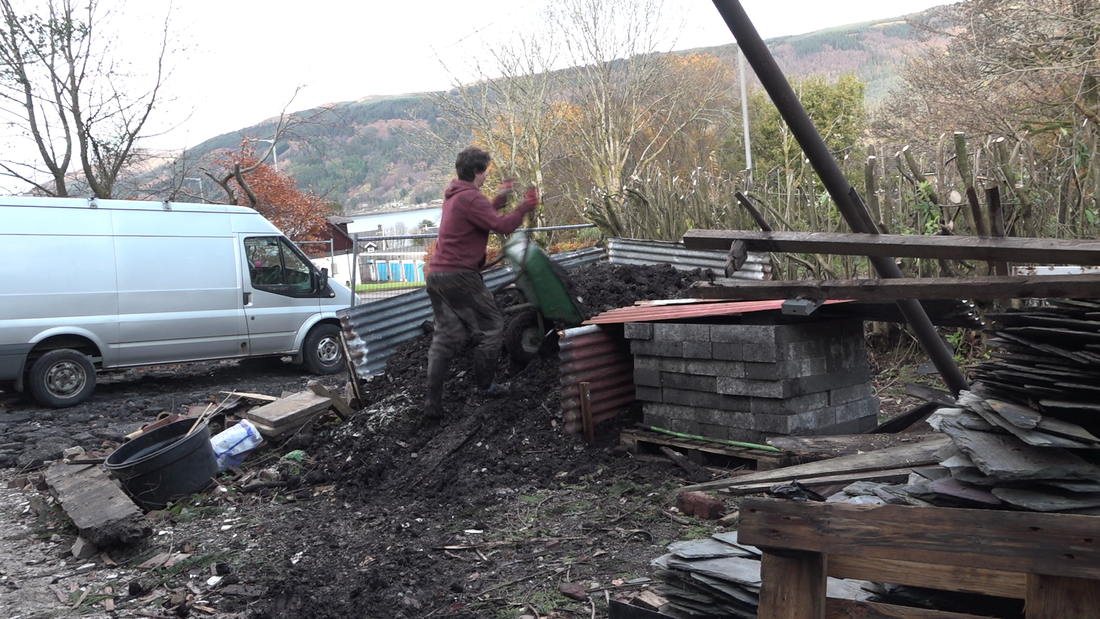 The pile of soil grew outside, as we dug away the "squidgy" mud that our sleeper walls had sat on. The work kept us warm, and we certainly grew stronger as the weeks progressed. Finally, we managed to dig all the trenches out. Filling them back in with concrete was an equally difficult task, but when we had poured all of our foundations and stepped on solid concrete for the first time, a relief washed over us. 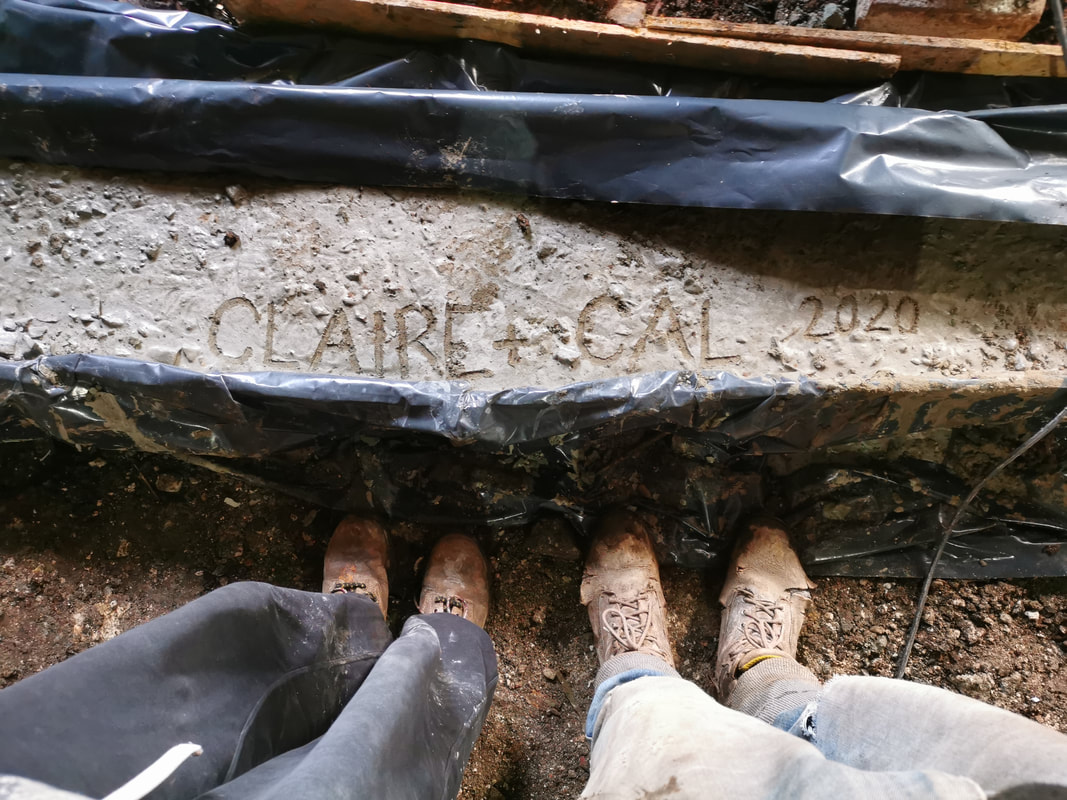 For most moments in our project, I can look back at times with fondness. Even if the going got a bit tough, we managed to have fun while doing it. But that just isn’t the take-away message for this piece of the project... I never want to dig another trench again in my life! Looking back on this time in our project, I am amazed that we had the strength to push through and I am so proud of us for persevering. But I am even more happy that it's all over! Now, with solid foundations that will stand the test of time, we are off the ground, and can truly start rebuilding home. Thank you for following our journey, as we restore Jameswood Villa. Claire In our last progress report, Cal and I had managed to put on a roof all by ourselves! (Well… with a lot of help from our ragtag roofing team!) 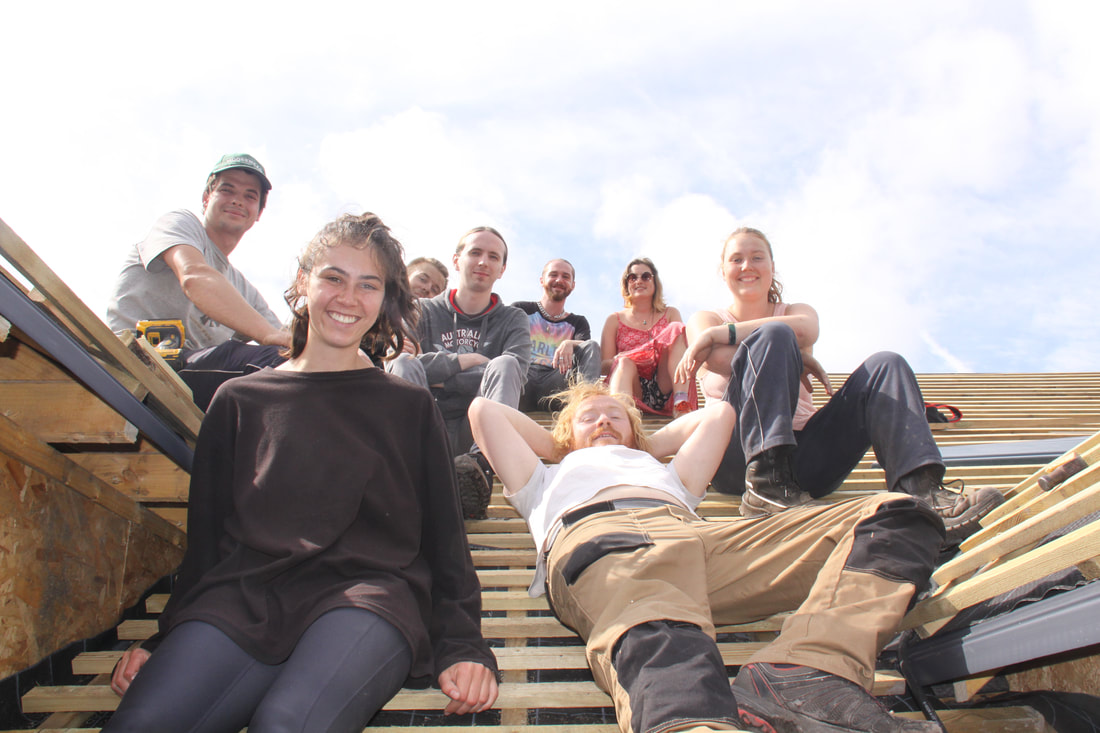
Our Rag-Tag Roofing Team!
It’s been a long time since our last report, and a LOT has happened since then! Our silence has not occurred because the project has come to a halt, but rather because we’ve been so busy building, it’s been hard to take a moment for blog writing! In the winter of 2019, Cal and I had one of our most challenging tasks to carry out yet. Designing the rest of our restoration and applying for a building control warrant! We wanted to take the design phase of this restoration seriously and we had a few goals in mind for our build! We wanted to
As the sun started to set earlier, we spent long evenings in the caravan, reading textbooks and PDF’s cover to cover, and debating (sometimes heatedly) over how we were going to rebuild our floors and walls, insulate, ventilate and more! As we read, we realised there was a lot more to consider when designing a restoration than we had originally thought! If we have some interest, I would be happy to write a more in depth blog post about the material and building approaches we chose to use for our restoration! We came across some excellent resources while researching for this project. You can find a list of resources that we found helpful for our restoration by CLICKING HERE! 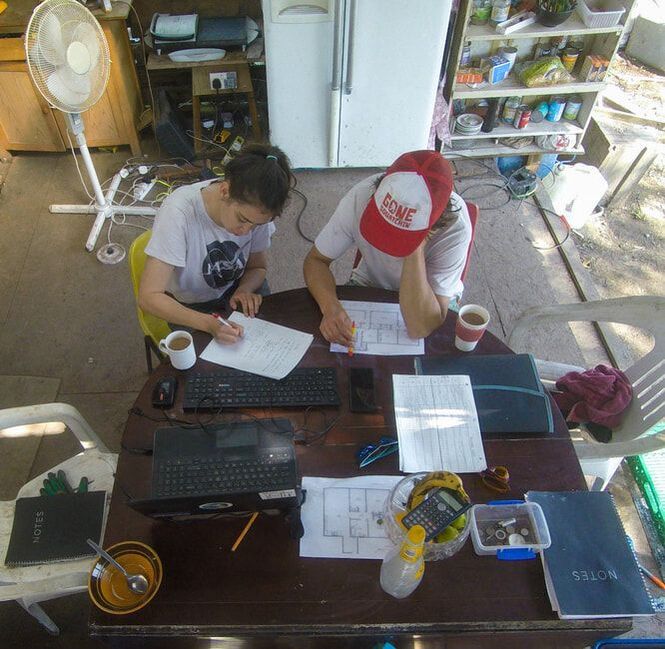
One of Cal and I's planning and design sessions! I'm glad this was a photo, because we were not agreeing on everything that day □
Once we had a plan, it was time to apply to building control. In the UK, major alterations that are made on a home will have to be approved and overseen by building control. Similar regulatory bodies will exist in most other countries, and their job is to make sure that all work done to a building is carried out to a safe and efficient standard. Usually, an architect or contractor would apply for building warrants on behalf of their client. I’ve found out that even self builders will usually hire a professional for help with the design phase of a project and building control applications. Cal and I, however, don’t have the budget for an architect or contractor, and like most things, we set out to complete this task, rather naively thinking, “How hard could it really be?” Cal tends to have very little patience for bureaucracy, and when he has to partake in paperwork of any kind, he has been known to voice his frustrations rather loudly to anyone in the vicinity. To make matters worse, Cal tends to have contempt towards authority. He knows right from wrong, but doesn’t like being told what to do. With so many injustices in todays world, I think it’s a good thing to beat to your own drum. But I am absolutely sure it will make our building control application a hundred times more difficult. For these reasons, I took responsibility of the building control application, and plan on being the point of contact for all communications with building control officers. 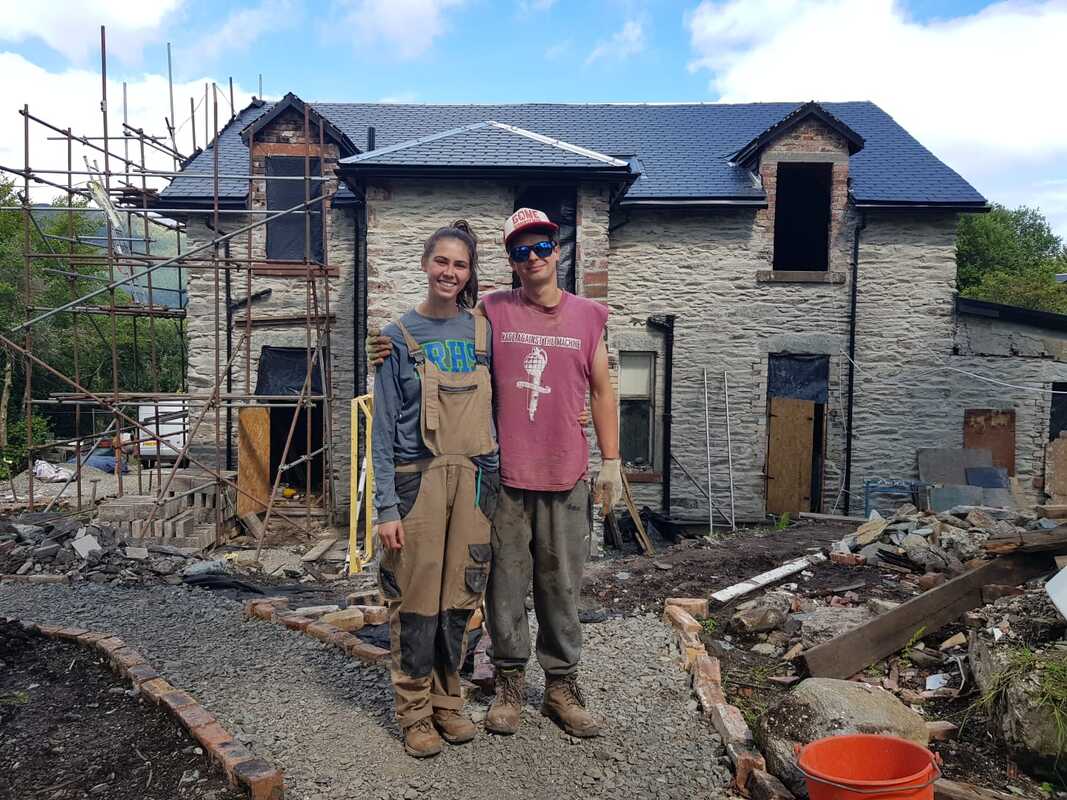
We love that Cal beats to his own drum...But his Rage Against the Machine attitude isn't going to help us with building control!
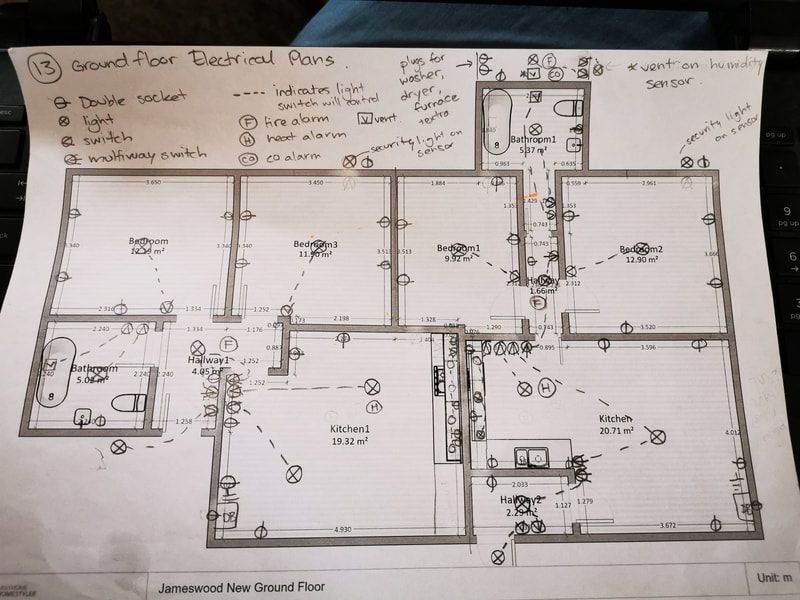
The procedure for writing, drawing and submitting a building control application is very vaguely outlined online. I assume this is because the process is usually undertaken by professionals who have completed countless applications. From what I could gather, the more information, the better. I read each part of the UK building standards that was related to our project. I included nearly word for word, every detail from the code that pertained to our project. I felt as though I was plagiarising the UK building code. Thankfully, our building control officer knew we weren’t professionals, and he didn’t expect computer-derived drawings from us. Two and a half weeks later, I had sixteen pages of information on how we would build our house, and a stack of drawings that showed elevations, sections, floor, electrical and plumbing plans for Jameswood. I was sure there was far too much information included in the document, and I was later amused when our officer asked us to add three minor notes to the application in order to approve the warrant. We managed to submit our application at one of the busiest times for the building control office. And to make matters worse, I’m sure my application was not in a conventional format, making it more difficult to read through and assess. But fair warning to those of you who are about to go through the process: get your application in with plenty of time before your planned start date. It took eight weeks to get an initial response from building control (not an acceptance, just a response.)
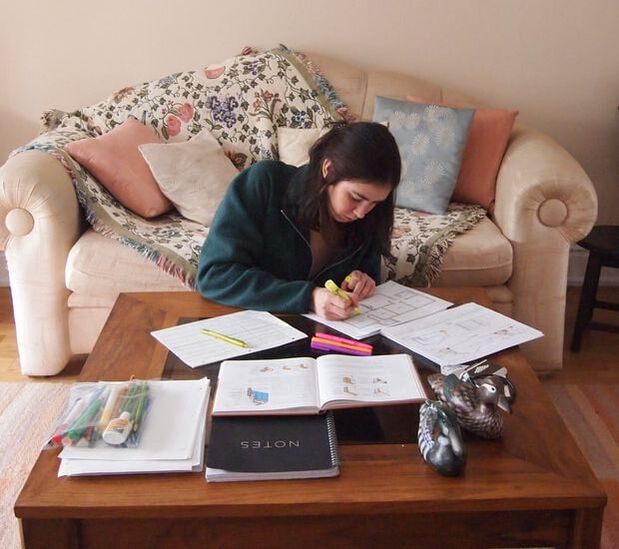
How we saved a thousand pounds on our project!Overall, the feedback was good. I must have submitted enough information, because I only had a few minor notes to add into the application. The adjustments took less than an hour to include. But there was one problem. We were told that even if we follow building code, all structural alterations made to buildings in Scotland required certification by a structural engineer. When I read this line in the email, my stomach sank as I imagined the horrendous bill we would receive for commissioning a structural engineer. I started contacting engineer firms and after the first day of calls and emails, my worst fears had been confirmed. Most structural engineers said they would only work on projects lead by an architect. Those that would work with us were quoting over 2000 pounds for their service. At the time, it felt as though we were being penalised for making improvements to our building. All the changes we wanted to make were there to improve the structural integrity, fire and water resistance of our home. If we had just built a like-for-like structural that had the same problems as before, we wouldn’t be charged two grand for a structural engineer to tick off the project! I really do understand that this requirement has been put into place to make sure structures are safely built, and I know the importance of these safeguards. But at the time, while receiving shocking quotes that would eat into savings we had set aside for windows, it didn’t feel very “fair”. After calling what felt like every structural engineer in Glasgow and Edinburgh, we finally found a really understanding guy who liked our project. He had a similar original quote to the rest we had received, but he said he could take close to a grand off the original price if we could produce our own CAD drawings. I had no idea how to use CAD software, but jumped at the opportunity. How hard could it be? I decided to try out Skillshare, a subscription-based online learning platform. I found an autoCAD course that was specific to architecture, and over the next five days I managed to learn how to use the software and produce floorplans, new elevations and section drawings of the house! 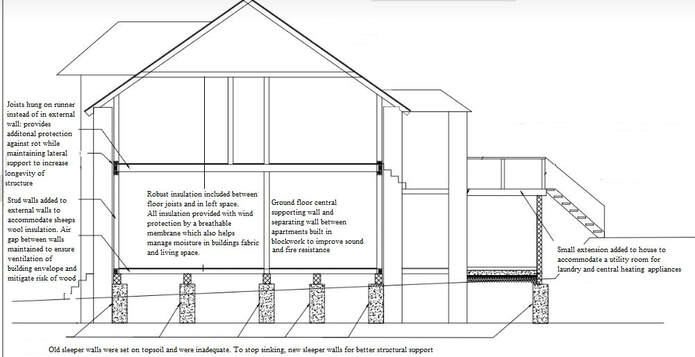
It was so nice to see Jameswood come to life on my computer screen, and five days of learning and useful new skill had also saved our project 1000 pounds! We were thrilled! Having genuinely been blown away by how helpful Skillshare was for our project, we’ve partnered up with the website to offer our readers a free trial! And as a bonus, if you enjoy the website as much as we do, signing up will directly support our restoration – so learning new skills for yourself will help us on our journey as we learn how to restore Jameswood! You can sign up for your free-trial by clicking the link: https://skillshare.eqcm.net/whathavewedunoon Thanks to the kindess and patience of a structural engineer that believed in our project, as well as the power of an incredible online learning community, Jameswood is one step closer to being structurally sound and stronger than ever. Having submitted an amended application that now included a structural engineer’s certification, we heard back from our officer in less than a week. I jumped for joy when I received the email that said our application had been accepted. It was a very drawn out and stressful process, but I’m glad Cal and I designed our restoration together, and lead the building control application process ourselves. Though I know I’m still far from being an expert, this process gave me a crash course in restoration design, and how to navigate the bureaucracy involved in a renovation. The process was frustrating, but it was also empowering. I’ve learnt how to design an efficient building, while taking into account the needs of a traditionally built home, I’ve learnt how to make and submit a building control application and how to produce architectural CAD drawings. Admittedly, we’ve only just begun our journey through navigating building control. With our application accepted, we’ll now have a number of inspections throughout the restoration to make sure we are building everything to code. But we feel like the hard part, the paperwork, is over. Now we just have to follow our designs, and do things right, just like we had always planned. Thank you again for following our journey, As we take on the restoration of Jameswood Villa. Claire x It’s been a very long while since I last did a progress report, so I thought I’d take some time to catch everyone up on the project! Recap In our last progress report, we had moved our caravan to the back yard, and started to settle into life on a building site. We managed to complete some very daunting tasks, including raising our sunken roof, rebuilding a section of partially collapsed sandstone wall, and playing a giant game of Jenga with our house when we decided to replace the cracked red sandstones in our front bay window! If you missed this update, you can click here to take a look! With these tasks all complete, we had managed to tackle some of the biggest structural problems with the building, and we were gaining a new-found confidence in our ability to take on this project! Progress Report #4: June – September, 2019. Reroofing Jameswood. When Cal first went to visit Jameswood back in October of 2018, we were both very disheartened by the state of the roof. The house had clearly suffered many years of water damage, which had left dangerous holes in the upper floor, wood rot throughout and mould that clung to every surface and left an unpleasant stale scent in the air. The roof was misshapen and as Cal made his way up into the loft space, he was greeted by bright specs of daylight that created a starry night effect on the ceiling. When it rained, the water seemed to come down equally hard inside our house as outside. The house would drip hours after the rain had passed, depositing icy-cold drops down the back of your neck when you least suspected it. From back in Canada, my father and I tried convincing Cal it wasn’t a big deal. We could learn to roof a building! But Cal was adamant that we didn’t have the skills and know-how to replace a slate roof. He was right. Slate is notoriously difficult to work with. It’s hard to cut and cracks when you hammer a nail in too tightly, step on it, or drop a tile. We were resigned to the fact that we couldn’t do the roof ourselves, and started calling roofers for a quote. One roofer spoke to Cal on the phone, and when he realised which building Cal was talking about, he immediately said his company wouldn’t work on it. Finally, we got a quote from a company. 40 000 just for reslating! That wouldn’t include any of the structural repairs that we would need to do. We didn’t even have 40 000 pounds! Getting a company to do our roof wasn’t going to be an option. After lots of research, we found the perfect solution for our project. IKOslate. It’s a long-lasting composite slate that’s made out of 99% recycled materials and is 100% recyclable at the end of its life. It’s eco friendly, in keeping with the original character of the building, and most importantly, it’s easy to install. It was absolutely perfect. We got in touch with IKO, and incredibly, they agreed to sponsor our project! Jameswood’s restoration would truly be at a standstill if it wasn’t for this company’s support. We can not thank them enough for their help. I’ve posted a link to IKOslate for those of you who are interested in the product. And *spoiler* I can genuinely and whole-heartedly say I could not be happier with how beautiful these slates look opn our roof. There's also a great video that we and the IKO team put together about our roof! https://www.ikogroup.co.uk/ikoslate-jameswood-house-dunoon/ So, we had a brilliant solution for our roof covering. But first we had to focus on fixing the roof structure. Thankfully, Cal and his father are both carpenters. We convinced Cal’s dad to come up for a …relaxing Scottish retreat…? …and the two of them started splicing new timbers into the roof where rafters were too rotten or warped.
Cal and his father splicing new timbers in where roof rafters were rotten and warped. As the weather warmed up, we posted our project on workaway – a website that connects travellers with hosts who are working on projects of all kinds. Similar to “woofing”, we would provide accommodation and food to travellers, and show them around the incredible Argyll coast (actually.. our good friends David and Tony usually showed everyone around while we worked on the house!) In return, our guests would help us out with restoring Jameswood! With about ten people staying in the backyard to help us with the roof and enjoy the Scottish scenery, Jameswood was starting to look more like a hippy commune than a building site. We had tents scattered around the yard, and I loved our days of community living. We had family-style meals, and wound down our nights around a bonfire in the back yard. Everyone took turns cooking and washing-up, and with a lightened domestic work-load, we could properly focus our attention on the house. A glimpse into life at Jameswood's "hippie commune" Once Cal and his dad had fixed the rafters in the front face of the roof, it was all hands on deck! We boarded out the roof in OSB sheets, fixed down a breathable membrane that would add extra protection to the roof and installed kilometres of batten for the slates to be fixed to! I had a go at carpentry, building the outriggers to extend over the gable ends, and rebuilding some of the dormer windows. Weeks went by as we prepared the roof for slating, and as unseasonably rainy weather kept coming, we became desperate for a dry space to store our tools. Once the front half of the roof was structurally sound, boarded and battened, we decided to start slating, and do the back half of the roof afterwards. One of the trickiest parts of roofing is setting out. If you don’t get the spacing and overlap of your tiles right, your roof could leak, your slates could uplift in wind and you could be left with an awkward line of slates at the top of the roof that are more wide or narrow than the rest! Luckily, IKOslate has handy markings that help you get the right overlap, and the slightly curved shape keeps the slates tight against each other so they can’t get pulled up by wind. I watched countless Youtube videos to figure out how to space the slates evenly, and Cal and I measured everything out over and over to make sure we had gotten it right. And then, when there was no more planning and double checking we could possibly do, we nervously got to slating. We made an assembly line with our guests: Two workawayers cutting slates, two sending them up to Cal and I and receiving measurements for the next cut. We hadn’t wanted guests to do the slating for fear of mucking up our roof… but we soon realised just how easy the process was! After a few hours of roofing ourselves, we decided the IKOslate was foolproof, and rearranged our process. We had as many volunteers up on the roof as possible. Usually about four of us. The slates were so easy to cut we decided to bring the jigsaws up to roof level and cut them as we needed them. With no more separate cutters and messengers, we just had two people passing up tiles at a constant rate and the slates started flying onto the roof! In less than a week, we had the front half of the roof complete! We were over the moon, and with our excitement renewed, we got on with the laborious task of fixing, boarding and battening the back half of the roof. At this time, I was taking on shifts at the local pub in the evenings, and one night, a local construction worker pointed out a problem with our roofing process. We had completely finished the front half of the roof and were about to open up the back half of the roof to the wind. What we had unknowingly managed to do is create a gigantic wind-sail on top of our house! He warned that he had seen whole roofs uplift in strong winds due to this mistake. With this worry in the back of our minds, work suddenly picked up, and we had the back half of the roof prepared in half the time it took us to complete the front! Still, I spent that fortnight sleep deprived. Every gust of wind woke me up, and I sleeplessly spent my nights checking the window to see if our roof was still firmly attached to our building.
Having finished the front face of the roof, and opened up the back, we had unknowingly made the structure a giant sail! Good thing the rafters had been carefully fixed down! As September came, we said goodbye to our workawayers, and got to slating the back half of our roof by ourselves. Cal and I were so motivated to push through and finish slating. We spent every hour of sunlight on top of the building, and incredibly, had the roof finished less than a week after we started slating. Just the two of us. Slating our roof together! On the last day of slating, I stayed up on the roof nearly the whole day. Getting tea and sandwiches brought to me. When the last slate was fixed, I clambered down to see the final results and I truly couldn’t have been happier. Our roof is absolutely beautiful, and I am completely over the moon about it. I spent days doing double takes whenever I looked at the house. Still, 6 months later, I sometimes catch myself staring at our roof with pride. We did that! And it looks so good! We celebrated with a bottle a bubbly shared between friends, and a week-long rest! Our beautiful new roof!!! Reroofing Jameswood was an absolute game changer. We finally had a dry space to work, and store materials and tools. Gone are the days of being sternly told-off by Cal for leaving his favourite saw untarped. Jameswood’s walls could finally start to dry, and slowly, as they released water and brightened in colour from the top-down, the damp smell that hung in the air lifted. We can not thank IKO enough for sponsoring the reroofing of Jameswood. When we had set out on the mission to reroof our house, we had expected it would drain our funds and leave our project at a stand-still. Because of IKO’s support, we have been able to carry on restoring Jameswood (in a dry space!!) With this buildings’ biggest problems now behind us, accidentally buying Jameswood is starting to look much less like a giant f***-up, and much more like a blessing in disguise. Thank you for joining us on our journey, Sincerely, Claire (and Cal!) We just wanted to start off this post by saying THANK YOU to everyone who has donated to our GoFundMe page! You've helped us get a little bit closer to making our dream of restoring Jameswood a reality! As we said before, we will be including the names of everyone who has donated to the project somewhere in our house! If you are interested in supporting the Jameswood Restoration, you can visit gofundme.com/whathavewedunoon We are blown away by the incredibly kind messages of support we receive from all over the world. Thank you SO much. To catch up on the progress we had made before May, you can check out progress report #1 and #2 here! PROGRESS REPORT #3: May - June, 2019 Last time I posted, we had just gotten the hang of putting up scaffolding, and were about to start to making our way around the building with it. But first, we had to move the caravan. It was at the front of the house, which wasn't ideal for traffic noise, privacy and safety (it was sitting in front of our partially collapsed wall!), but it would also get in the way of the scaffolding braces. Our neighbour has a 4 by 4 pickup truck, and he kindly offered to lend a hand. He moved the caravan from our original driveway, around to the new driveway we had recently made for receiving scaffolding. 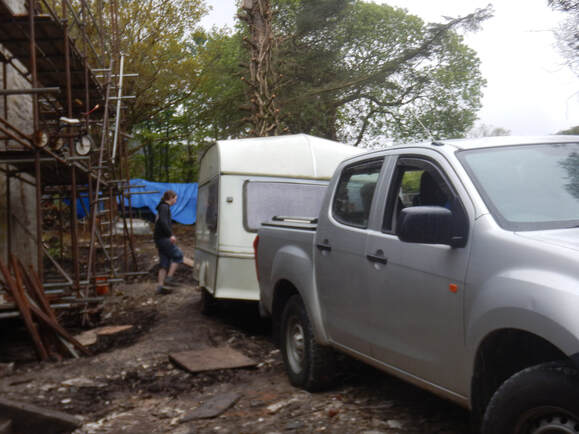 It's been nearly four months since our last progress report, and lots has happened since then! When you see Jameswood on a daily basis, it's really easy to forget how far you've come and notice the changes that are slowly happening. When a friend re-visits and exclaims, in shock, that, "the place has electricity!" Or, "this room is cleared out!" You realise, lots has changed since we first started the project! It's important to allow some time for self reflection. We've taken on HUGE project, and looking back at all we've accomplished so far helps motivate us to carry on! RECAP In our last progress report, we had managed to clear the garden - an epic task that required battling through a forest of weeds that had engulfed our property and rescuing trees from the chokehold of ivy and other climbers.
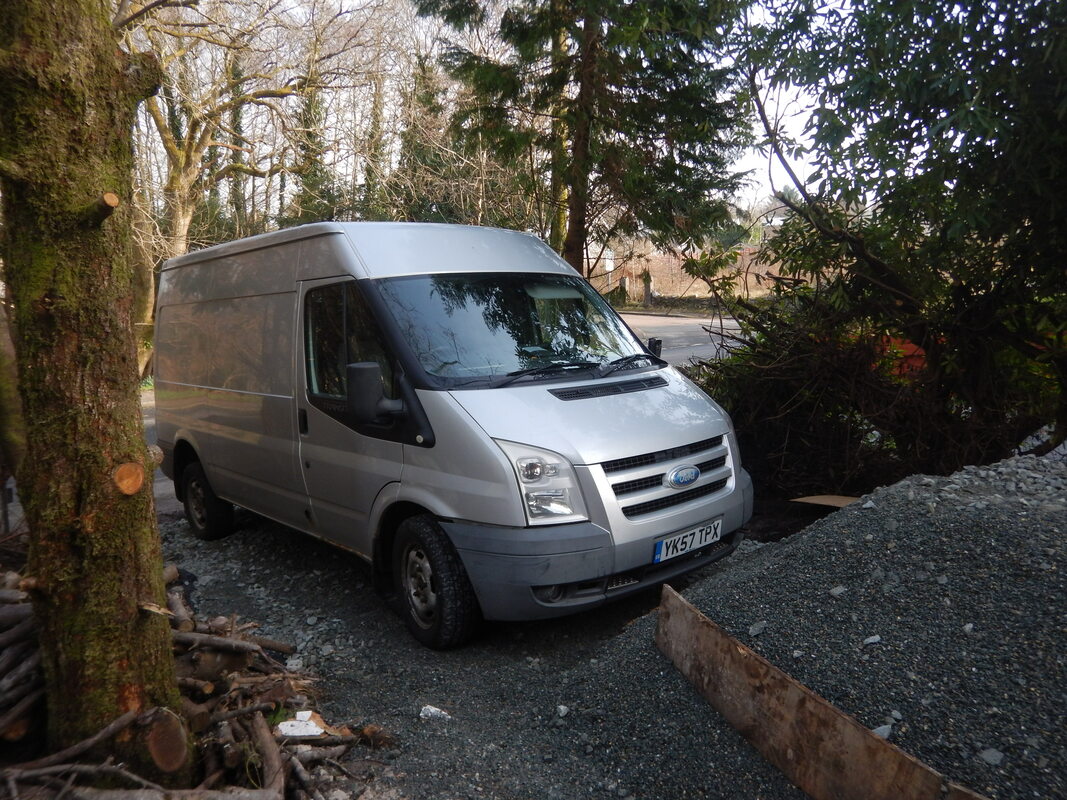
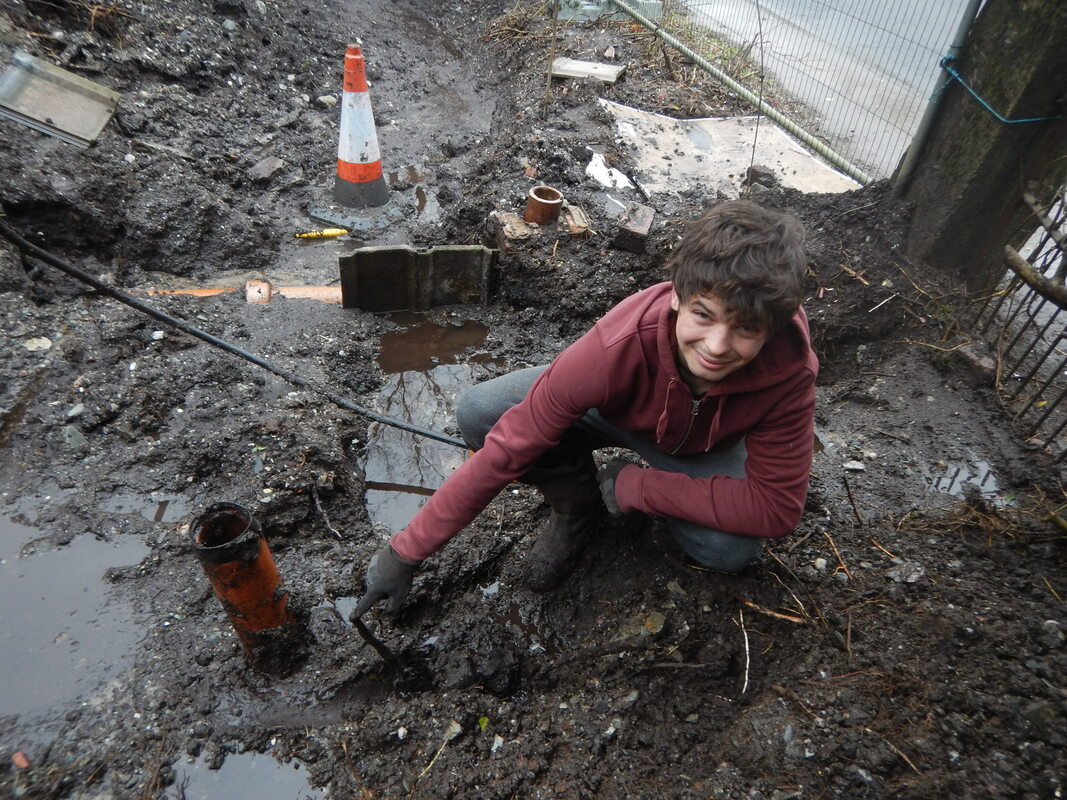
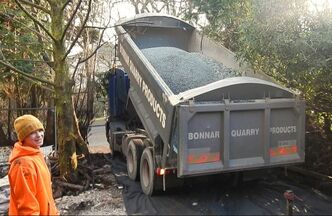
PROGRESS REPORT #2: March - April, 2019 While taking on a restoration project of this scale, we inevitably find ourselves hitting road bumps at nearly every step of the way. Finding a new problem seems to be a daily occurrence here at Jameswood. To keep our spirits high, and stay motivated, Cal and I like to reflect on some of the small victories we've had, instead of the huge hurdles ahead of us. 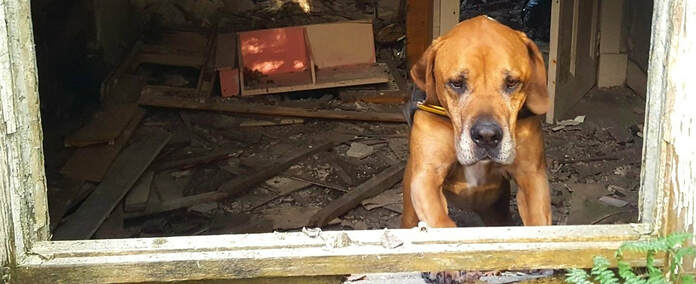 Dexter: "Oh no! What have they Dunoon?" So here they are... Finding the elusive electricity wire The first, and arguably, the best win we've had in the past week has been finding the cut electricity wire, that used to connect the property to mains electricity. Soon, I'll post a blog explaining just how hard it was to find this wire, but for now, just know that we have been searching for this wire since November! Hopes of finding the wire were starting to dwindle in the past few weeks, and the gravity of the situation was starting to become clear. If we couldn't find the wire, we were going to have to pay a hefty fee to have the pavement dug up, to be reconnected to the main line. We were told to look for a little black box, where the cut end of the wire would be sheltered, about 500mm deep in the ground. We were also given a map of the property that indicated (inaccurately) where the wire was supposed to have run. This week, while digging out drainage pipes at the front of the property, Cal stumbled upon a cut end of a thin, black wire, wrapped tightly in black electrical tape, lying in the ground, with no "black box" in sight. It was the live electricity wire and we are so relieved to have found it! (And very excited to have electricity on site in the near future!) 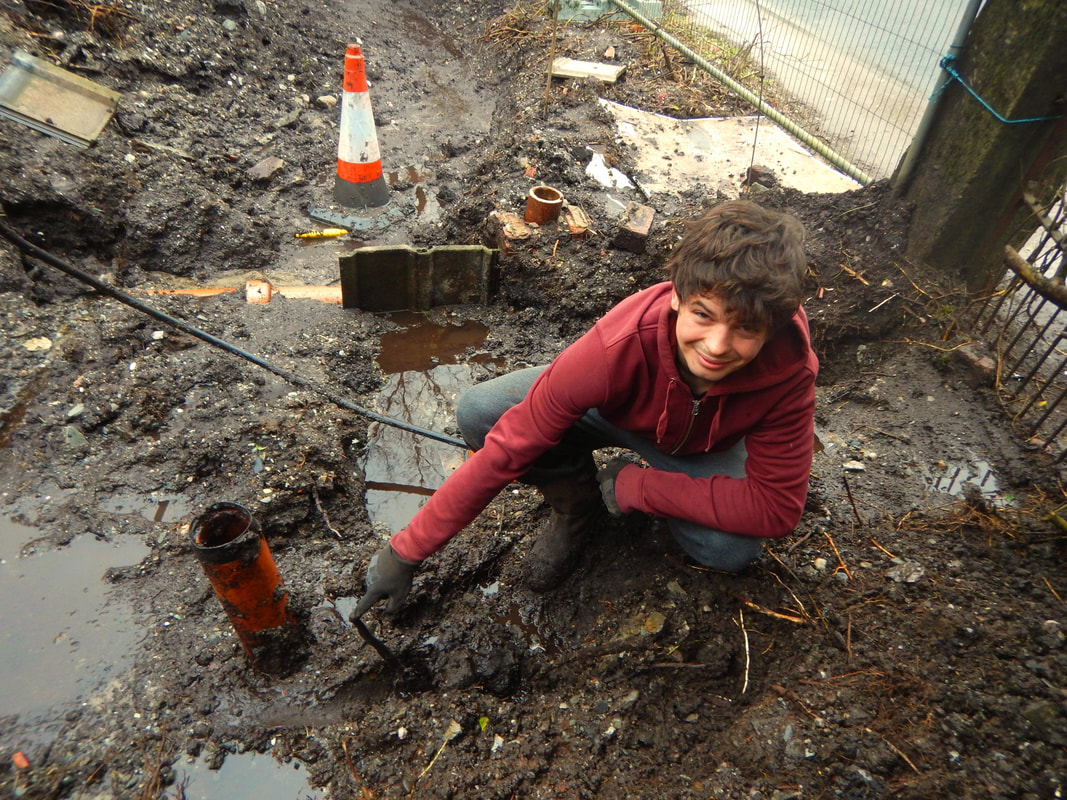 A needle in the hay stack? Nope. Just a wire in the mud. Getting a driveway laid One of the first things Cal did when he first got to Jameswood was clear a Ford Transit-sized space at the front of our property, to facilitate access to our building site. Now, Transits are incredibly helpful to have when restoring a home, and I'd recommend them to anyone looking to take on a project like ours. However, I would not recommend them to those of you looking for an off-road vehicle.. Our van has gotten stuck in the slick, deep mud on our "driveway" too many times to count. And with such a heavy vehicle, pushing it out (with the help of our friendly, but exasperated neighbours) is not an easy task. For a while, we would lay old plaster out on the driveway while we were clearing the house. The plaster was a great temporary driveway, but it was a bit too water soluble for the wet conditions we get here in Scotland. Once it had rained, the plaster just added more gunk to the the messy mud our van was getting stuck in. This week, we were excited to receive our first on-site delivery: 10 tonnes of aggregate, about a quarter of which has gone into making a nice, new, sturdy resting spot for our van!
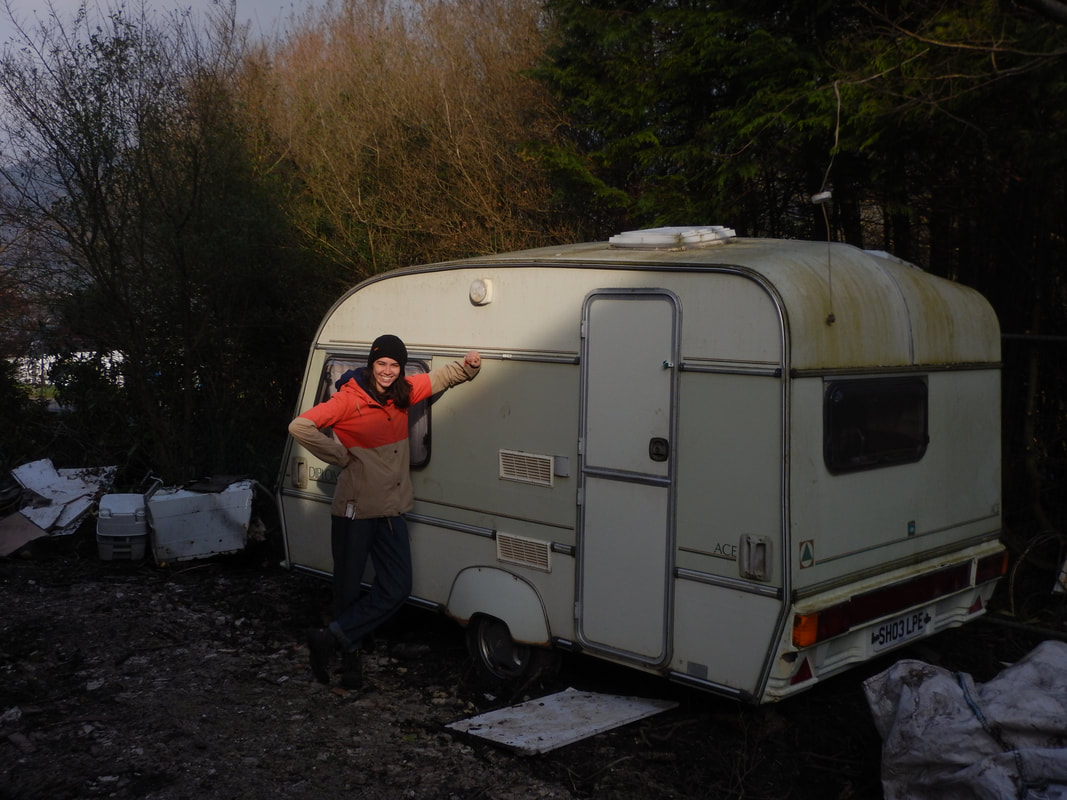
Our New Home - A Caravan! As much as I love #vanlifeYoutube videos, trying to live in our Ford Transit, while also using it as a working van, has not been ideal. This week, we've found a new home! We are now living in a little, 1990's, two berth caravan. It's a dry, clean space to retire to at the end of the day (and has way better closet space compared to the Transit.) I am absolutely thrilled! 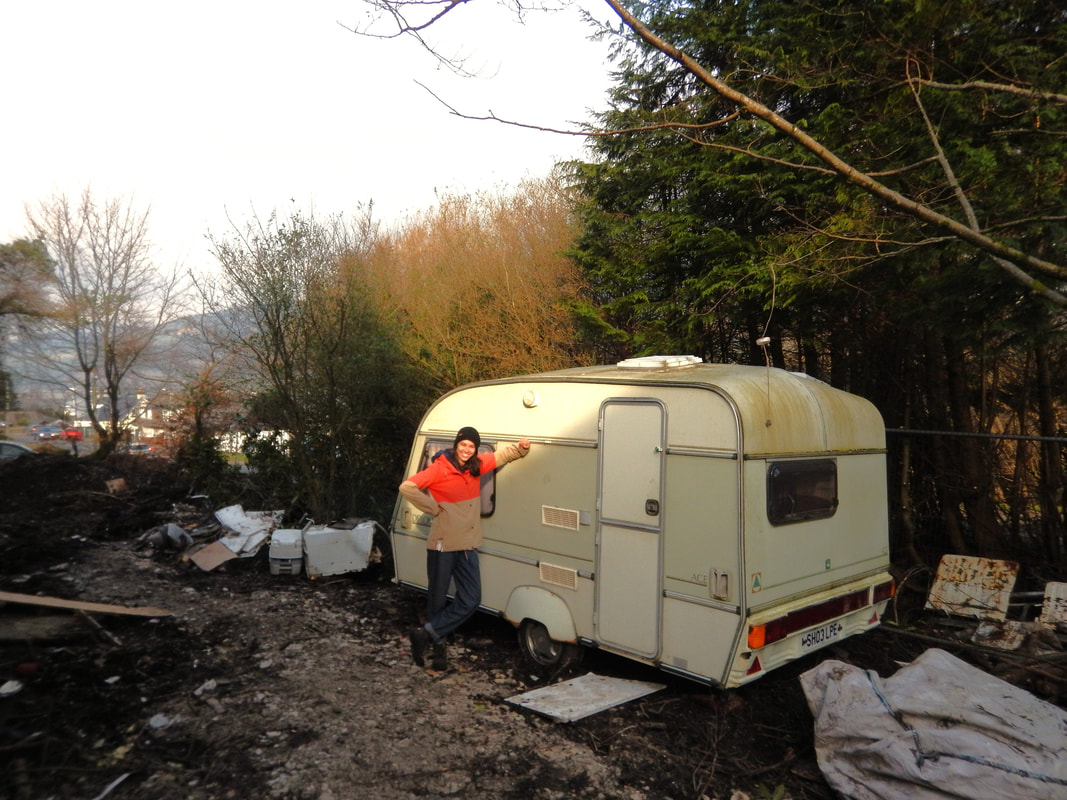 So, as frustrating as this house can be at times, Jameswood is helping Cal and I remember to appreciate the little things in life, and focus on our small victories, instead of the constant problems we encounter. I hope we have many more little victories for me to write about soon! Claire |