You’ll need: (Click the item for a link to where I bought them) Self Adhesive Lead Strip – £10-25
Utility Knife (a sharp knife to cut lead strip) Soldering Iron – £8-15 Lead-Free Solder - £8 Soldering Flux - £5-10 Paint Brush – a couple quid
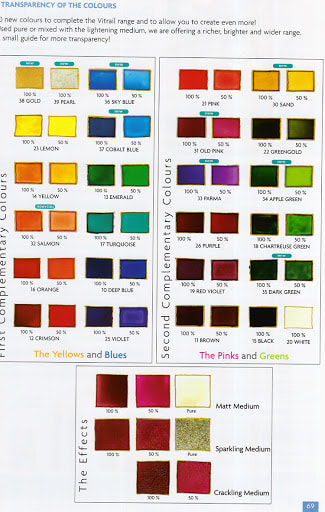
PEBEO Vitrail Glass Paint - £4.25 each
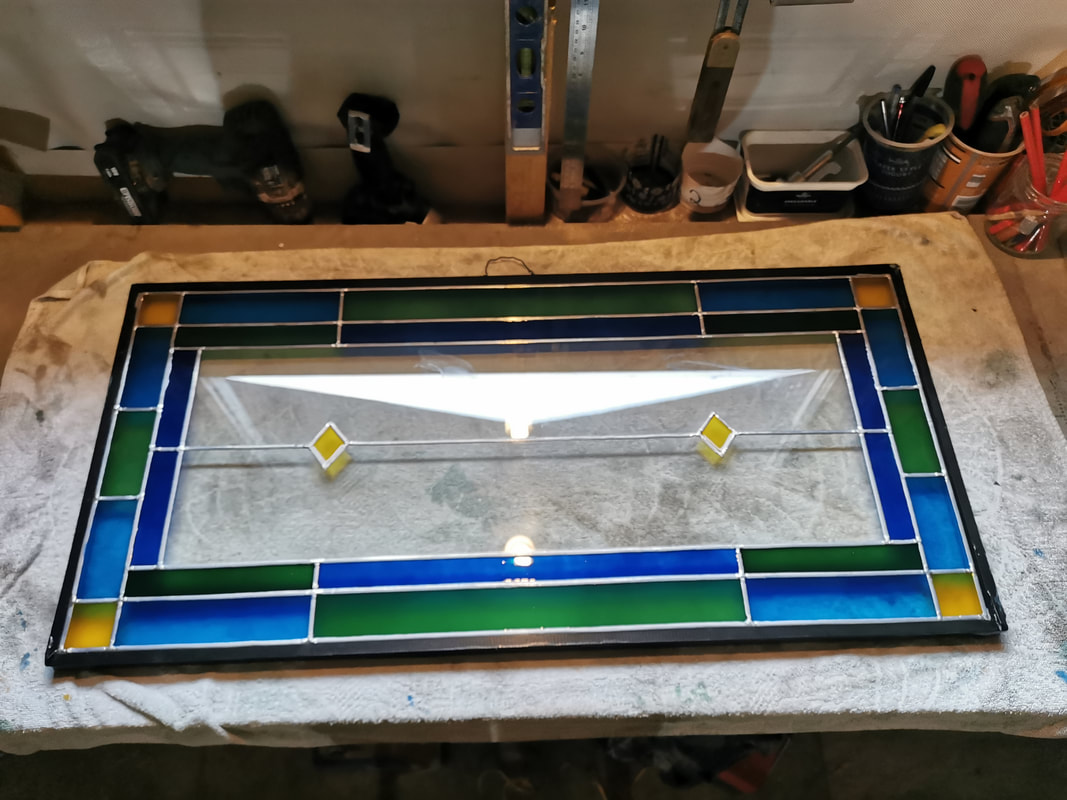
 .I used this Youtube video to make my transom window. Though I used a different technique for painting my glass. I used this painting technique. 1. Design Start by choosing a design! I used Instagram to find inspiration for my design, and then drew out a rough plan. You can also find inspiration on your favourite website, or Architecture in your city! 2. Apply Lead Stripping Clean your glass and start by applying your lead stripping. If you are trying to get a straight line, I would recommend placing a ruler alongside the lead strip while applying it to the glass. The lead strip appears not to be very sticky, until it is rubbed thoroughly with the applicator provided. 3. Soldering Once your lead is applied to the glass, apply a thin layer of flux to each of the joins. Make sure your soldering iron has reached full temperature before soldering. Heat up a small amount of lead free solder and quickly apply across the join. The lead has a lower melting point than the lead-free solder, so be careful not to hold the soldering iron on the lead for too long. My soldering iron almost hovers above the lead, only touching the solder itself. This is the trickiest part of the job, and I would recommend practicing on a test piece before soldering your glass painting project. 4. Painting Clean the glass one last time before painting. I used small artists paint brushes, and chose to use Vitrail paint in lemon, cobalt blue and chartreuse.
That’s all there is to it! I hope you enjoy getting creative and making beautiful pieces of glass artwork for your own home! DM us your finished work @whathavewedunoon! 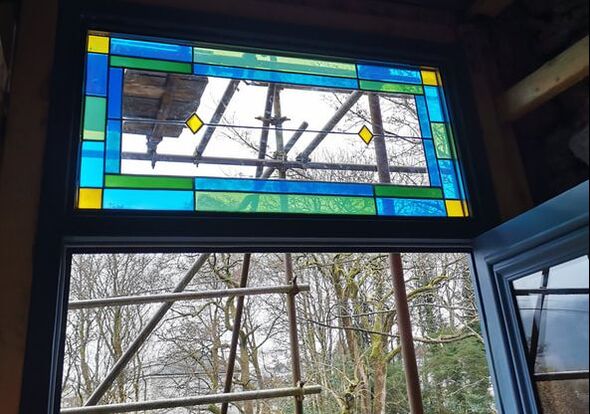
8 Comments
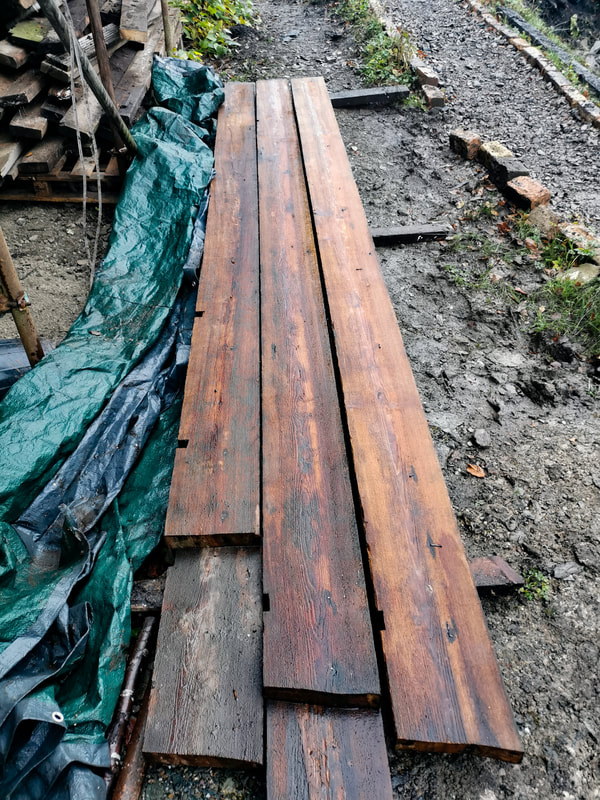
When we first arrived at Jameswood and slowly started to peel back her crumbling, waterlogged plaster walls, we uncovered a devastating amount of wood rot inside our home. 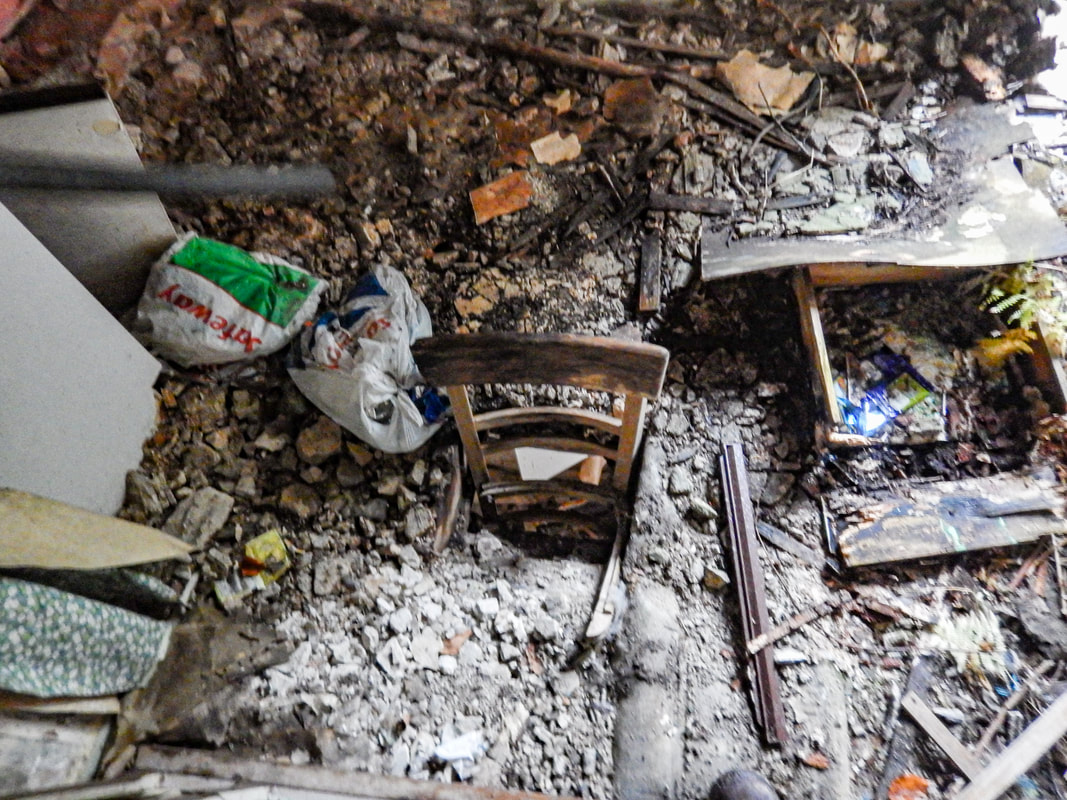 A dangerously rotten floor engulfed a chair left in our derelict home. We were careful to save as much timber as we could, but the majority of the original structure was unsalvageable. The lengths that could be kept still needed to be cut at the ends, and with such a small number of full length timbers left to reuse, we decided not to put them back into Jameswood. Almost all the timbers in the house had been affected by, or in close proximity to wet and dry rot. We didn’t want to run the risk of bringing these destructive fungi back into our home.
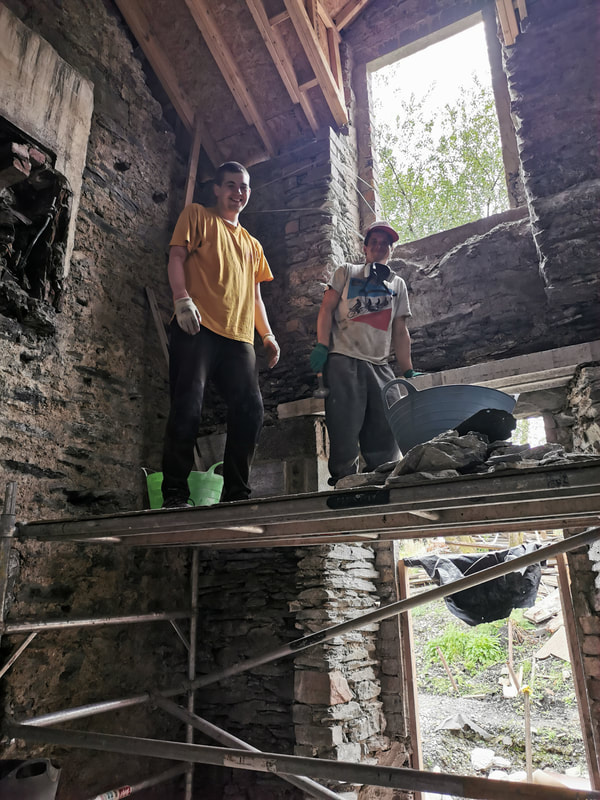
 An overwhelming pile of timber that was pulled out of our home. Later sorted into burn and salvage piles. With nearly the whole house cleared and back to its bare bones, the upper floor was the final element that needed to be removed from the building. Unfortunately, this is easier said than done. The upper floor is an important structural element in a two-storey stone building. The big, heavy floor joists are embedded in the front and back walls of the building, and help provide “lateral support”. Without this support, the external walls of the building run the risk of bellying outwards, or in extreme cases, collapsing. Thankfully, our structural engineer was quite certain that we could use our wrap-around scaffolding as a temporary brace for our home. Once we had braced the front and back walls, we embarked on the nerve-wracking task of carefully removing the 8m long timbers that hung 3m above our heads. 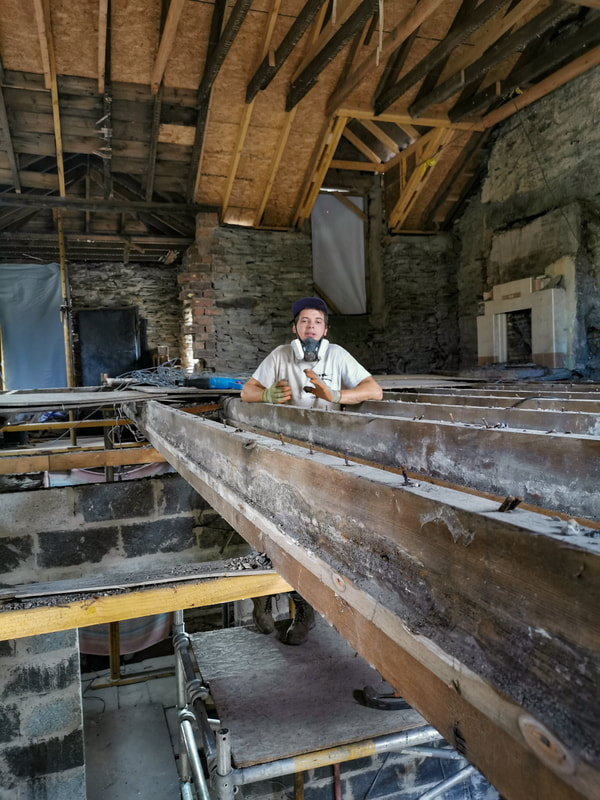 Cal briefing our rag-tag building team before we took down our first floor joist.
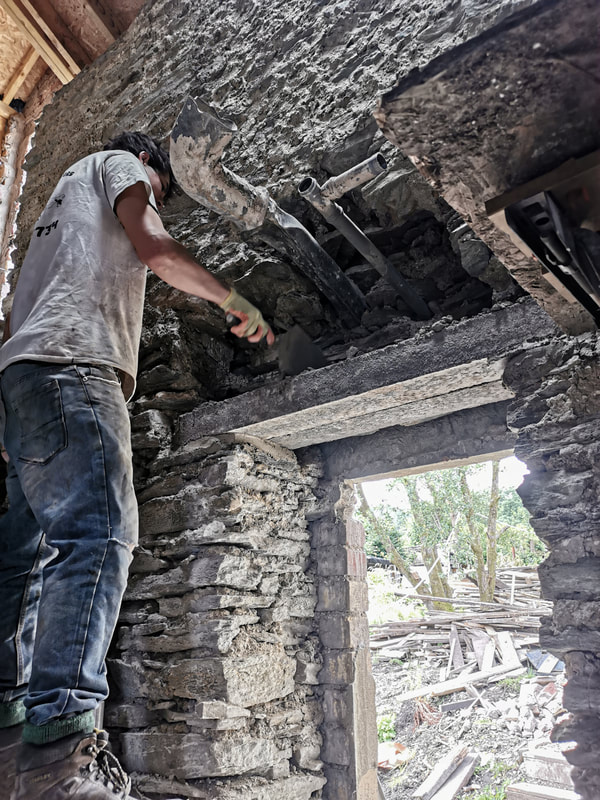
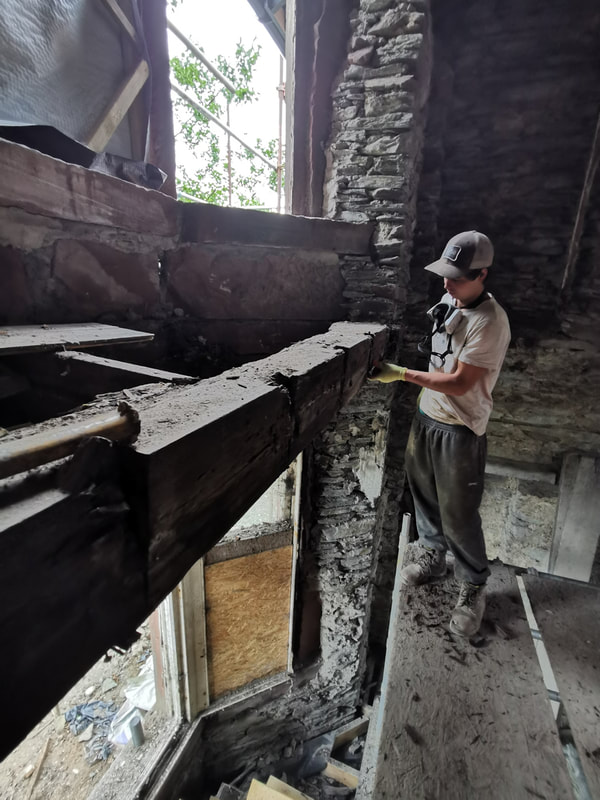
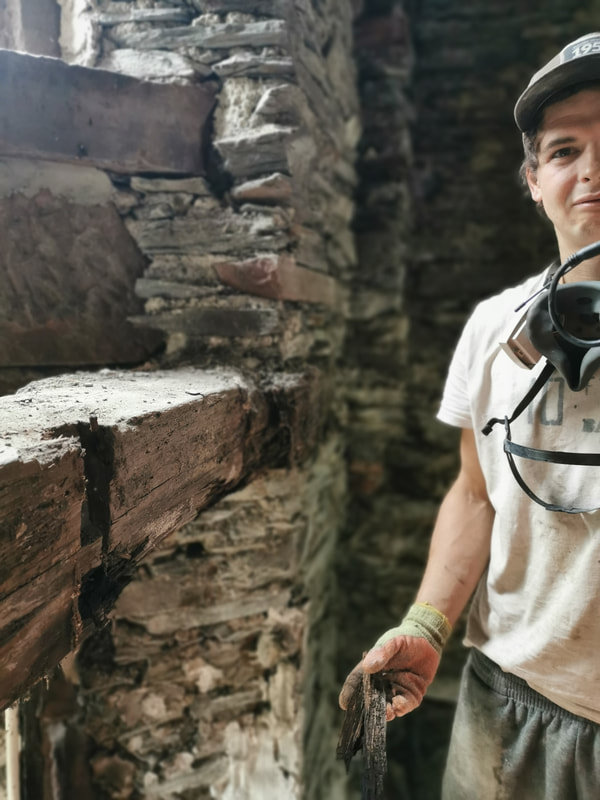
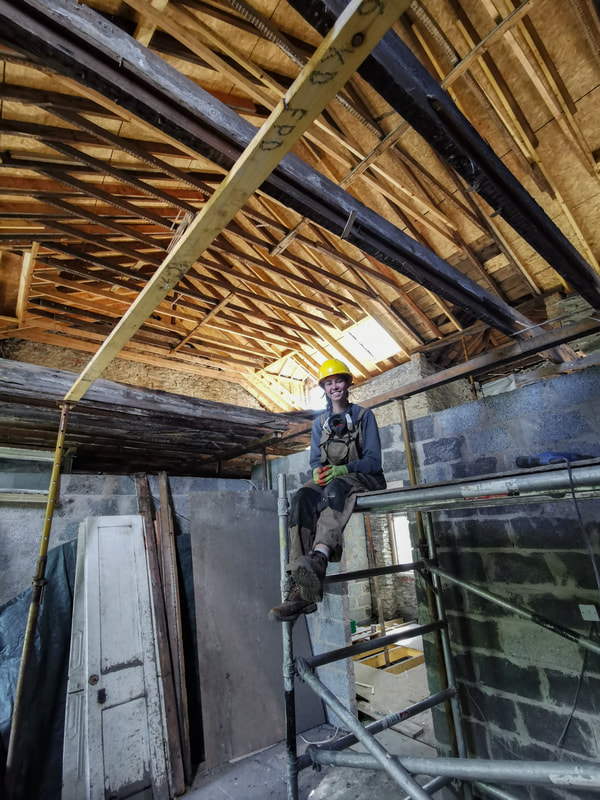 Very pleased with progress! It was fun to see the roof structure from down at ground level. With that out of the way, I really believed that we must be passed the most nerve wracking pieces of this restoration. Over the past year, we had managed to literally lift our roof off of Jameswood’s walls AND play a giant game of Jenga with our bay window. Surely we had to be on to normal, low-risk building work! Of course, I was wrong. Before we could frame the house, we also had some lintels and a bressummer beam to replace. For those of you who, like myself, had never heard of a lintel before the restoration of Jameswood, it’s a structural element that holds up the wall above a window or door opening. My question was, what’s supposed to hold up the wall when you take the lintel out, to put the new one in?
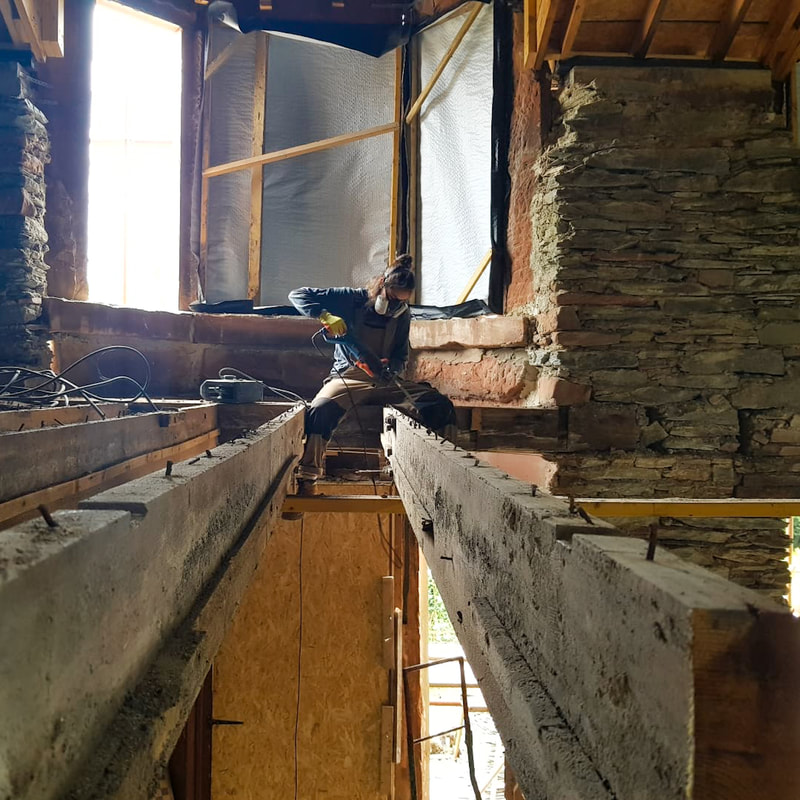
Thankfully, there’s a tool for that! Cal was able to replace all of the lintels with relative ease, and after seeing him do the first one, I was left with less worry as well. A bressummer beam is a structural element that spans across a bay window, and supports the upper floor of a house. With our upper floor removed, it seemed like a good time to replace our beam, which had severe rot at one end. The problem is, this beam is nearly half a meter thick, and went nearly a meter into the wall in either direction. The sheer size of the beam meant that it had become a huge component of our front wall, and we really didn’t know how we were going to safely get this thing down.
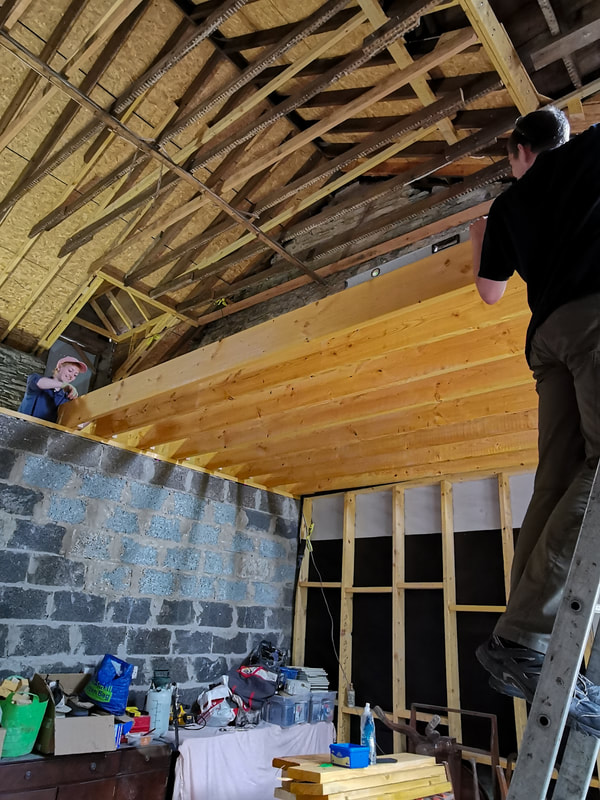
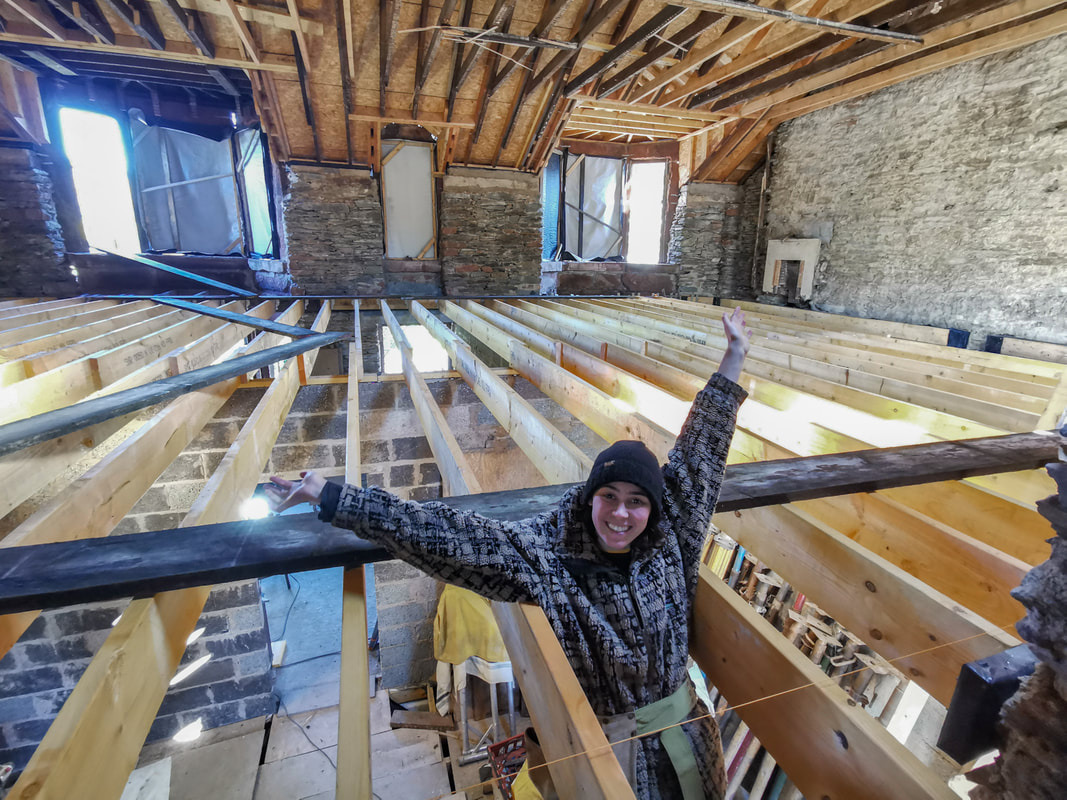
Cal decided there was no way we had enough man-power to lower the beam down as a whole. His solution: We would prop the walls at either end of the beam, and pull out the stones around it to separate the beam from the wall. We would put two props at the centre of the beam and then CHAINSAW the beam in half. The two halves would then balance on either props, until Cal and Gab pulled them out of the walls and lowered them to the floor. We didn’t know if the boys could lift even half a bressummer beam, and a balancing act that involved a chainsaw (at heights) sounded like a terrible idea. I strongly objected, but with no other idea to offer the group, Cal’s idea prevailed. 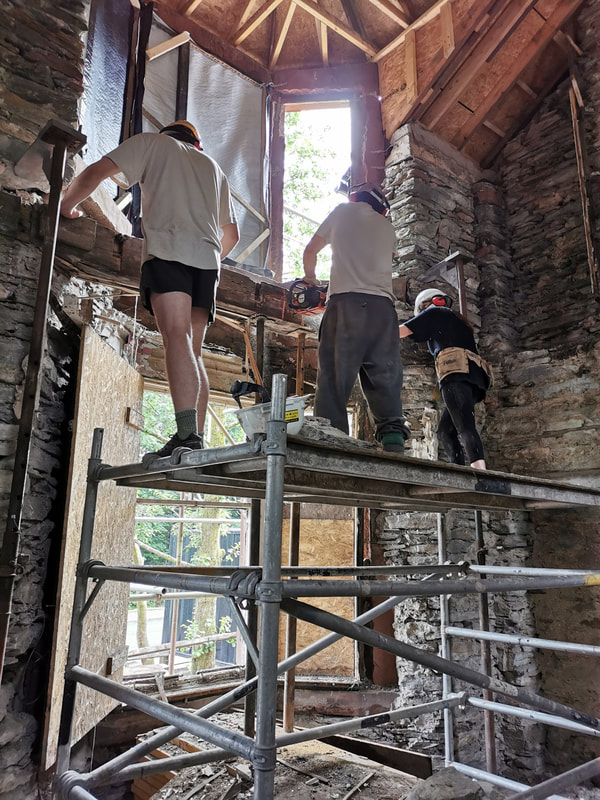 Cal's plan in action...just as described. I was behind the camera...very unwilling to involve myself in chainsawing at heights. Before the work commenced, I asked our friend Carrie, who was on hand to help, whether she thought the plan would work. She simply shrugged and said, “Today might be the day that this house finally comes crashing to the ground,” before calmly taking her place at the centre of the action, holding the prop in place for the bressummer beam to balance on. It all went surprisingly well. The beam balanced, the chainsaw only cut wood, the chunky pieces of timber were slowly lowered to the ground, and the surrounding wall stayed in its place! By the end of the day, a new steel beam spanned across the bay window, and we were all celebrating Jameswood’s (and our own) survival. 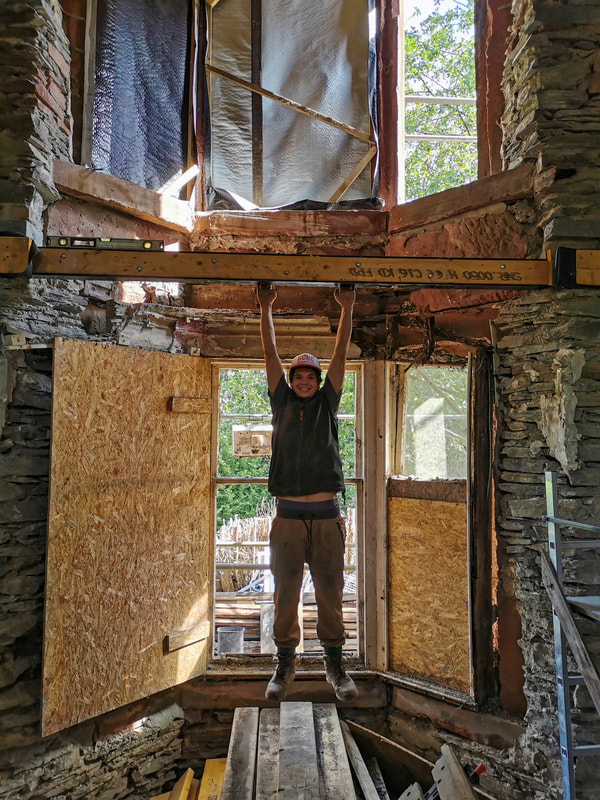 A very happy Cal testing out the new bressumer beam and showing off all his in-tact limbs. The visual progress that ensued was so satisfying. Cal, a framer by trade, was finally able to use his skills, and a new upper floor was thrown up in less than a day. Cal set a sheet of OSB down on the joists, and for the first time, I excitedly twirled on my 2.88 sqm dance-floor, in our future living room.
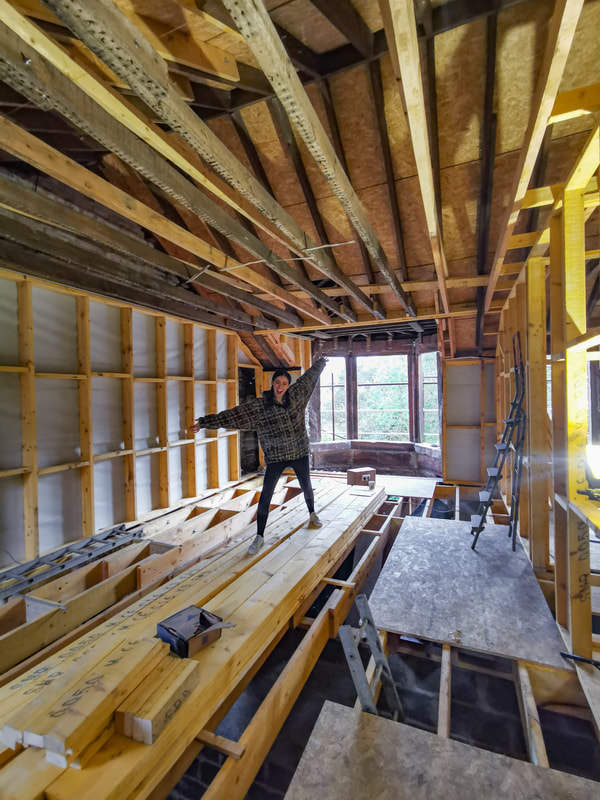
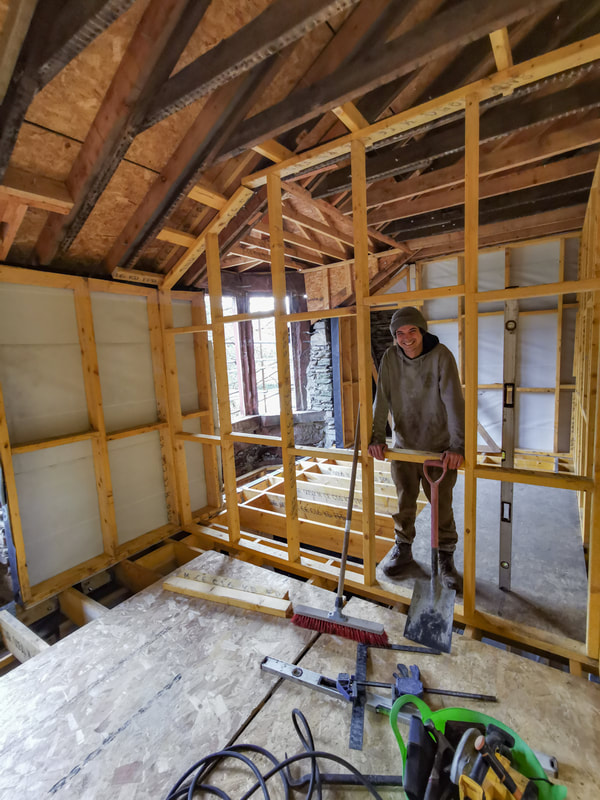
I pretended to sit in our bathtub and walk around our bed as we carefully mapped out the final dimensions of our home. After teaching me how to make a stud wall, we found a beautiful rhythm, cutting, *pop-popping and wrapping walls. In a matter of weeks, a real-life house – with rooms and hallways, appeared around us. *I have nicknamed our first fix nail gun the pop-pop and the second-fix gun the pip-pop
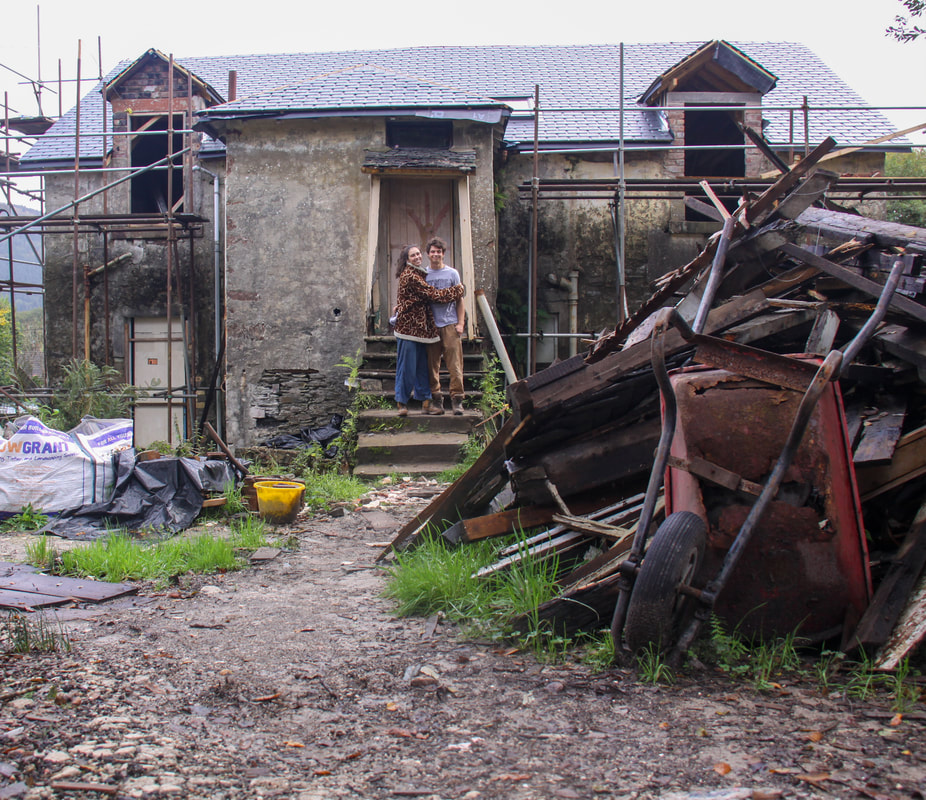
I joked that the place was starting to look too normal now, and as visitors were given a tour of the place, I found myself pulling out my phone to show them how messed up the room they were standing in used to be. It was a nice feeling. Restoring Jameswood was starting to feel like less of a pipe-dream and more of a reality, but as walls appear, new challenges face us. Clearing out and shoring up an old building is tough, time consuming work, but it doesn’t cost much money. In order to carry on with the project, we would have to get Jameswood wind and water-tight once and for all – which would require one of the largest investments in our restoration: windows! And our goal was to get them in before Christmas! Thank you for joining us as we restore Jameswood Villa! Sincerely, Claire (and Cal) |