|
Restoring Jameswood Villa sustainably has always been a priority for us. Now that the renovation is complete, we wanted to extend that goal to furnishing our spaces. With that in mind, we were thrilled to discover Harrison Spinks mattresses. This family- owned business creates mattresses from natural materials – including hemp and linen grown right on their 300-acre farm in North Yorkshire! They're the only British bedmaker to source materials straight from their own farm - talk about keeping it local! Additionally, they raise their own sheep and alpaca, and partner with British Wool to ensure all wool in their mattresses come from ethically sourced, traceable British farms.  
 Since welcoming guests, many have commented on the exceptional sleep they experience at our rentals. This can be attributed to the microsprings in Harrison Spinks mattresses – designed as an alternative to foam, they provide excellent support and contoured comfort.  The natural fire-retardant properties of these mattresses also eliminates the need for harmful chemical treatments - meaning a Harrison Spinks mattress is 100% free of foam, glue and fire-retardant chemicals. We can rest assured knowing we’re getting a healthy night’s sleep.  We're incredibly happy with our Harrison Spinks mattresses. They've exceeded our goal of a sustainable interior, delivering incredible and noteworthy comfort while we sleep. 
0 Comments
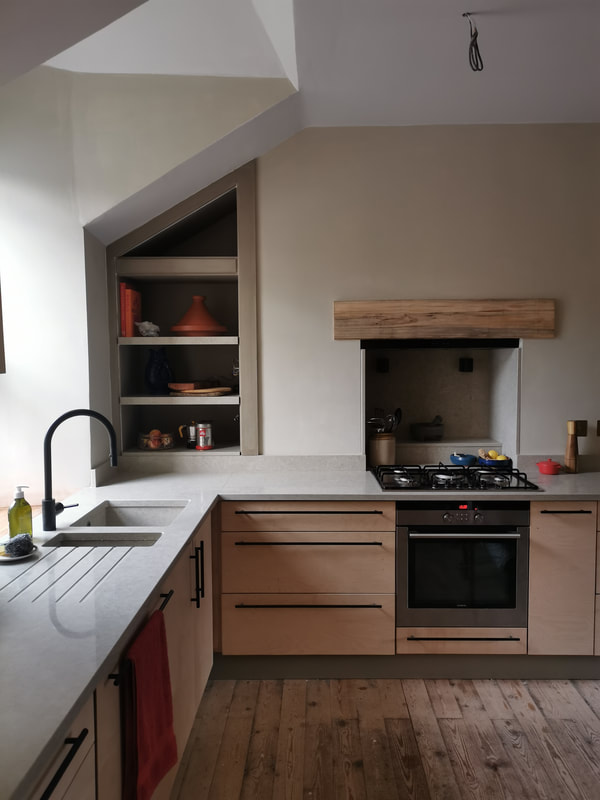
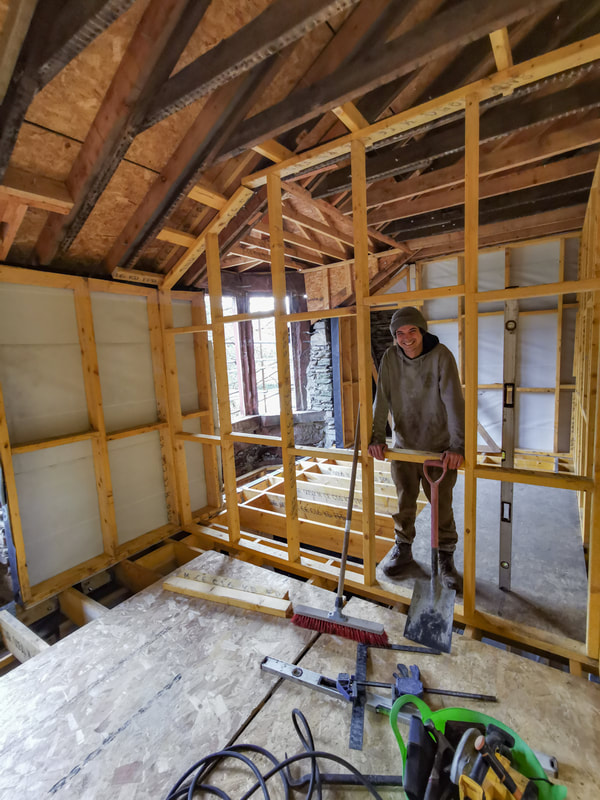
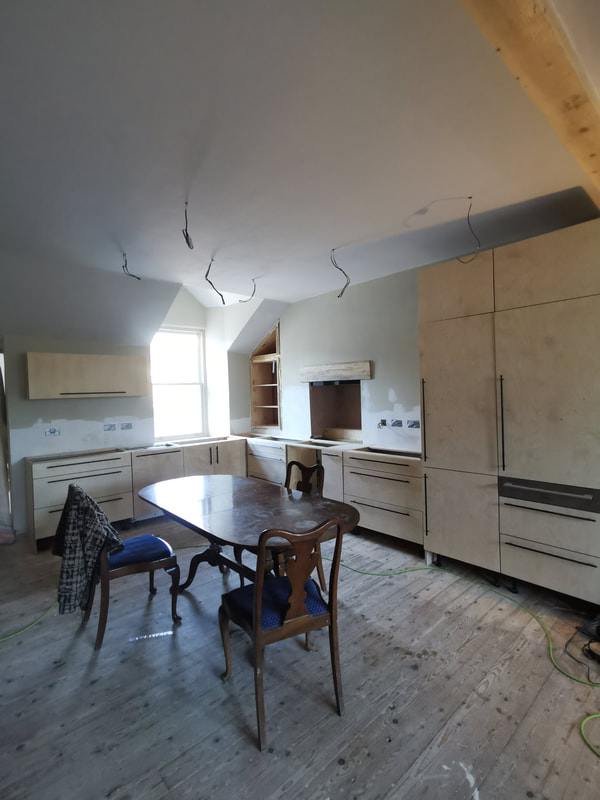
The kitchen has always been the heart of Jameswood. Long before we had a roof on the house, or windows in - our outdoor kitchen had become the hub of activity here on site. Feasts were prepared for and by guests from all over the world, under a leaky tin roof, atop our two-burner camping stove. Our fridge became a white board, with messages from friends, and lists we would slowly cross off as, bit by bit, we turned our derelict house into a home. Around the old beat-up table we rescued from a Guy Fawkes bonfire pile, we shared food, drinks and memories - I soon realised that we had already created a home here in Dunoon - though that didn’t take away any determination to build a much more comfortable and conventional one, metres away from the tiny touring caravan and scaffolding kitchen we had already built for ourselves. When I imagined finally moving into Jameswood, I have always imagined sharing this home with our friends and family - making meals together, sharing them round a big table, after a day of exploring the beautiful hills in our Scottish seaside town.
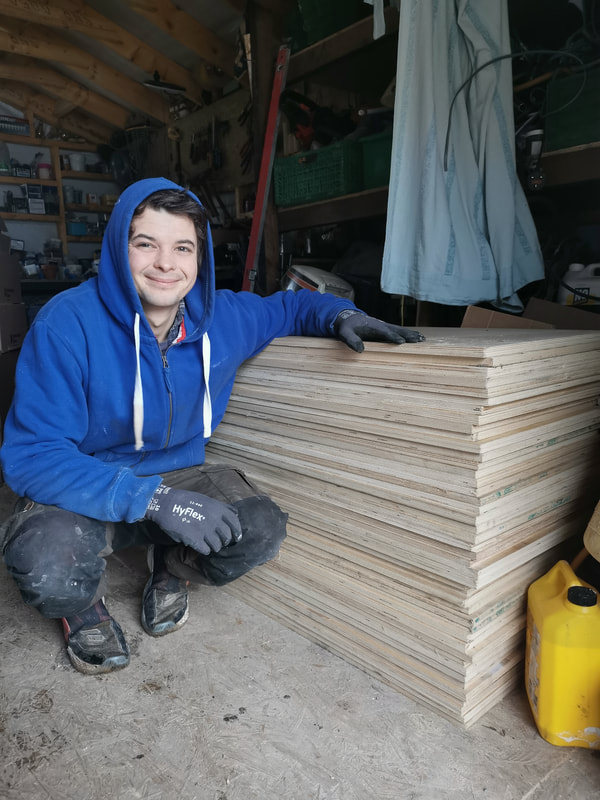
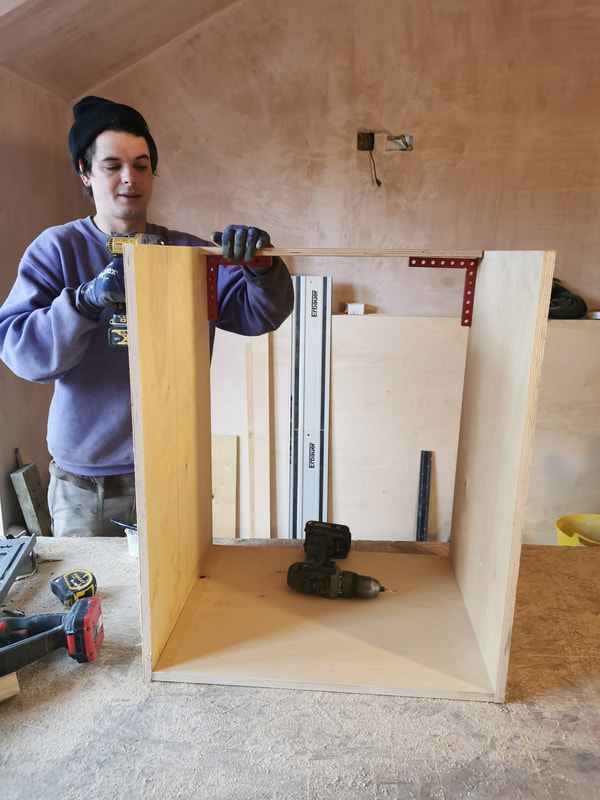
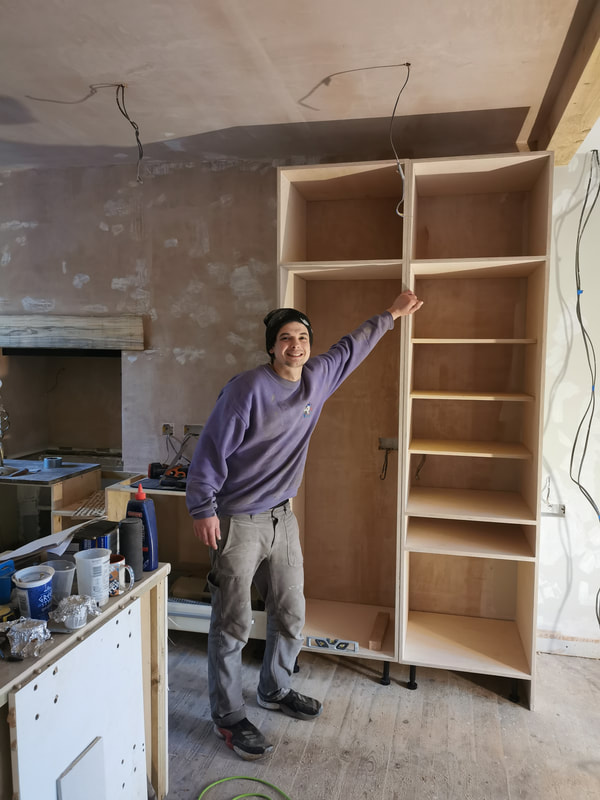
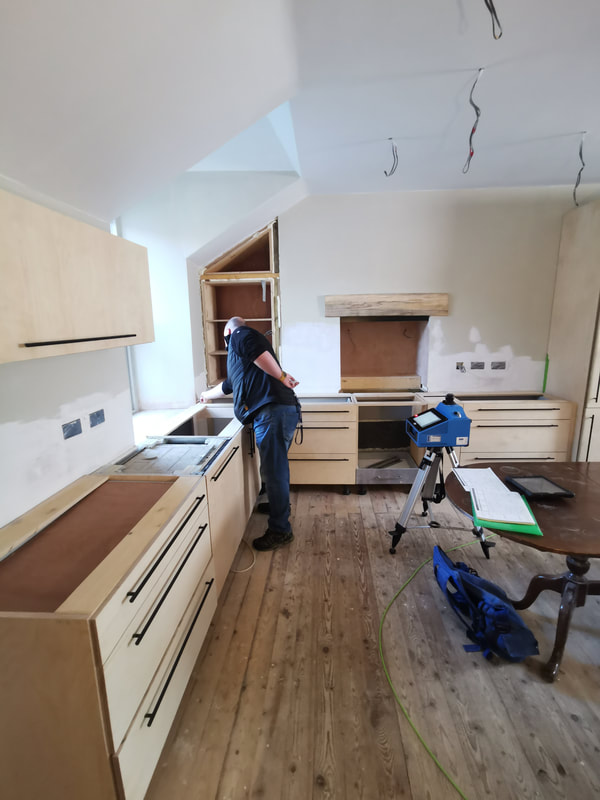
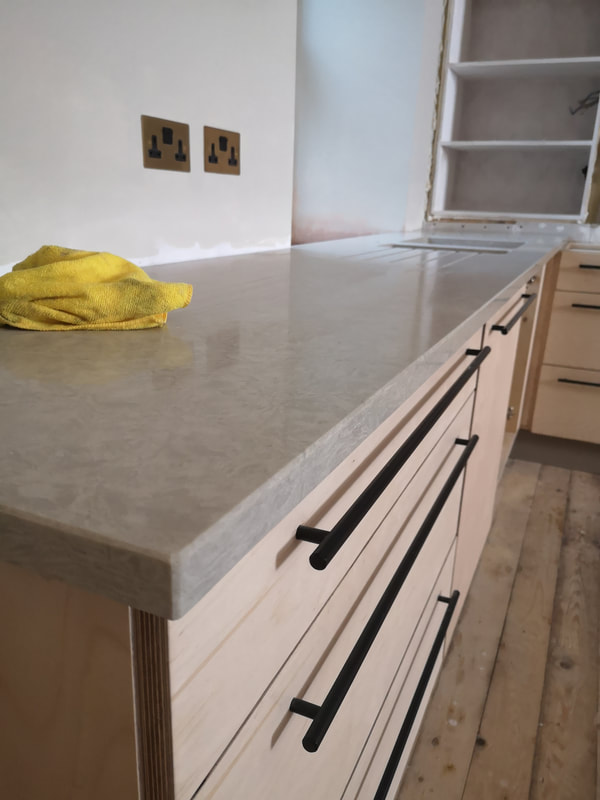
 This kitchen build would be one of the most special moments in building our home - an exciting moment not unlike finishing our roof, or getting our first (& last) window in! To limit costs, and come up with a bespoke, high-quality kitchen for ourselves, we decided to take advantage of Cal’s skills as a carpenter. We chose to make a plywood kitchen, which would be robust enough to last a long time, while still being cost effective. Luckily, we had found a supply of plywood offcuts on eBay, which we could use to make our kitchen carcasses - and we bought beautiful Birch plywood for the external faces and doors of our kitchen.
We were lucky enough to have been offered to reclaim a good quality kitchen that was being taken out of a home, and would otherwise have ended up in the tip. We were able to salvage the Blum drawers, and reuse the appliances, which included an integrated fridge, dishwasher, as well as an oven and warming drawer! We then found a great gas hob, which had been heavily discounted for having a tiny dent in the metal. Our kitchen was coming together quickly - after about two weeks, Cal had finished fitting his cabinets - and they were stunning! He had managed to match the grain through the doors, and I loved the unimposing soft warmth of the Birch. Now, all that was left to do was get worktops!
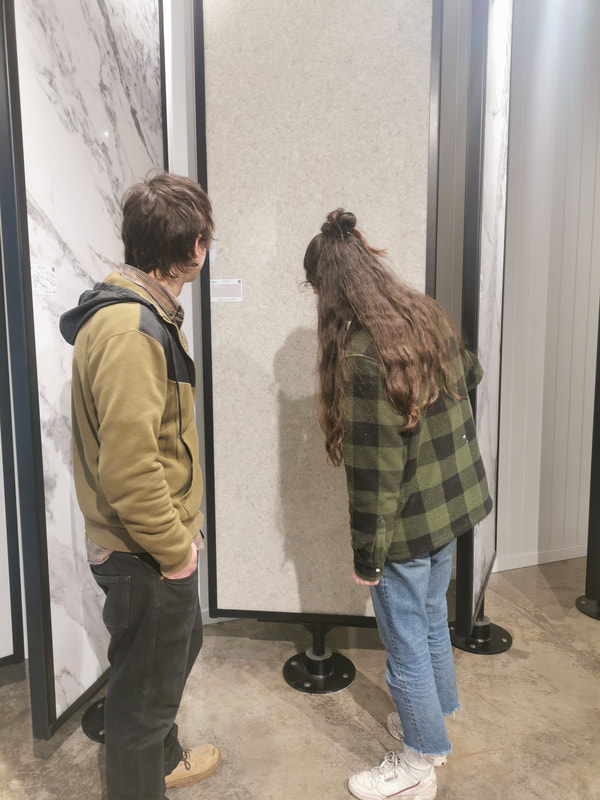
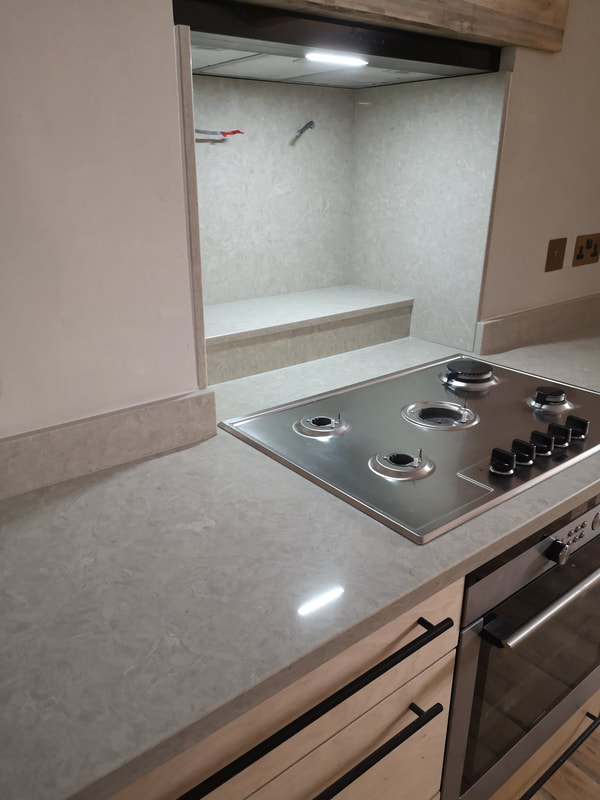
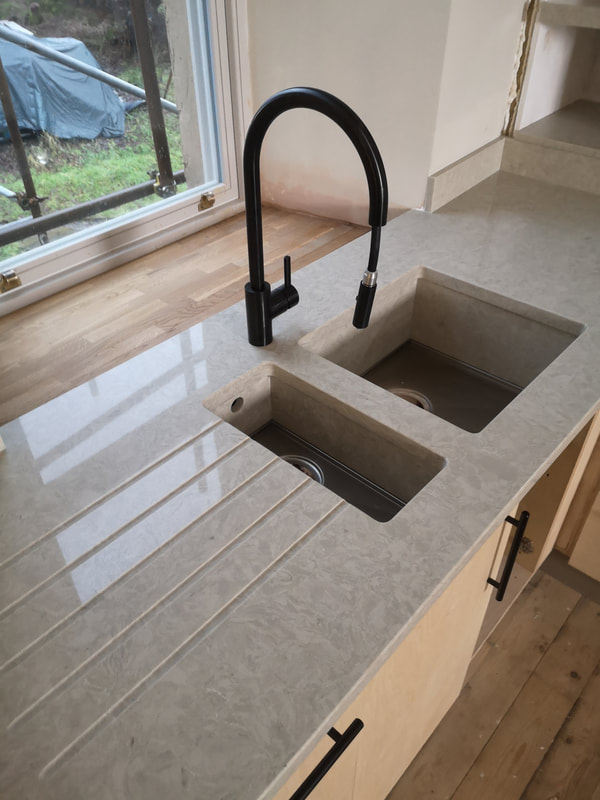
 We chose to work with Gemini Worktops for our kitchen. They have sponsored our worktops. It’s important to me that I remain transparent with our online community when working with brands, I do, however, only ever agree to a certain number of “deliverables” with any contract - be it a blog post, or Instagram posts. I never promise a brand to leave a specific review, and as such, you can go forward knowing the following review is my fully honest take on Gemini’s products and services.  The process started with a trip to Gemini’s website to choose some free samples from their beautiful collection of Gemini Quartz colour options. A few days later, our samples had arrived. I loved the large format, which gave you a good idea of what the pattern of the Quartz would look like. The back includes a sticker with a photo of the full format slab, for a better sense of what it might look like in your kitchen. It didn’t, however, make our choice easy, because all three samples we had ordered were stunning. We chose to take a look at the Calacatta Gold, Timberwolf and a Concrete effect Quartz, and managed to narrow our choice to the first two, but were having a very hard time deciding between them. You can order your three free samples by clicking this link. 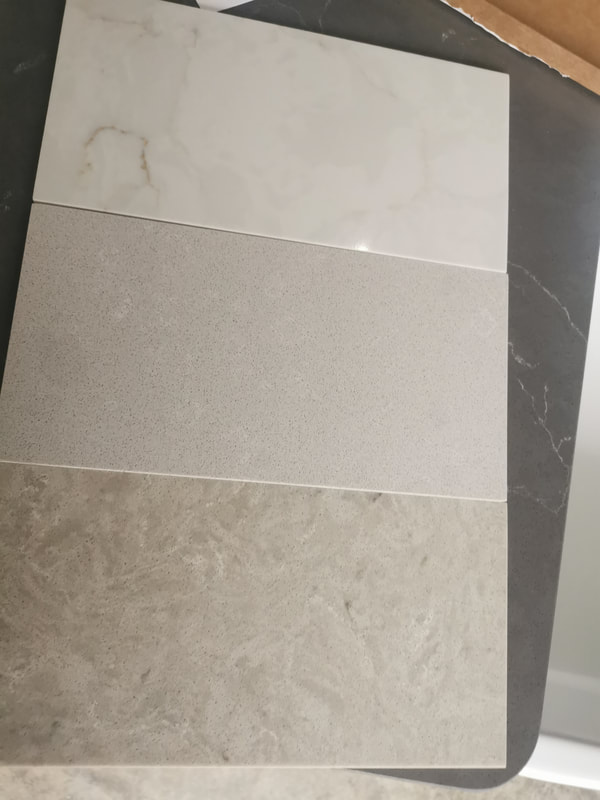 Next, we decided to take a trip to Gemini’s showroom, for a design consultation, and to see the full-format Quartz in-person, in an attempt to pick between our remaining Quartz colour choices. Cal and I hadn’t used professionals when designing and building our kitchen - instead, we had built the cabinets as we went, and as a result, we didn’t have any electronic sketch-ups of the kitchen. That wasn’t a problem at all. Before the consultation, we took some rough measurements of the kitchen, and brought some hand-drawn layouts, which was all that was needed for the design team to help us with our worktops. While in the consultation, we thought we would just choose the thickness of the Quartz, decide on whether we wanted upstands and pick an edging profile - but it was so much more helpful than I ever could have imagined. We had a nook behind our stove, which had once been a fireplace, and now housed our extractor fan. What was supposed to be a lovely period detail had started to look like an awkward, extra deep hole that didn’t really make sense in the workspace. We sheepishly skirted around the issue - it was done now, we thought - and it just wasn’t turning out how we had imagined. But then our design consultant offered a brilliant idea for the space! They recommended a raised shelf, which would break up the space, and create easier access to items sat at the back of the nook. Clad in the same material as the rest of the countertop, it would tie the space in, and make it feel like a beautifully designed, purposefully built feature of the kitchen, while making it easy to clean, which was important near the stove-top. Now that it has all come together, this is the first feature people notice when they enter our kitchen - always exclaiming that they love the shelf behind the cooker. They also gave us the idea of cladding the shelves in our wall press in the same Quartz material - to both elevate the design of the kitchen, and tie the press into the space. We also love that this provides an easy-to-clean surface that we can tuck away appliances in, like our George Forman. When we saw the showroom, we absolutely loved the Axis 1810, Quartz cladded sink, and chose this in a two-basin design for our space. We think it gives the space a seamless, clean look - and the drainage groove are a beautiful feature to add function and complete this look. The designer knew how we could creatviely use the Quartz to really make our kitchen special. We came away from our design consult with a kitchen that looked professionally designed, with added beauty and function for the space. You can book a free design consultation here - and if you don’t stay in the Yorkshire area, the whole consultation can be done over a virtual meeting, with the same excellent results.
At the showroom, we also had a chance to look at the full format Quartz slabs, to help us make our final colour choice. Though we loved the dramatic and warm veining of the Calacatta Gold , we decided to go with Timberwolf. The warm, earthy tones of the Quartz, and the soft pattern creates a relaxed finish in the space. This is something the space was craving, as the blended kitchen-living room, which is often filled with guests and dinner parties, can otherwise feel a bit chaotic! Now that we have it in the kitchen, I am so pleased with our choice. It suits our kitchen to a tee.
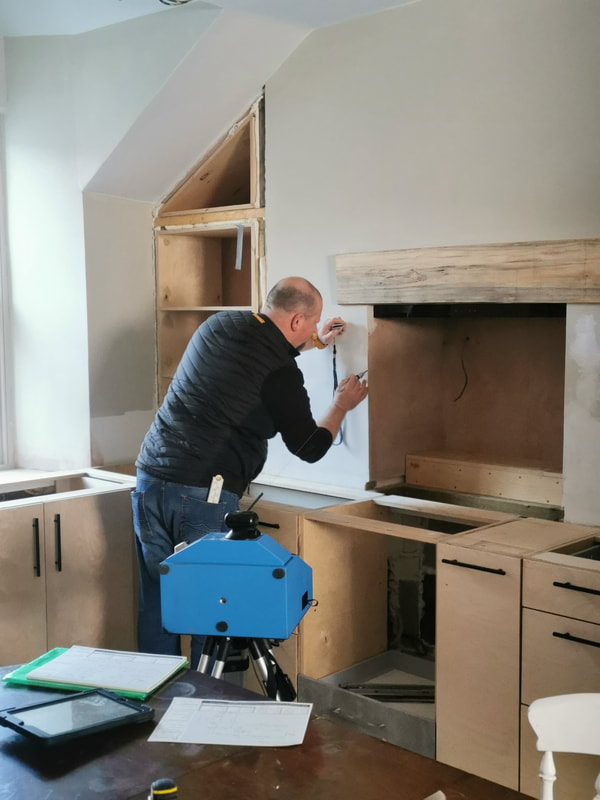
Soonafter our design consult, it was time for templating day! Before the Quartz is cut, Gemini sends a member of their team out to take all the measurements needed for a perfectly fit worktop. They use a machine that takes incredibly accurate measurements of your space, and sends the electronic measurements straight to Gemini - this eliminates human-error, and ensures the best possible fit for your space. The process is incredibly quick, only taking an hour or so from start to finish. Worktops are an investment for your home - a piece you would like to have for years to come - and once they are cut, it’s not easy to make a fix if they’ve been cut too small! It gave us such great peace of mind knowing that the kitchen had been professionally measured before any cuts were made to the lovely Quartz we would be incorporating in the space!
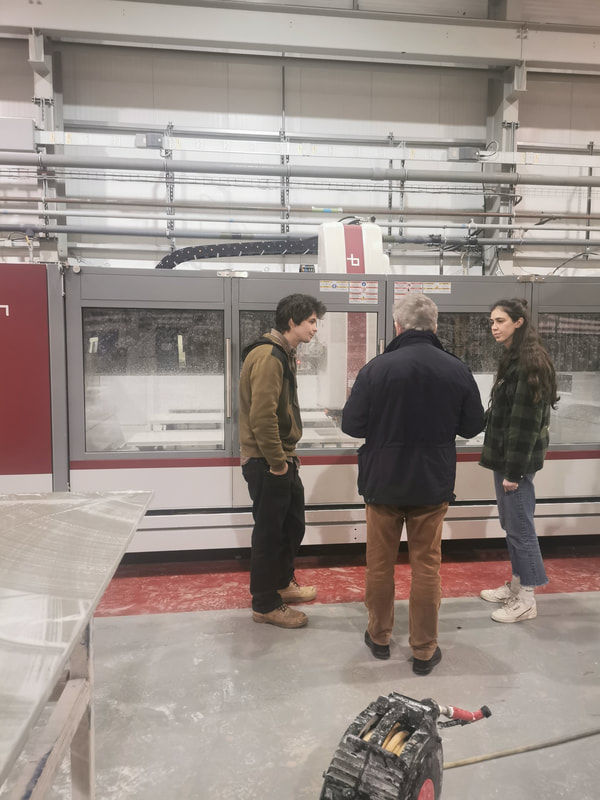
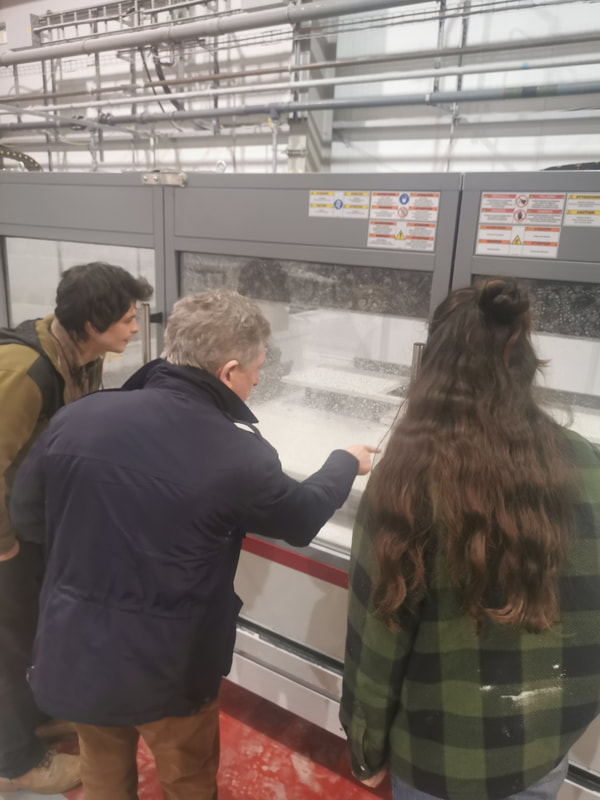
You can expect your Quartz to arrive about 2 weeks after templating. We went to Gemini’s factory to take a look at the process, and it was amazing! At the workshop, a huge arm sweeps over the factory floor and delivers quartz to the CNC machines, which precisely cuts your kitchen worktop design into the material. The worktops are checked over by stone masons, who then polish the edges and buff the worktop for a beautiful, professional finish.
On delivery day, a team of installers showed up at our house on-time, and fit our worktops professionally and quickly. I couldn’t believe how beautifully all the pieces fit in the space. The fitters had an eye for detail, even ensuring that the caulking was neatly finished. They gave the worktop a clean before leaving, and you wouldn’t have known they had been working in our space, if not for the gorgeous worktops they had left in our kitchen!
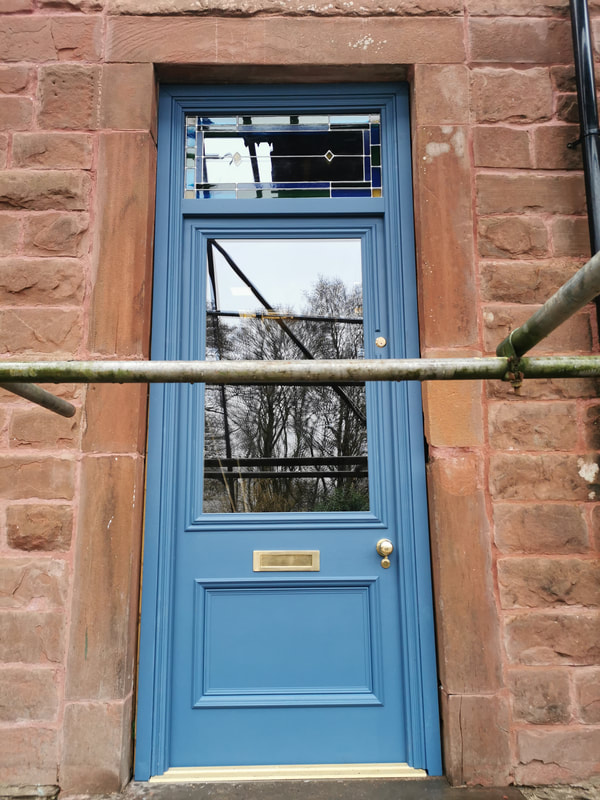
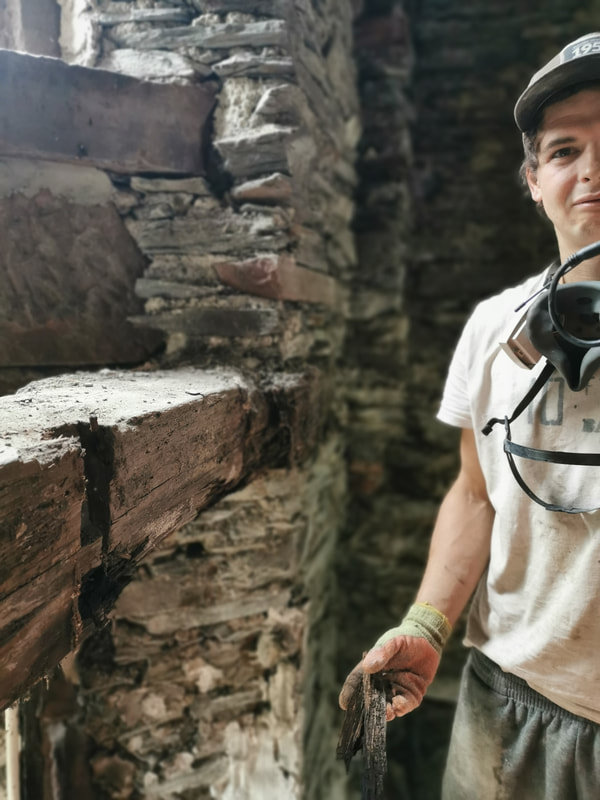
I have honestly been blown away by this whole process. Cal and I have built our whole house on our own, with no help from professionals, aside from an electrician who checked over our work, and a certified plumber, to connect our gas. We are not used to letting go of the reigns, and allowing someone else to come in, and finish a space for us - but we are so glad we did, in this instance! We could not have achieved the same level of finish, or thought of the gorgeous design details that elevated this space, and made our kitchen so special. Gemini put our minds at ease on every step of our journey, with their timely and clear communication and their friendly and professional service. We are so glad to have come across a family-owned business, who puts as much love and care into their worktops, as we have for our home. Click here, to start your journey towards getting the kitchen of your dreams, with Gemini. 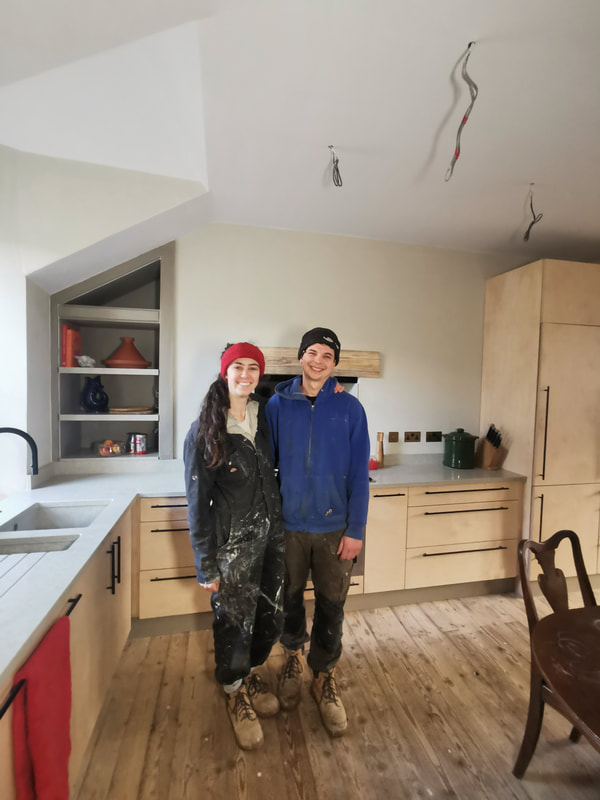 Some of our main goals in restoring our home have always been reinstating the original character of our Victorian building, while doing so in as sustainably a way as possible - all while working with incredibly tight funds. Salavaging as many materials from the original house as possible became an important part of achieving these goals. Aside from adding the original character back into the building, they were also free - and mitigated the need to by new materials - thereby lowering the carbon footprint of our build. After Jameswood sustained about 30 years of water damage, this was easier said than done. Most of the structural timbers in the building were rotten at their ends (or all the way through, as so often was the case.) They were no longer suitable to be brought back into our home, and were instead used to build our shed, outdoor kitchen, or, if completely rotten, used as firewood. Fortunately, our doors had been smothered with numerous layers of paint, over their 120 year life. Their thick coatings were able to protect them from the water damage the rest of the building had sustained. We were determined to salvage these original pieces, and incorporate them into our restored building. To bring these doors back to life, we wanted to remove their many layers of paint, to bring them back to bare wood, before giving them a sand, fill and fresh coat. We've tried many methods of paint stripping while restoring the 16 doors that would go back in the building. First we tried scraping the paint off, using a shavehook like this one This method works... but it takes a LONG time - and it can also be dangerous. When working with Victorian doors, you have to assume there will be lead paint on them. Scraping off dry paint lifts a lot of paint-dust in the air. Breathing in lead dust is not good for you. If you try this method, be sure to wear a good quality face mask, clean your work area well after, and throw your clothes straight in the wash. You also get a lot of blisters from hours of scraping, so I really wouldn't recommend. I would, however, recommend grabbing one of those shavehooks. It is helpful for scraping small knooks and crannies. A good tool to have around for this job. Next I tried a store bought chemical paint stripper. I started with tryign No Nonsense stripper, from Screwfix, as it was the cheapest I could find. It was rubbish. Don't waste your time with it! I then tried KlingStrip. This product worked well - but it was expensive. You have to lay it on very thick, cover it in plastic, leave it for a few hours (for best results, I left it overnight) and then clean off the paint and stripper. You have to be very careful to use gloves, and clean any stripper that gets onto your skin immediately. I left a speck on my arm for about 5 minutes, and it had already created an open sore. At about £30 for a 5L tub, and with 16 doors to get through, I would be paying hundreds to get all the paint off. Our project finances are so tight - this just wasn't an option. I decided to look into the ingredient list for this product, and found the main active ingredient was Sodium Hydroxide - a.k.a. Lye. This is the chemical commonly used in soap making. It is readily available, and very cheap. So, here is my homemade paintstripper recipe! It is a fraction of the cost of the pre-made versions, and jsut as effective. Homemade Paint Stripper RecipeSafety information: Sodium Hyrdroxide, or Lye, is incredibly corrosive. It WILL cause open sores if not cleaned off skin thoroughly with water, within a few minutes of exposure. Please wear long rubber gloves, sleeves and goggles when mixing and using this product. Lye also creates heat when initially mixed with water. Always add Lye to water, rather than pouring water over lye. Ingredients: Water: Sodium Hydroxide approx 10:1 ratio Cornflour - as thickening agent Instructions: While wearing all saftey equipment, measure 1L of water into a suitable plastic bucket. Add 100ml of cornflour to the water, mix thoroughly. While stirring, add 100ml Sodium Hydroxide to the mixture. Continue mixing for a minute. As Sodium Hydroxide heats the water, the cornflour will begin to thicken. Let cool for 10 minutes before use. Storage: Store away from children, in well labelled container. Use: Do a test patch on the material you would like to paint strip. Once tested: Apply a thick layer onto item. Cover in plastic wrap. Leave overnight for best results. Scrape off as much excess paint and stripper before rinsing thoroughly. If, after rinsing, the item still feels slippery, spray down with cleaning vinegar (25% vinegar) to neutralise any excess paint stripper. We have successfully used this recipe to fully paint strip our original Victorian doors, as well as cast iron radiators.
As things progressed at a tremendous pace in the summer months - with walls and floors transforming our home week by week, we confidently invited Cal’s family to come spend Christmas in Dunoon. Surely we would have a kitchen and heating system in by then?! What could go wrong?
We knew we didn’t have time to install a boiler for our central heating system at such short notice, but we had always had plans for a wood burning stove in our living room - so why not just pop it in before Christmas? It turns out, trying to get the wood burner of your dreams, just as the weather has turned cold, and weeks before Christmas…is a big ask. I went online, and after some research, found an efficient stove that would fit the style and size of our space - the problem was, the lead time on the stove was 6 weeks. Our dreams of a warm Christmas around a fire, surrounded by family and friends were fast dwindling, but determined, I called around to see what could be done. With no answers, and now only two weeks before Christmas, we were ready to call off Christmas in Dunoon and head down south to meet family in Bristol, when to our surprise, my desperate attempts at contacting companies were answered by Stovax (PR Product). They could get us our dream wood stove before Christmas! I actually jumped for joy when we heard the good news. It was a Christmas miracle!
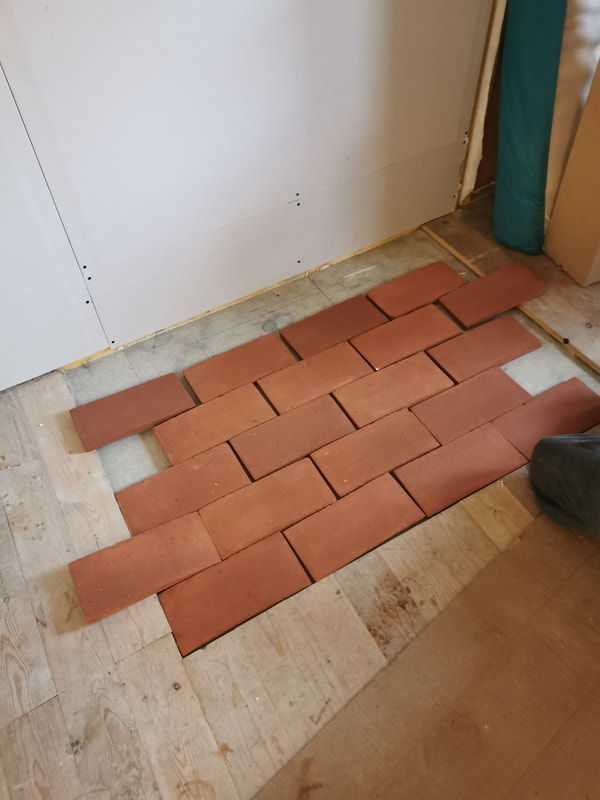
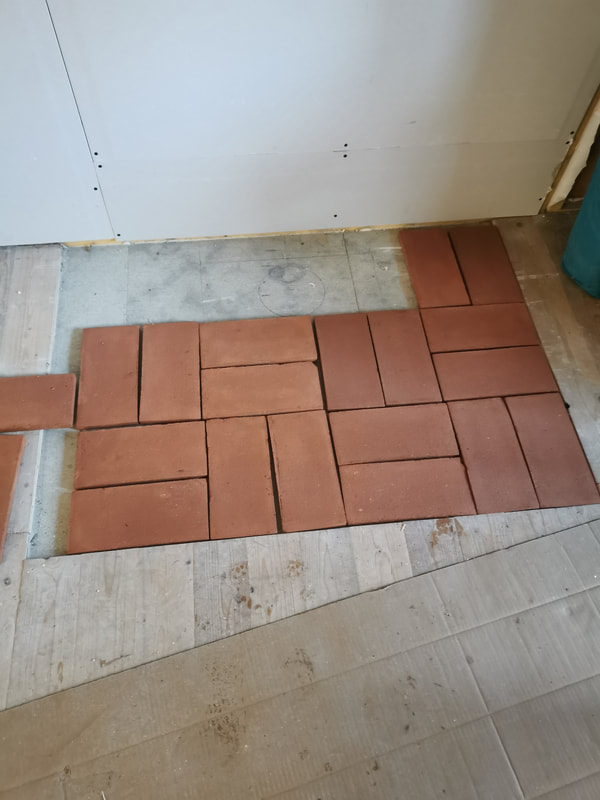
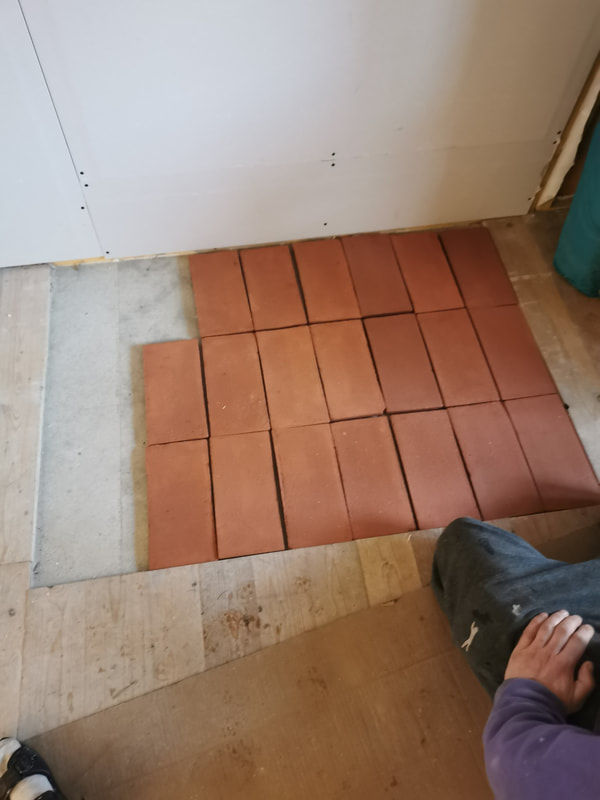
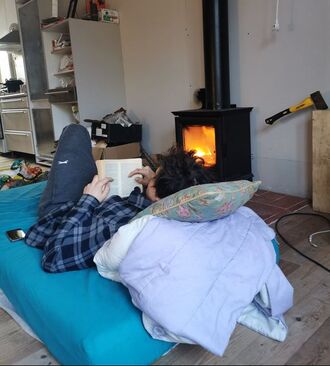
We got to tiling the hearth, in preparation for our stove. UK regulations state that a hearth must be made of a 125mm non-combustible material, unless otherwise specified by the manufacturer. Thankfully, our Stovax Sheraton 5 only specifies a 12mm thick decorative hearth - which meant we could use our beautiful Claybrook Studio Red Terracotta tiles, which were also going to be used in the entrance hall, to create the tiled area. After installing the hearth, we worked on building out a temporary kitchen in our apartment while we waited for our flue and stove to arrive. From here, things did not continue to go smoothly. I had already ordered a twin walled flue for our wood stove, but after some measurements, we decided we needed a 15 degree offset, so that the twinwall flue was far enough away from combustible surfaces to meet regulations. The original website I ordered the flue from did not supply offsets, so we went to a different company for this part. On the phone with this new supplier, a representative explained to me that flues are not made to be universal - every brand has their own way of connecting the pipes, so I needed to make sure I was buying the correctly branded materials. I checked on the original website, where the title of the product stated the Brand name we had ordered and relayed this on to the new company who were helping with the missing piece. On the day of our planned install, Cal’s mom had arrived, and was quickly assured we would a wood burning stove lit by the end of the evening. We excitedly opened up packages (our stove was so beautiful!! AHH!!!) and as Cal started dry-fitting pieces of flue together, we quickly realised they did not fit. I sat in shock and disbelief - I was absolutely sure I had ordered the correct pieces! We called both companies, and soon found out the first supplier had recently swapped brands, but had not updated their website accordingly. With only 4 days before Christmas, and 2 days before Cal’s siblings and partners arrived, there was no way we could get the correct flue bits sent to us in time. We started calling around Glasgow suppliers, to see if we could drive into the city and pick up the missing piece. It turns out the flue brand we had chosen primarily sells its pieces online, and noone in the area kept it in stock. It was starting to look like we were not going to have a pleasant Christmas in Dunoon. We were finally resigned to the fact that we were going to have to buy a whole new flue system. It was a series of unfortunate events, but luckily, all the online companies were willing to make returns on the items we had bought, and we found a helpful company in Glasgow who was still open for business on the week of Christmas. 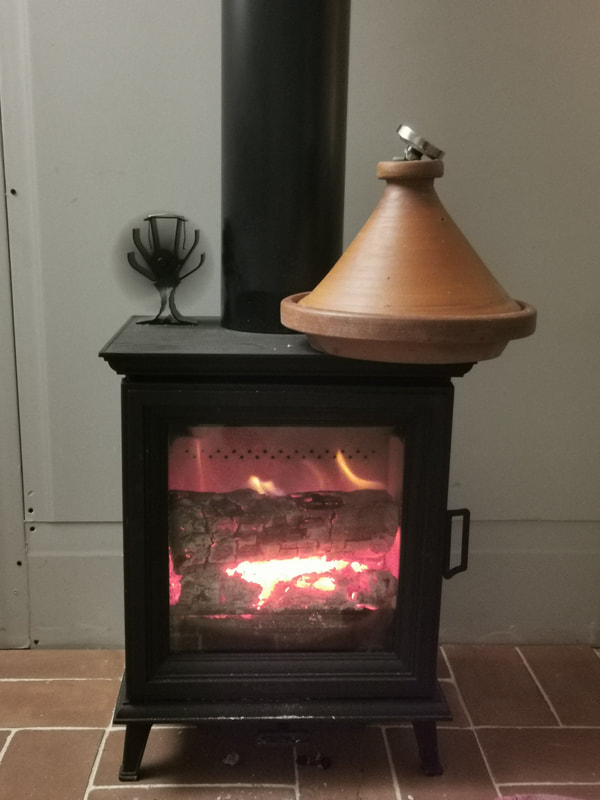 Warming a tagine on our new woodburning stove! The next day, we managed to get the wood burner installed, and as we lit the stove for the first time, our living room was transformed. What was a cold, unpleasant space to spend any amount of time in, quickly warmed to a toasty room temperature. It was the first time we could really enjoy being in any part of the house during the winter months. With plenty of wood cut down while clearing our property, and stacked by Cal and Jake two summers ago, we indulged in a lit fire every afternoon and evening during the Christmas holidays. I spent most of this time at the best spot in the house - the single mattress we sat on the floor in front of the burner. There is nothing more magical feeling than the cozy warmth that a wood burner engulfs you in on a cold winter night.
It was also a relief to see that our insulation was working - the room held its heat overnight, and the next day it was still noticeably warm before lighting a new fire. When buying a wood burning stove, consider the size of your room and insulation levels to figure out what size burner you will need. Our room is approximately 5*8m, and the wood burner will be a secondary heat source - although, with the rising price of gas, and the ability to source cheap local fire wood, we are considering using the burner as more of a primary heat source in the winter to come - to keep the living room warm and toasty, while keeping bedrooms at a cooler temperature. Here’s a rough sizing guide provided by Stovax for their burners: https://www.stovax.com/frequently-asked-questions/buyer-faqs/solid-fuel-buyer-faqs/size-stove-need/ The Sheraton 5 uses Stovax’s Cleanburn System for great efficiency, control and for a cleaner burn. Our wood burner has a beautiful, large glass pane incorporated in its door, which offers a beautiful glow to the space. The wood burns so cleanly, we rarely have to clean this glass. Here's the stove we chose: https://www.stovax.com/stove-fire/sheraton-wood-burning-multi-fuel-stoves/sheraton-5/ We have a few takeaway messages from this close call at Christmas. Summer is the perfect time to start looking for your dream wood burner! That way you have plenty of time bfore the weather cools for ordering and installation. Also…order all your flue equipment from the same supplier! Stovax truly saved Christmas in Dunoon, and their stove has made the rest of the winter months spent working on the house much more enjoyable. We can’t thank them enough for all their help. 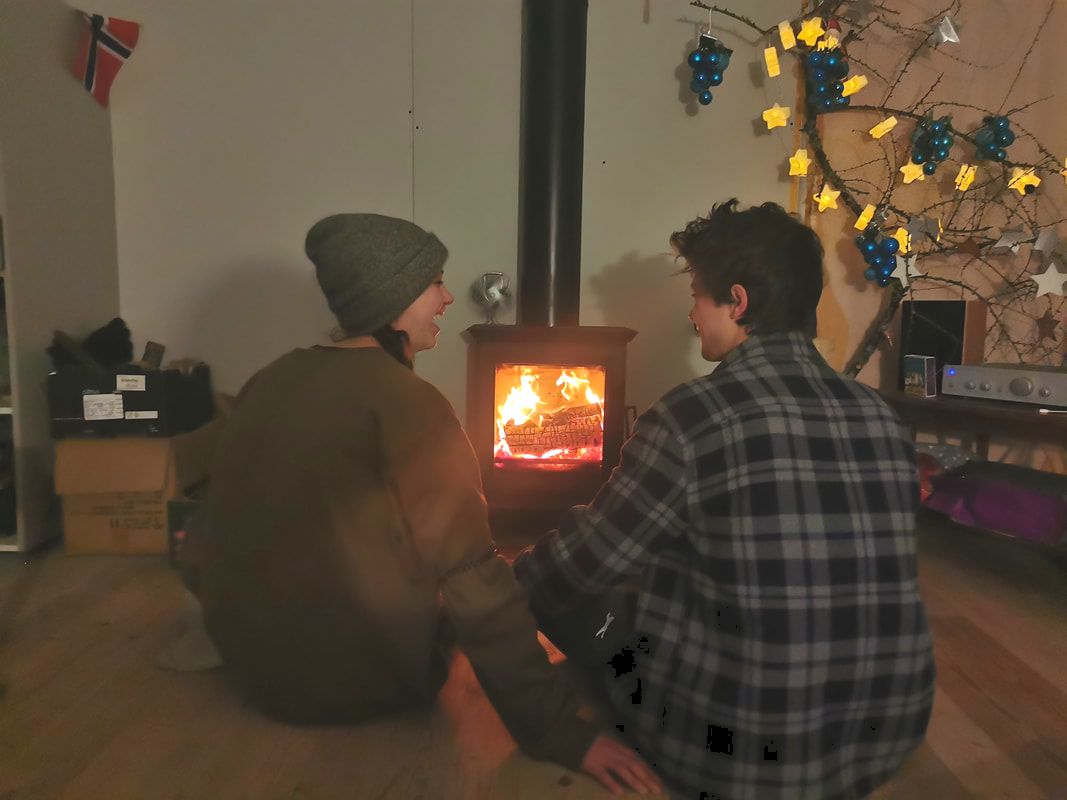 In the Spring of 2021, we drove down South to the Bristol area for a 3 week visit with family. In Autumn of the previous year, Cal had worked in Bristol on a contract with his dad, and had planned on putting the van through its MOT (yearly roadworthy test) while he was down South. After failing the MOT, Cal had to abandon the van down South.
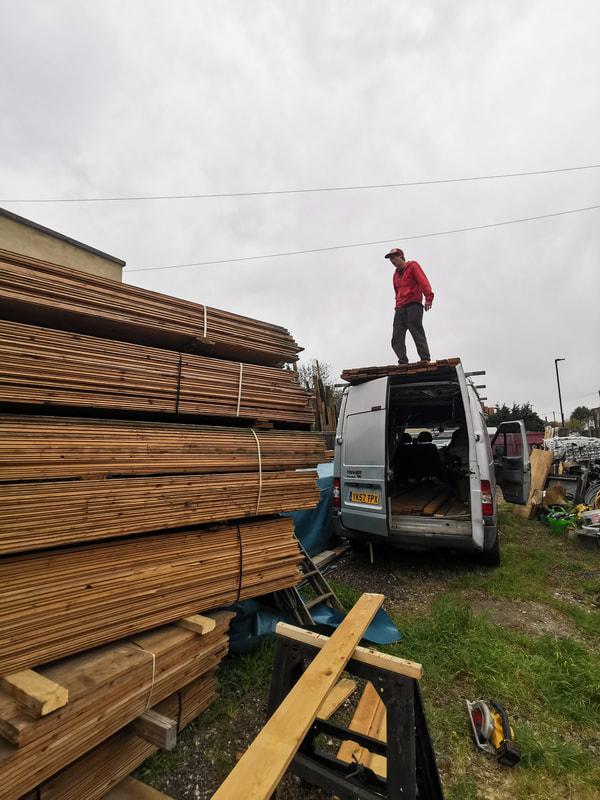
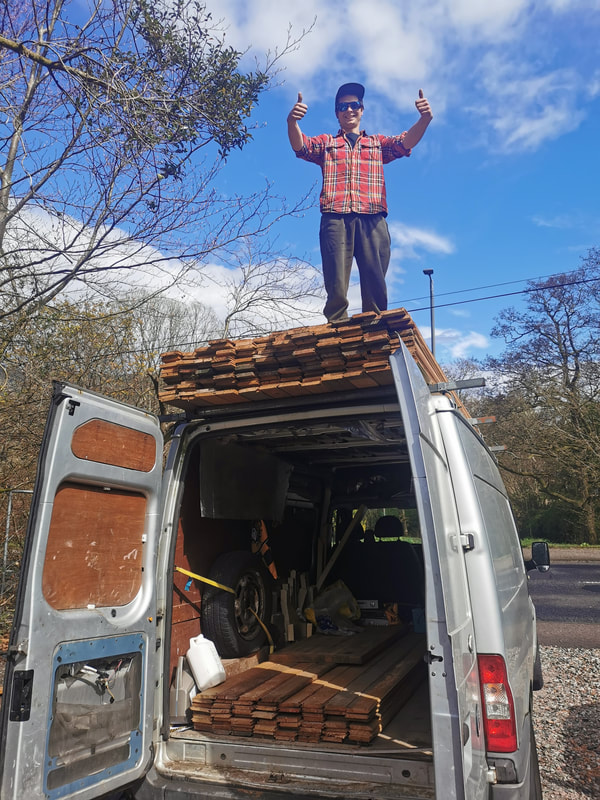
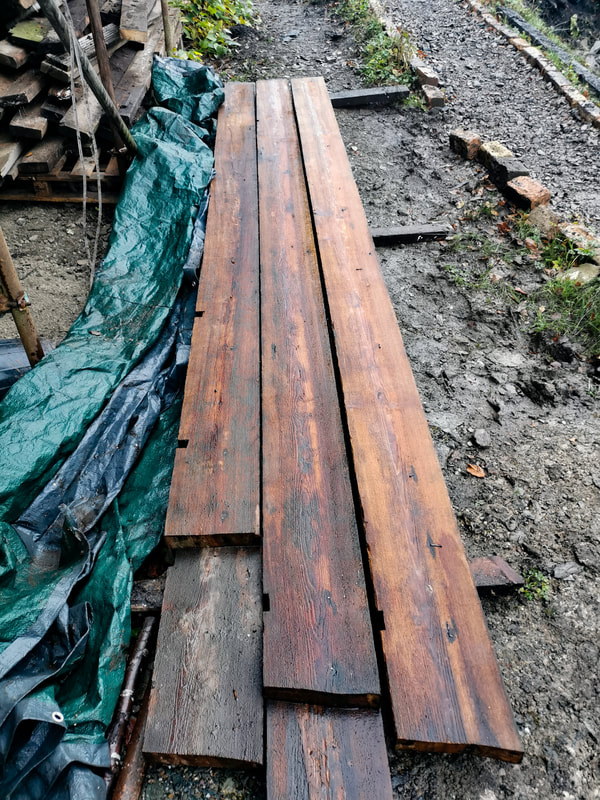
This was the deal of a lifetime! In recent years, reclaimed floorboards have become increasingly trendy - for good reason. They are much thicker than the floorboards being made these days, and the old pine was traditionally slow grown - a better quality than you would find today. They last a lifetime, and if your boards ever look tattered and worn, a quick sand and oil will bring them back to life. As people have started realising the true value of these boards, they have gone up in price - some reclaimed boards can go for more than a brand new floor. At a minimum, we had expected reclaimed boards - without any refurbishment - probably naily and in poor condition, to go for between £20-25/sqm. With a brand new MOT, we went straight to London to pick up our flooring. We found out these boards had previously been used as racking in an old carpet factory - which meant they were barely worn, and they only had one or two nails in either end - rather than every 600mm, as one would expect from old floorboards.
With heafty fines for overloading a vehicle, we decided it was worth making two trips. The extra tank of fuel was well worth it - as we were saving thousands on our flooring budget (note, this was well before the fuel crisis). We made the second trip fun, by stopping by Hull on our way home, to visit family.
I was surprised by how monumental this progress felt. For the first time in the years we had owned Jameswood, we could finally walk around upstairs without the fear of falling through the floor. The visual progress that the flooring contributed to was immense. Even with stud walls still open, the flooring made the house feel homely.
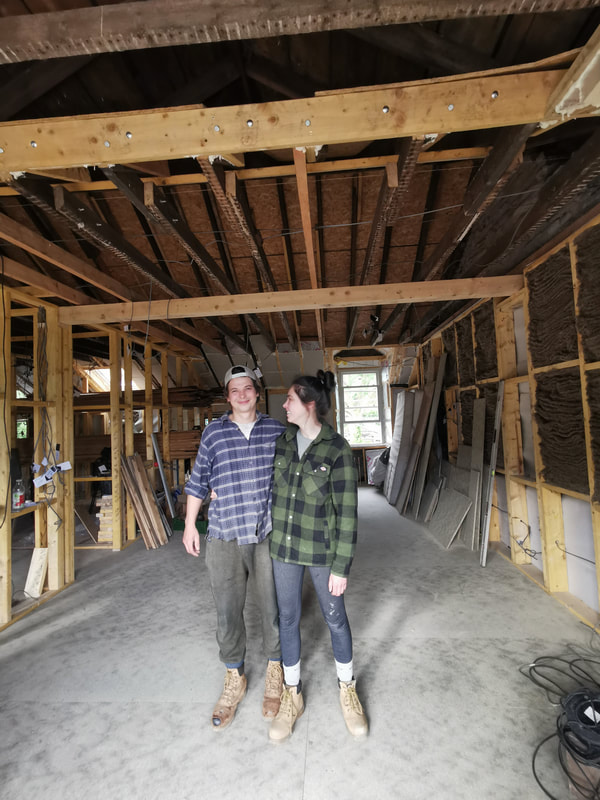
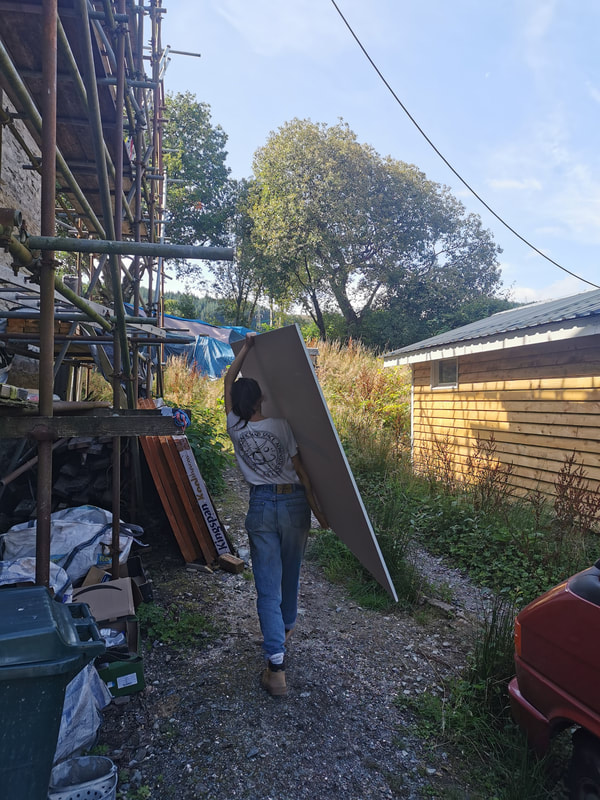
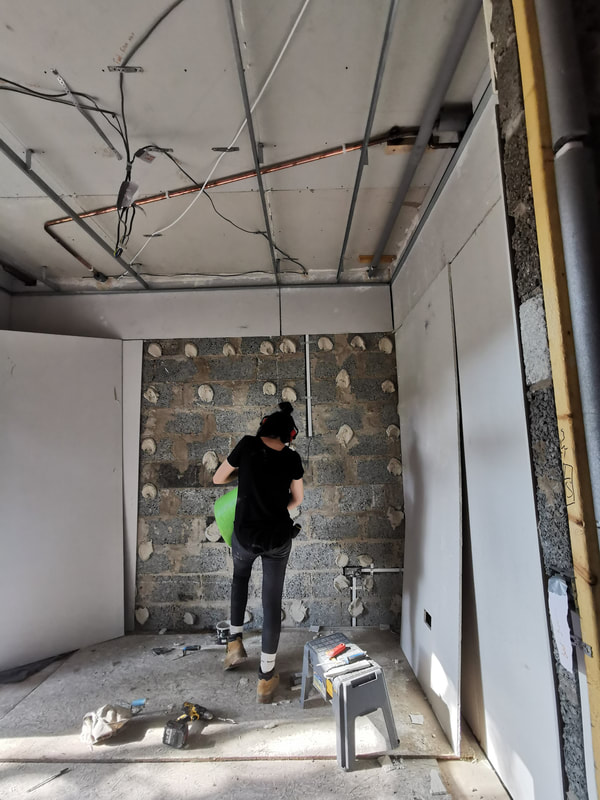
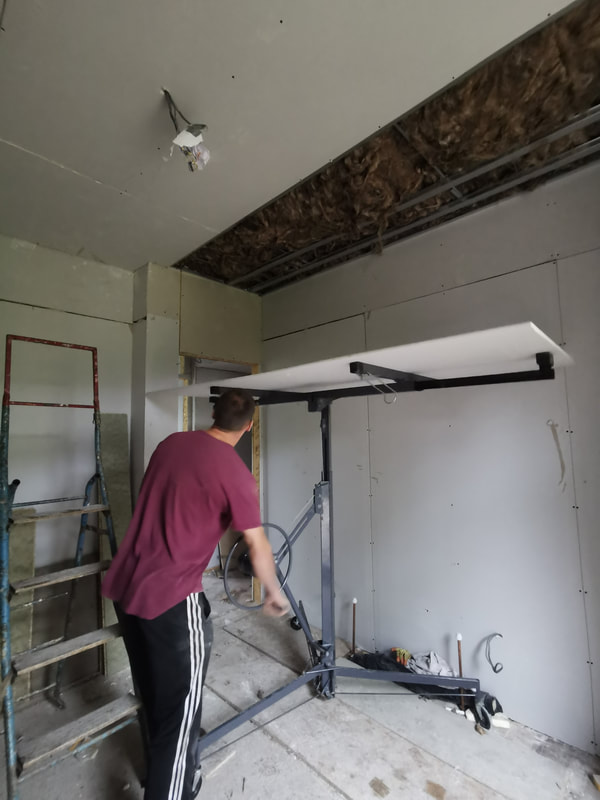
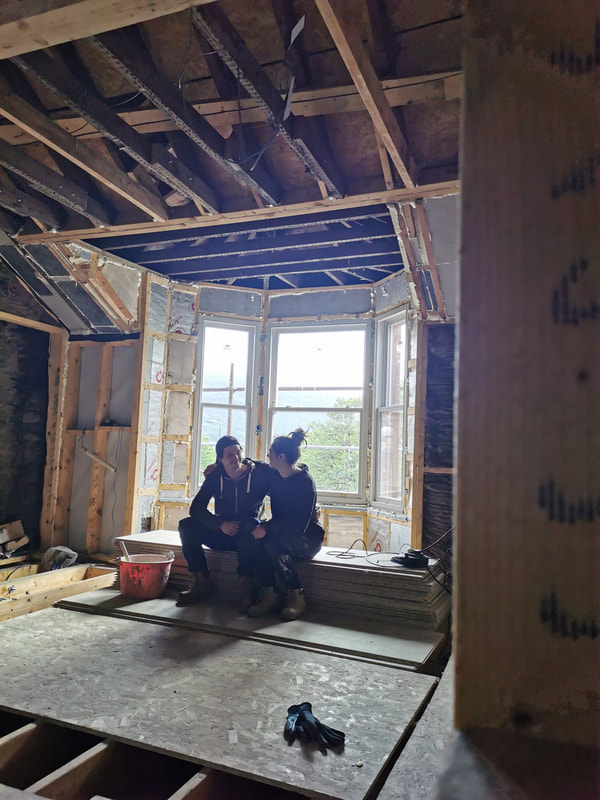
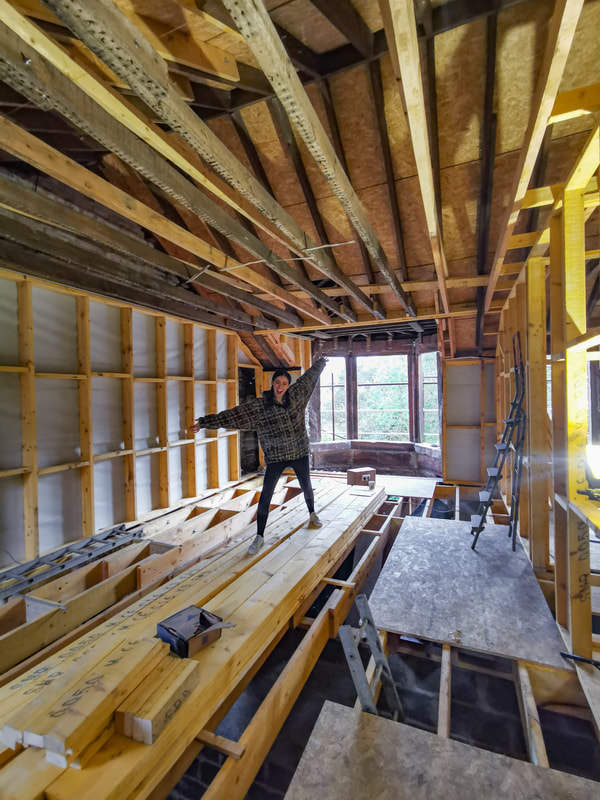
Once the flooring was all in, it was time to move on to plasterboarding. With Cal working on clients’ carpentry projects to bring in some much needed cashflow, I took on this task with the help of our workaway volunteers. I Youtubed how to install the boards, taught my team, and we got to work. This was dusty, heavy work, but many hands make light work, and in another 6 weeks, we had managed to plasterboard the house. A neighbour, who we had leant some scaffolding to, offered us a plasterboard lift, which helped immensely with the ceiling boards. By the end of the summer, I was able to lift a whole sheet of plasterboard by myself - something that I had struggled to do at the start of this project. With plasterboard in, the house was really starting to look like a finished space. There was lots left to do, but we were starting to see a light at the end of the tunnel.
It was a sereal moment in the project, where at the beginning of the summer we didn’t have floors and stud walls stood skeleton-like in each apartment - we now had finished floors and rooms forming in our home.
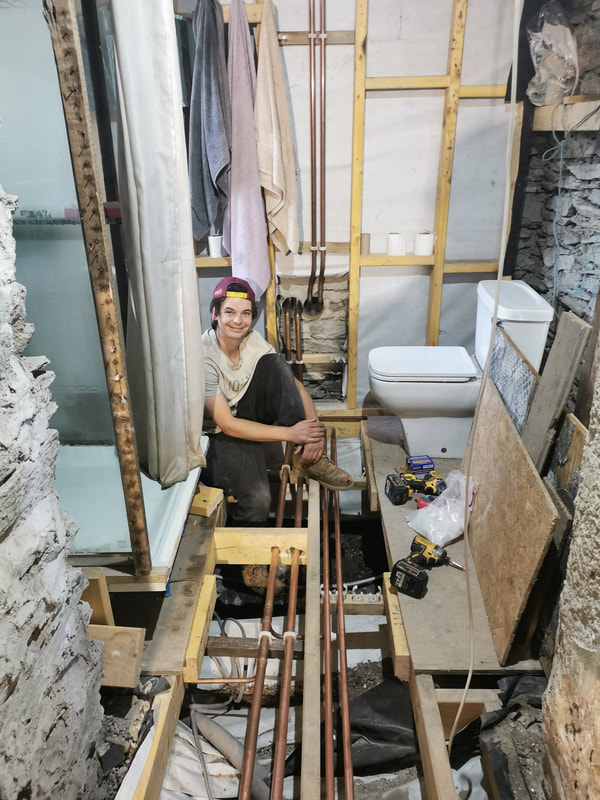
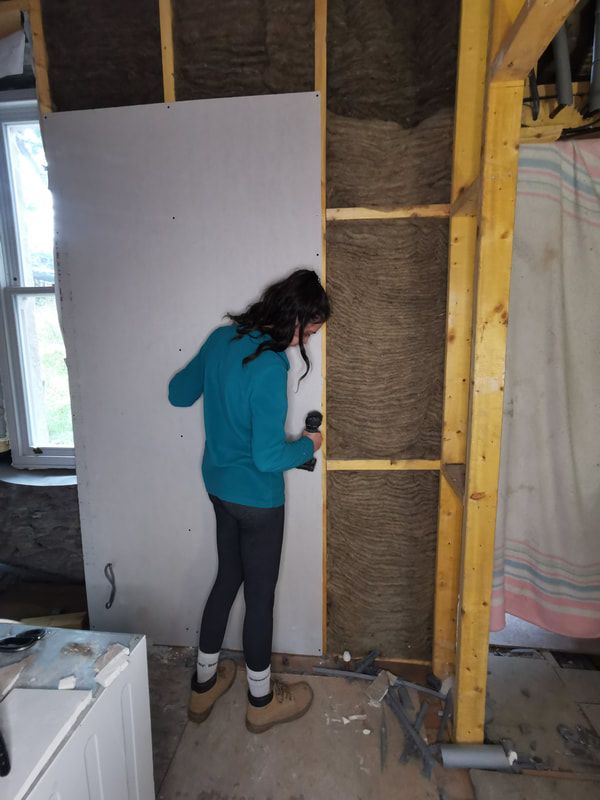
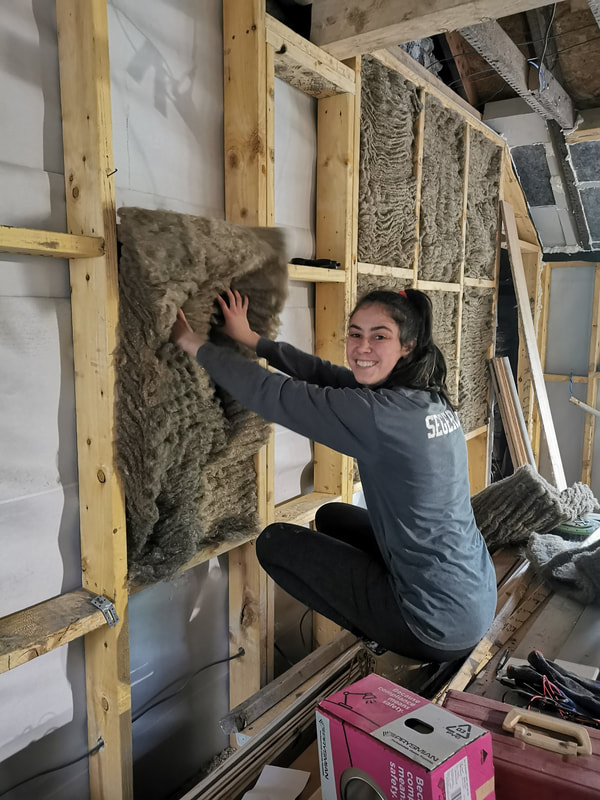
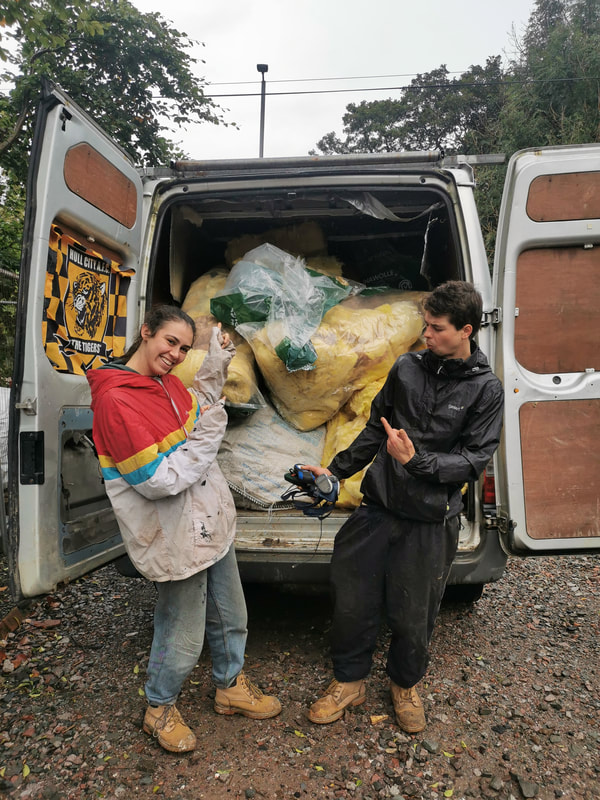
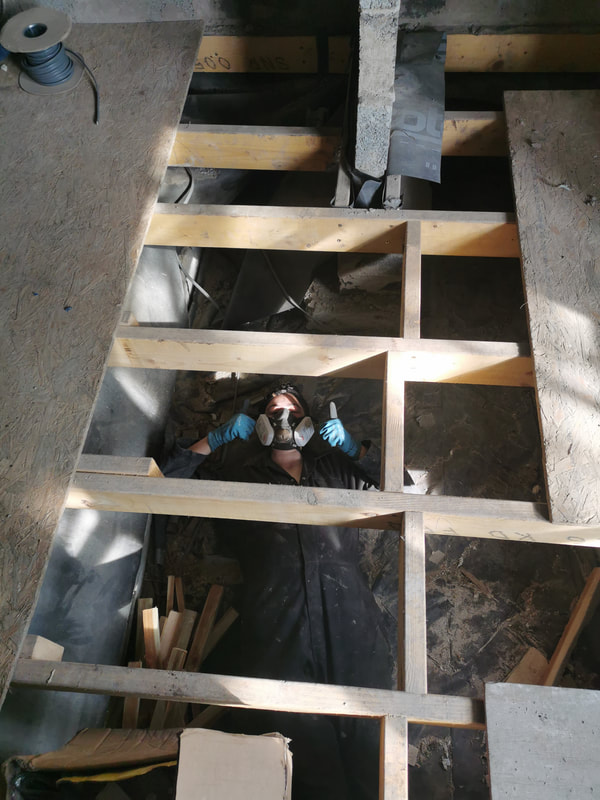
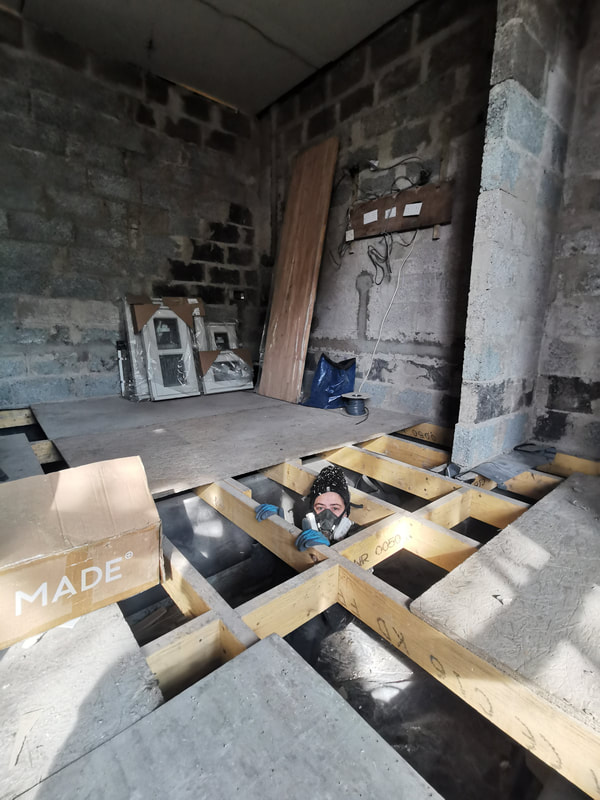
We were finally wind and water tight, just in time for the new year. After our windows were in, Cal and I both took on winter jobs - doing some tree planting and seasonal picking to rebuild funds for the project. As winter became spring, we decided to divide an conquer - a strategy we would use for the whole summer, only again working on projects together in late Autumn. Cal had two main goals during this time. He was in charge of first-fix plumbing and electrics, as well as bringing in more income for the project. While he got underway with these tasks, it would be my job to insulate the house, lay flooring throughout, and plasterboard our walls, with the help of our incredible volunteers. 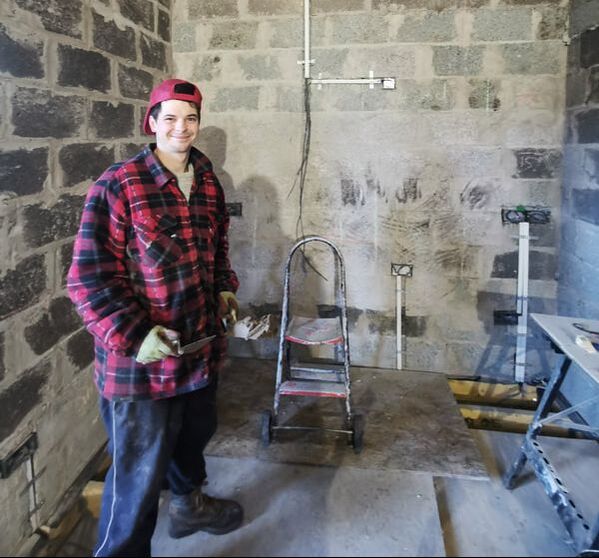 Cal beginning his first-fix wiring journey. Insulating Our Home As Cal got on with first fix plumbing and electrics, I made it my mission to insulate our home. This part of our project was key to our sustainable renovation’s success. Jameswood is an old Victorian home, and like 91% of the UK’s traditionally built, solid-walled homes - she has never had wall insulation (1) - and like 32% of all British homes, the building had such a small layer of loft insulation included, that by British standards, the home was considered to be uninsulated (1). For our home to be efficient, and ready for life in the 21st century, we were going to wrap the building in a continuous layer of insulation - under the floors, in the walls and of course, in the ceilings. But there were some factors we had to consider when choosing how to insulate this property. Traditionally built homes are made of solid stone walls, with an air gap between this, and the inner layer of lathe and plaster that encloses the living space. The stone walls are designed to get damp in rainy conditions, and with the help of ventilation blocks in the crawl space, air flow gaps in the eaves and the air gap between the outer and inner layer of the walls, the walls will breath and dry out in dry weather conditions. It’s essential that this process is unimpeded by the insulation we put in our home (2).
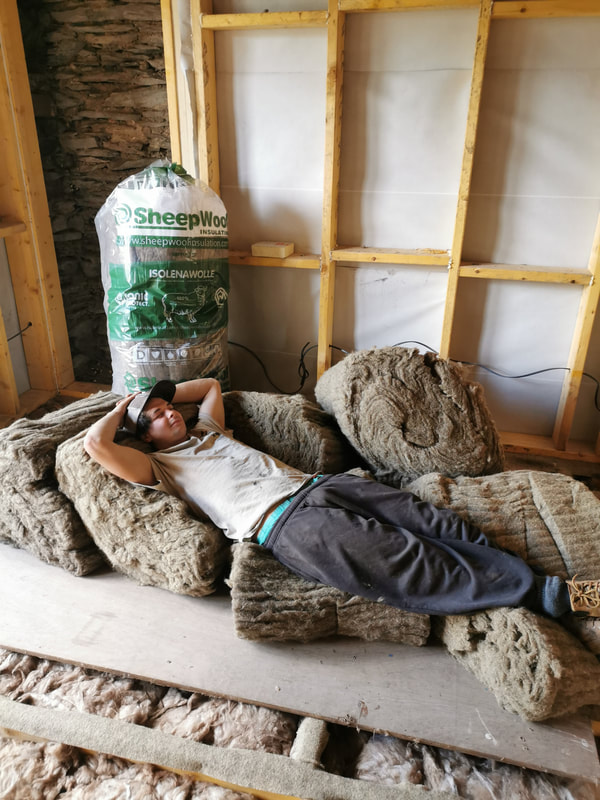
Unfortunately, SheepWool insulation is expensive. In terms of costs, it is comparable to Kingspan - which has also become an expensive way of insulating a home, and is far more expensive that Glass wool insulation. We decided to be strategic about its use in our home, because we just didn’t have the cash to insulate our entire home in the material.
In the roof space and under the floor, we used glasswool insulation, some of which was salvaged from a friends renovation project. We used Kingspan sparingly - it was used around window and door reveals, where room was tight, and we needed a highly efficient, thin insulating material - for these, we managed to get second-hand boards for many of the spaces, and “seconds” - rejected boards with small defects, for the rest.
With an insulation plan in place, I got to insulating! Working with the Sheep Wool insulation was a dream! It has a sweet grass smell to it, it was easy to cut and install, and it was safe to work with - no PPE required! Unfortunately, the same couldn’t be said of our glass wool and Kingspan insulation. They were itchy and dusty to work with (always wear a proper face mask when working with this material!) and worming my way under the floor, and crawling around in the attic wasn’t the most fun job I’ve had to do in our renovation - but we quickly saw progress, and in no time at all, we had an insulated home! An exciting milestone for our project!
With an energy crisis AND and climate crisis in our midst, it’s increasingly important that we insulate our homes.
Putting wall insulation into a Victorian can be a bit tricky, and can require taking plaster down, reframing walls, and replastering large spaces. It’s not a practical solutions for everyone to tackle. However, there are some easy places to make your home more effiicient. Check your loft - it should have about 300mm of insulation. If it doesn’t, topping up your insulation is a very quick, easy and inexpensive way of increasing the energy efficiency of your home. You could make savings that cover the cost of this upgrade in as little as a year (5)! If you’re taking up flooring while doing renovations, consider putting underfloor insulation in as well. This job could save up to 10-20% extra on your energy bills (6). Make sure your insulation creates a continuous envelope, with no gaps. A gap in your insulation can dramatically decrease its energy efficiency - it’s like putting on a jacket in the winter, but refusing to zip it up - you’ll get cold! Check out your local government’s website for energy improvement grants. Right now, the Scottish government will cover the costs of putting insulation in your home! If you don’t own your home, make your landlord aware of these grants and ask that they make these important energy improvements. 1. https://assets.publishing.service.gov.uk/government/uploads/system/uploads/attachment_data/file/970064/Detailed_Release_-_HEE_stats_18_Mar_2021_FINAL.pdf 2. https://www.thepebbletrust.org/sustainablerenovation.asp 3.https://www.swinter.com/party-walls/choosing-insulation-for-carbon-value-why-more-is-not-always-better-part-1/ 4. https://www.sheepwoolinsulation.com/ 5. https://friendsoftheearth.uk/climate/saving-energy-home-heating-and-insulation 6. https://www.edfenergy.com/heating/advice/complete-guide-floor-insulation I last posted on this blog over a year ago - and since then, I’ve had a number of concerned emails from readers, asking if we’re okay, and if the house is okay? The silence has been a sign of good things! The fact of the matter is… blog posts take a LONG time to write, and so does building a house! This blog has taken a seat on the backburner for the sake of progress on Jameswood. Now, I am taking a few weeks away from the house to visit family and friends in Canada, for the first time since the start of the pandemic. With a bit of extra time while I'm here, I thought I would sit down and update you on our house! So what have we managed to get done over the past year? Let's go back to December 2020, and fill you in! December 2020 2020 brought with it one of the most exciting and memorable Christmas’ I’ve experienced. We were finally completing the momentous step of getting Jameswood wind and water tight - with the addition of our beautiful new windows!!! This was a HUGE deal for us. They could easily cost more than we initially paid for one of our apartments, and they were likely to completely drain funds for the project. Even with these facts looming over us, we wanted to make a good choice for our home.We didn’t want the cheapest windows we could find - we wanted something that would add value to our home, help bring the original character back to our Victorian property, and importantly, choose windows that would last - so that we didn’t have to make this very large purchase again any time soon. It was for these reasons that we decided it was important for us that we put timber framed windows into our home. Unlike UPVC, which have a life expectancy of between 15 - 30 years, timber framed windows can last a lifetime, if taken care of properly. Though most of Jameswood’s windows had been broken by vandals, and damaged beyond repair, we actually still had three windows left, that were original to our home. With a good sand and paint, these remaining three 120-year old windows have become a beautiful feature on our new shed - and a testament to why we chose timber frames for our home. 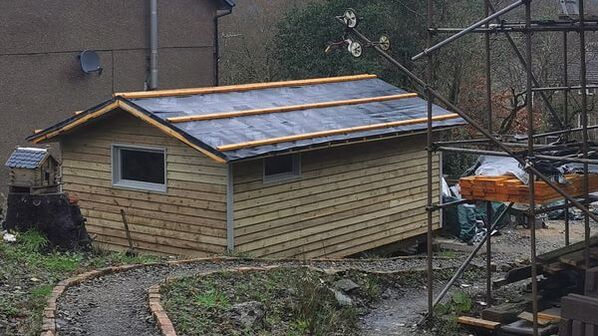 Jameswoods original timber windows, reused for our brand new shed (built shortly after getting our windows in, in January 2021) The key to making timber windows last is maintenance. Everyone seems to be afraid of this word these days. UPVC, as well as numerous other parts of our home, are marketed as maintenance-free. But let’s rephrase that, and say it as it is: they’re unmaintainable. They can’t be fixed. When they get discoloured and brittle from the sun… that’s that. If a piece of the frame breaks, you have to buy a brand new window. And the old one ends up in landfill. Timber windows, in contrast, will last a lifetime. If a section of window does get damaged, you can replace a piece of the frame, instead of the whole window. As long as the windows protective paint coating is maintained, the window should stay in good working order. We decided we would much rather paint our windows with a high quality coating every ten years, instead of replace them every 15-30. Once we had re-framed our perspective, the additional cost of timber windows felt a lot less daunting. After lots of careful research, we finally chose a company, style, and completed the very daunting task of putting down a deposit and ordering our windows.
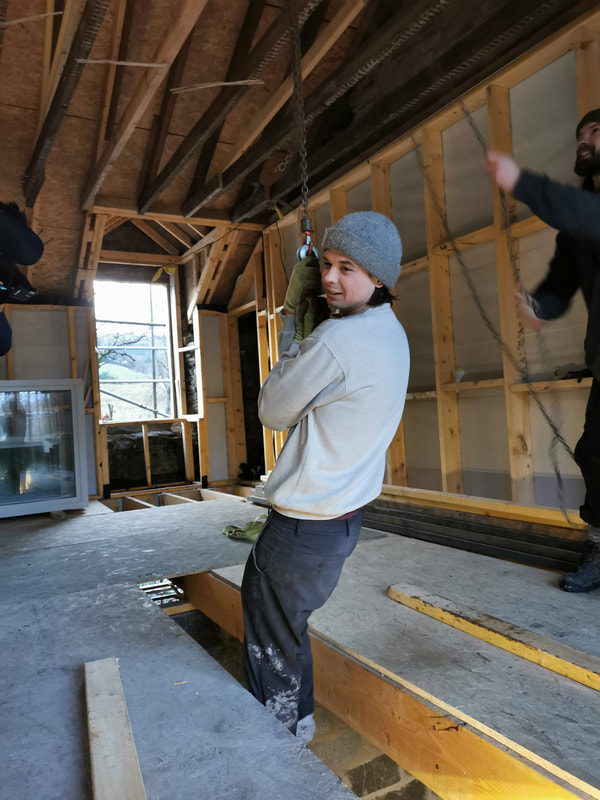
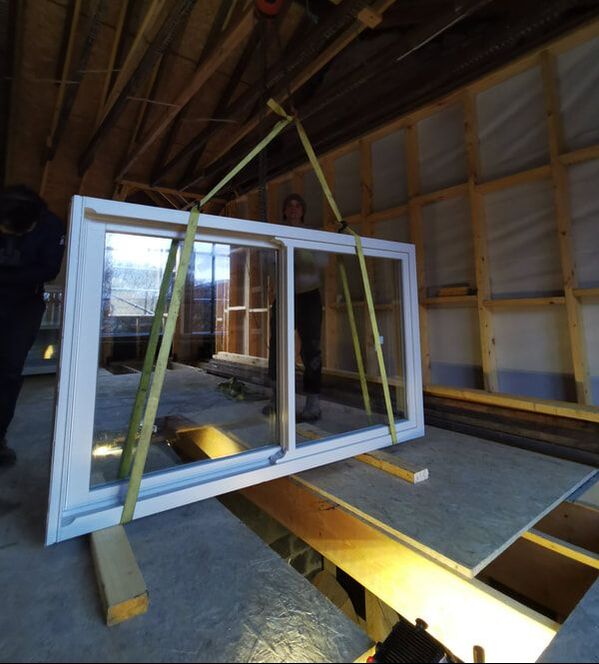
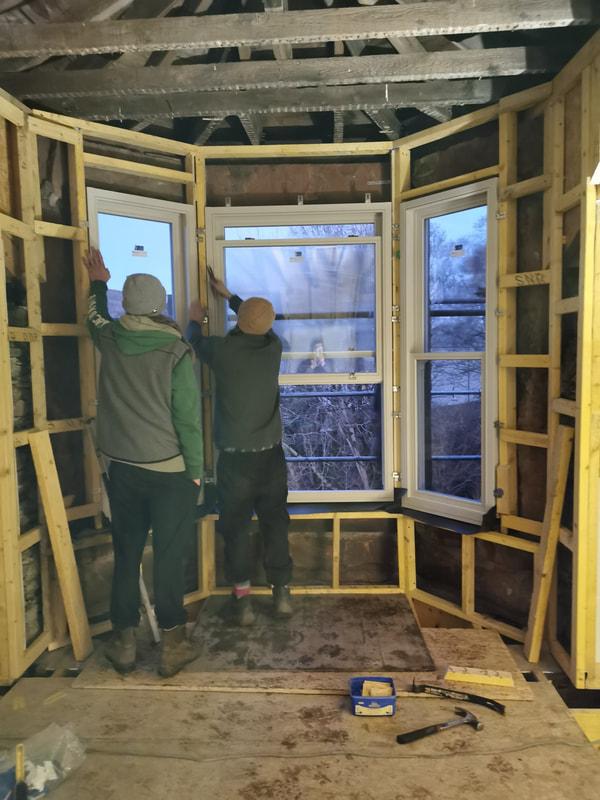
Days before Christmas, with our bank account drained, but our spirits high, we got the best Christmas gift we could ever imagine. We received an exciting delivery of brand new, beautifully built and finished timber windows. 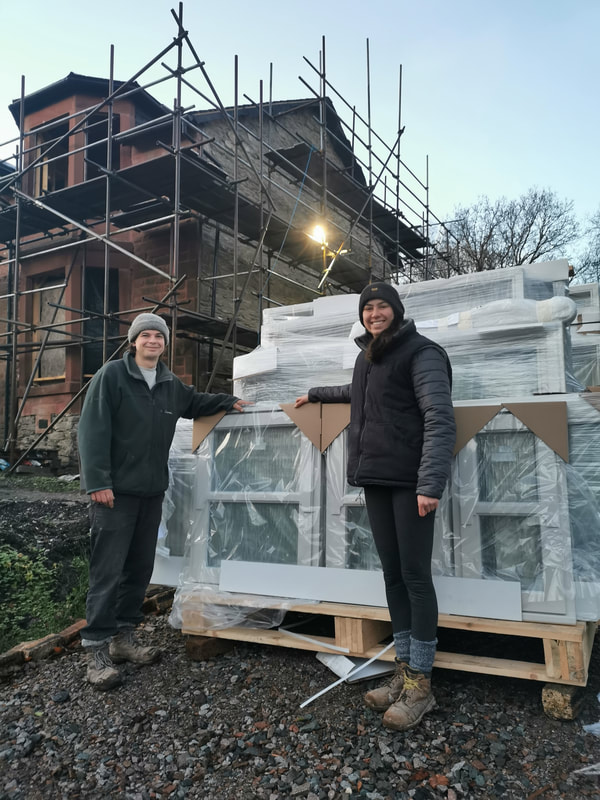 Grinning ear to ear, we were so happy to receive delivery of our windows days before Christmas. With extreme care, we started unpacking and moving our delivery into the house. We were so thankful to have great friends help with this task - with bay window openings that are taller than us, some of our timber windows were extremely heavy. At this time, we didn't have any flooring upstairs, just temporary boards laid over joists. Even more problematic was the fact that there was no proper stairway to access this upper floor. We had been getting up to this area via ladder. With no way of safely carrying these huge windows up a ladder, Cal set up a block and tackle from the roof rafters, and - inch by inch - we pulled our precious cargo up to the second floor.
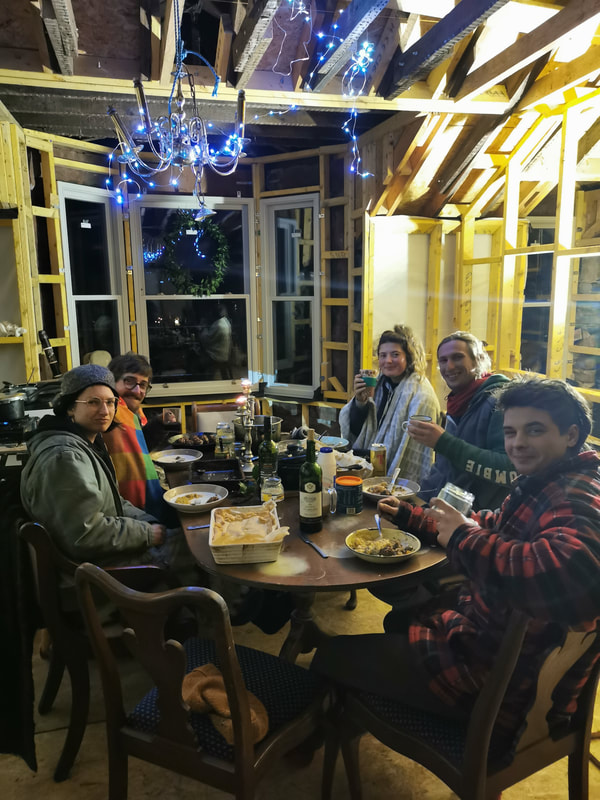
Over the next few days, with the help of our incredible friends, we closed out the windy and rainy December air, window by window. By Christmas, we had all the upstairs windows installed, and we were able to enjoy a... still cold, but wind-free Christmas with friends in our future living room!
As each window was installed, Jameswood started to come to life. She was looking more and more like a real-people house! I kept stopping and staring as we pulled into the driveway, or came home from a walk, and were greeted to a building that was really starting to look beautiful.
We couldn’t have been happier with the company we found to design and build our windows. Bereco makes high-quality timber framed windows from slow grown, sustainably forested timber. They offer free online design consultations, so that you can speak with an expert, and get the correct style window for your price point. We chose their traditional sash windows, though they also offer contemporary styles. They even matched the horn detail from our original windows, which was an exciting feature for us, that would help us restore the building to its original beauty and character. For transparency’s sake, we DID receive a discount on our windows, for sharing them with our audience on Instagram. But I can whole-heartedly recommend this brand. Their windows are such high-quality, stunning pieces. Their company is responsible to the environment and infinitely helpful. Their windows have truly been an investment that has added beauty and value to our home. We were finally wind and water tight, just in time for the new year, and Cal and I couldn't be happier.
You’ll need: (Click the item for a link to where I bought them) Self Adhesive Lead Strip – £10-25
Utility Knife (a sharp knife to cut lead strip) Soldering Iron – £8-15 Lead-Free Solder - £8 Soldering Flux - £5-10 Paint Brush – a couple quid
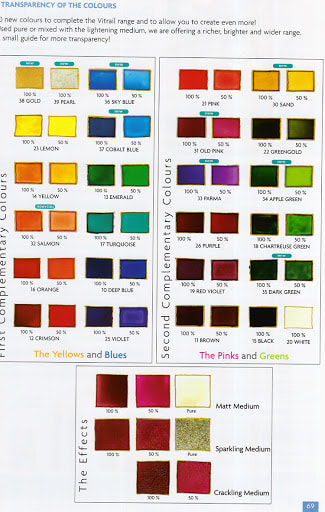
PEBEO Vitrail Glass Paint - £4.25 each
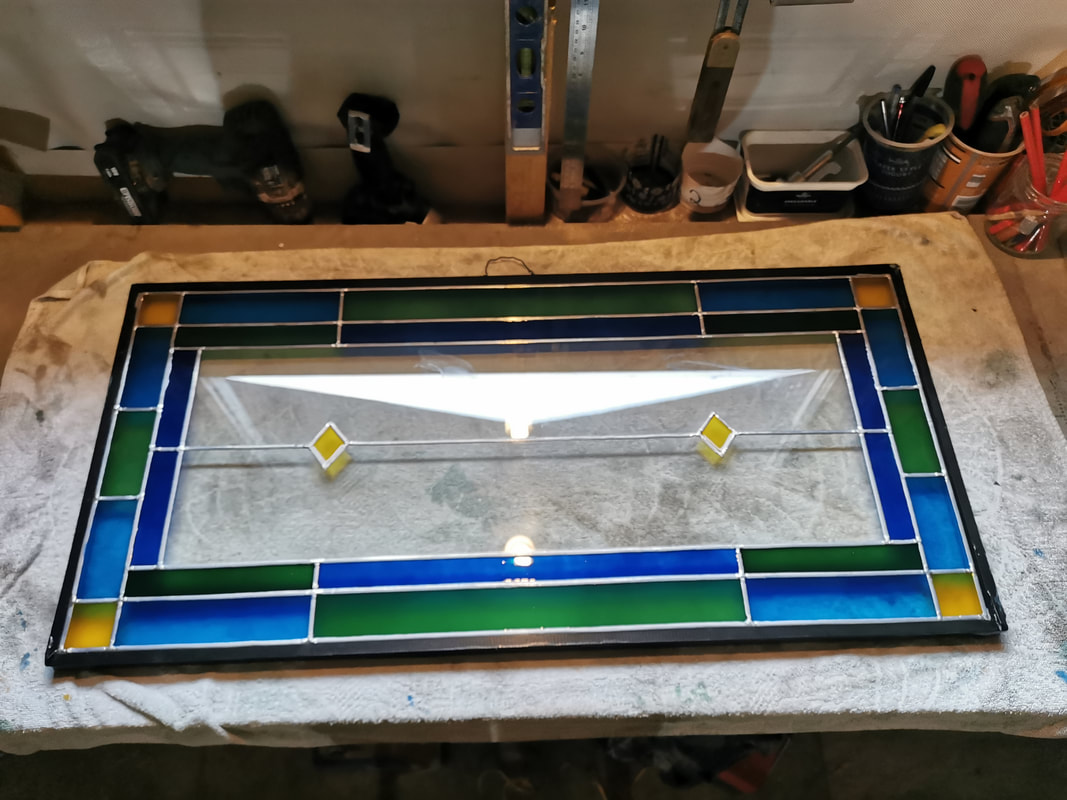
 .I used this Youtube video to make my transom window. Though I used a different technique for painting my glass. I used this painting technique. 1. Design Start by choosing a design! I used Instagram to find inspiration for my design, and then drew out a rough plan. You can also find inspiration on your favourite website, or Architecture in your city! 2. Apply Lead Stripping Clean your glass and start by applying your lead stripping. If you are trying to get a straight line, I would recommend placing a ruler alongside the lead strip while applying it to the glass. The lead strip appears not to be very sticky, until it is rubbed thoroughly with the applicator provided. 3. Soldering Once your lead is applied to the glass, apply a thin layer of flux to each of the joins. Make sure your soldering iron has reached full temperature before soldering. Heat up a small amount of lead free solder and quickly apply across the join. The lead has a lower melting point than the lead-free solder, so be careful not to hold the soldering iron on the lead for too long. My soldering iron almost hovers above the lead, only touching the solder itself. This is the trickiest part of the job, and I would recommend practicing on a test piece before soldering your glass painting project. 4. Painting Clean the glass one last time before painting. I used small artists paint brushes, and chose to use Vitrail paint in lemon, cobalt blue and chartreuse.
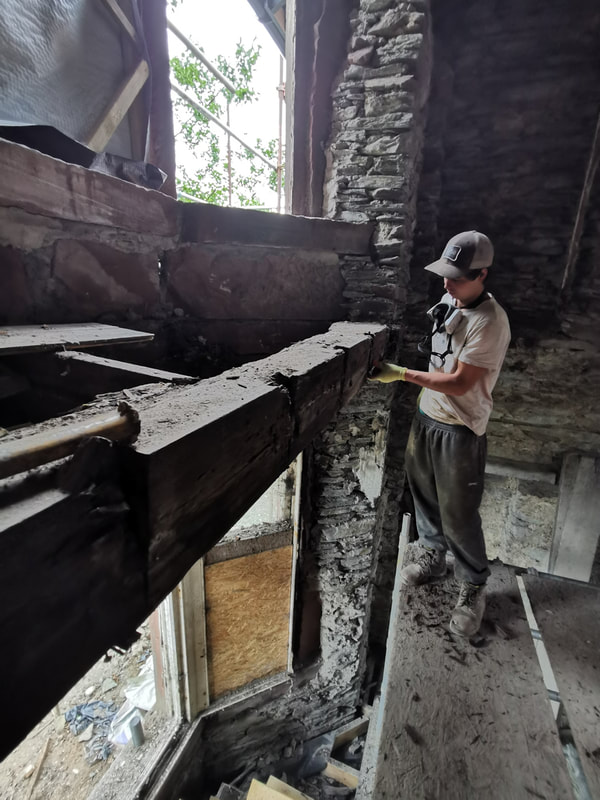
That’s all there is to it! I hope you enjoy getting creative and making beautiful pieces of glass artwork for your own home! DM us your finished work @whathavewedunoon! 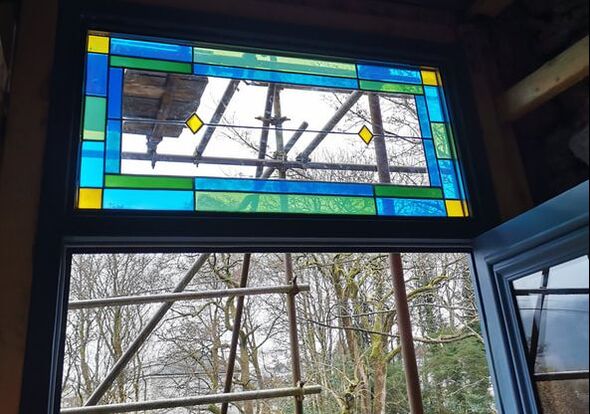 When we first arrived at Jameswood and slowly started to peel back her crumbling, waterlogged plaster walls, we uncovered a devastating amount of wood rot inside our home.  A dangerously rotten floor engulfed a chair left in our derelict home. We were careful to save as much timber as we could, but the majority of the original structure was unsalvageable. The lengths that could be kept still needed to be cut at the ends, and with such a small number of full length timbers left to reuse, we decided not to put them back into Jameswood. Almost all the timbers in the house had been affected by, or in close proximity to wet and dry rot. We didn’t want to run the risk of bringing these destructive fungi back into our home.
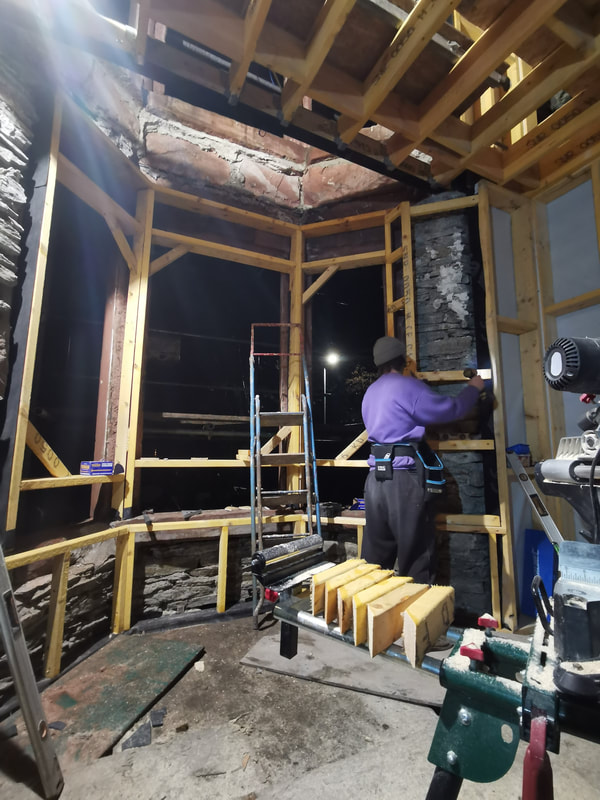
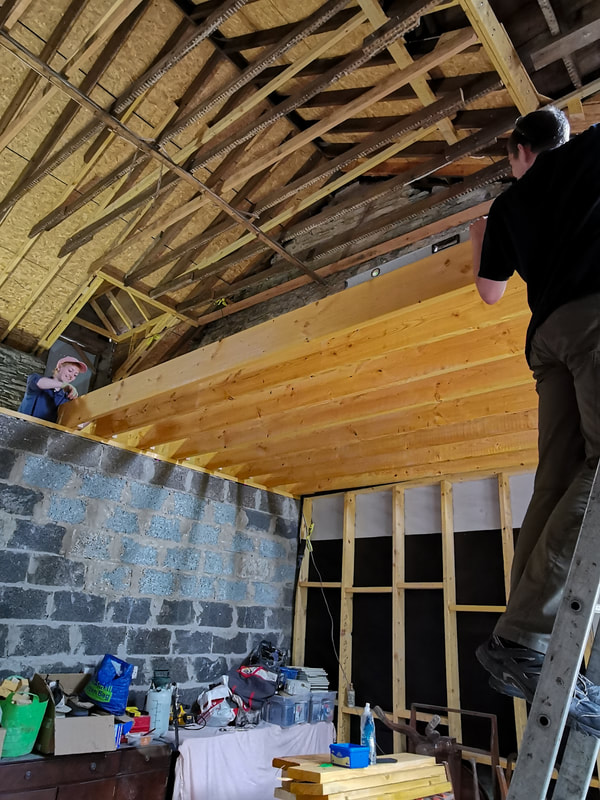
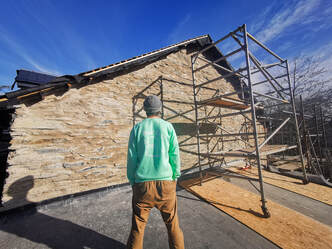
 An overwhelming pile of timber that was pulled out of our home. Later sorted into burn and salvage piles. With nearly the whole house cleared and back to its bare bones, the upper floor was the final element that needed to be removed from the building. Unfortunately, this is easier said than done. The upper floor is an important structural element in a two-storey stone building. The big, heavy floor joists are embedded in the front and back walls of the building, and help provide “lateral support”. Without this support, the external walls of the building run the risk of bellying outwards, or in extreme cases, collapsing. Thankfully, our structural engineer was quite certain that we could use our wrap-around scaffolding as a temporary brace for our home. Once we had braced the front and back walls, we embarked on the nerve-wracking task of carefully removing the 8m long timbers that hung 3m above our heads. 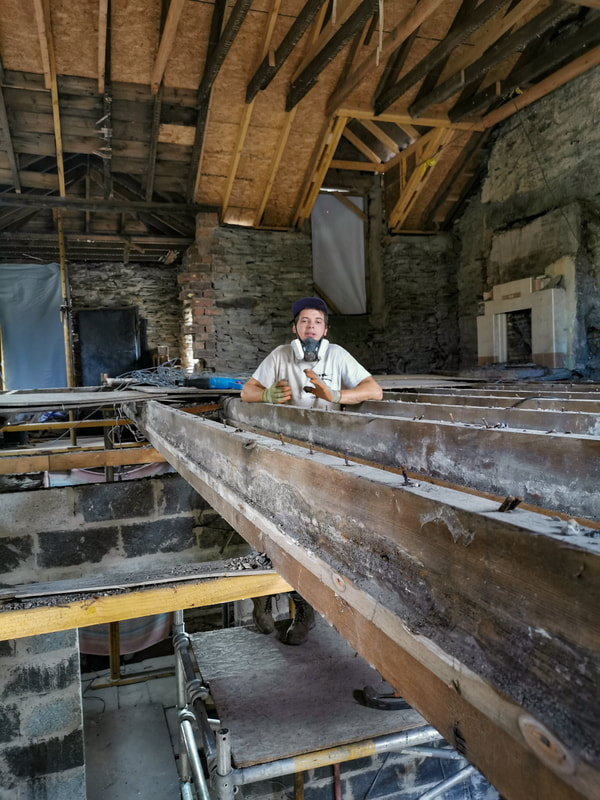 Cal briefing our rag-tag building team before we took down our first floor joist.
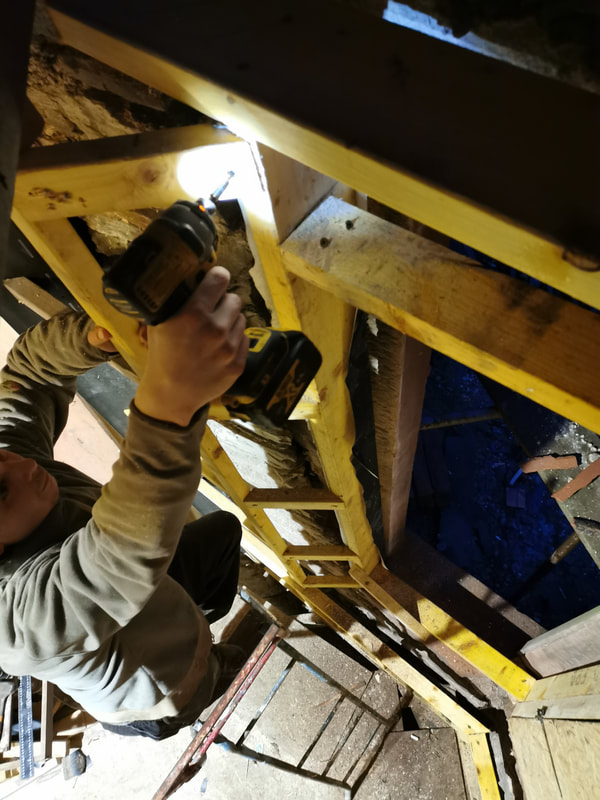
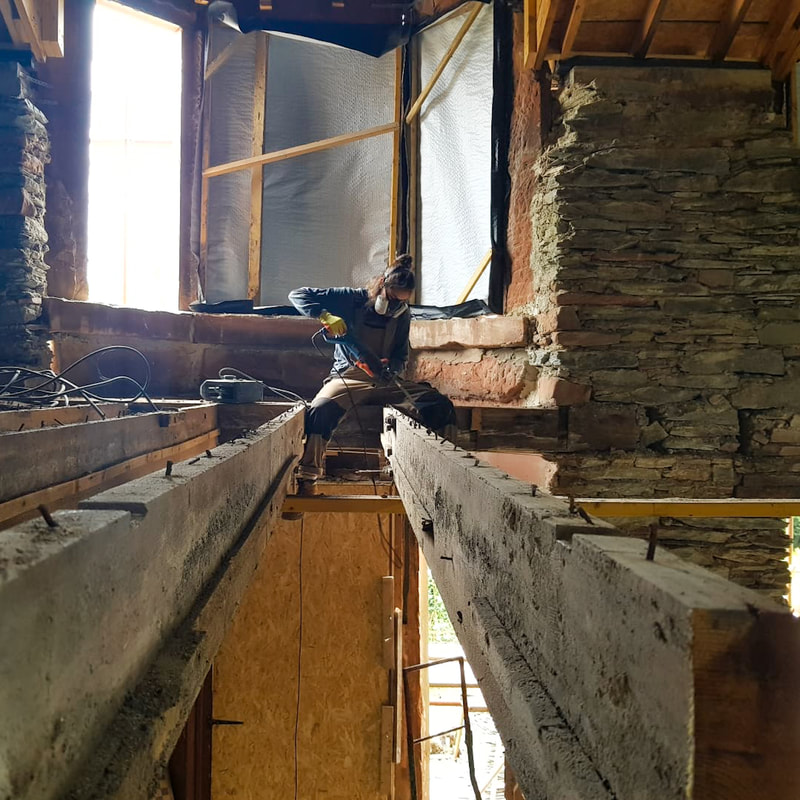
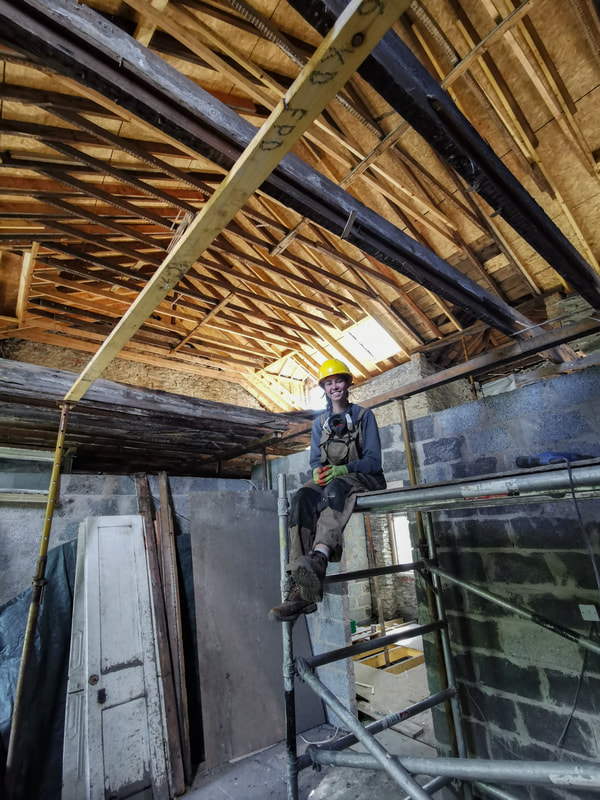 Very pleased with progress! It was fun to see the roof structure from down at ground level. With that out of the way, I really believed that we must be passed the most nerve wracking pieces of this restoration. Over the past year, we had managed to literally lift our roof off of Jameswood’s walls AND play a giant game of Jenga with our bay window. Surely we had to be on to normal, low-risk building work! Of course, I was wrong. Before we could frame the house, we also had some lintels and a bressummer beam to replace. For those of you who, like myself, had never heard of a lintel before the restoration of Jameswood, it’s a structural element that holds up the wall above a window or door opening. My question was, what’s supposed to hold up the wall when you take the lintel out, to put the new one in?
Thankfully, there’s a tool for that! Cal was able to replace all of the lintels with relative ease, and after seeing him do the first one, I was left with less worry as well. A bressummer beam is a structural element that spans across a bay window, and supports the upper floor of a house. With our upper floor removed, it seemed like a good time to replace our beam, which had severe rot at one end. The problem is, this beam is nearly half a meter thick, and went nearly a meter into the wall in either direction. The sheer size of the beam meant that it had become a huge component of our front wall, and we really didn’t know how we were going to safely get this thing down.
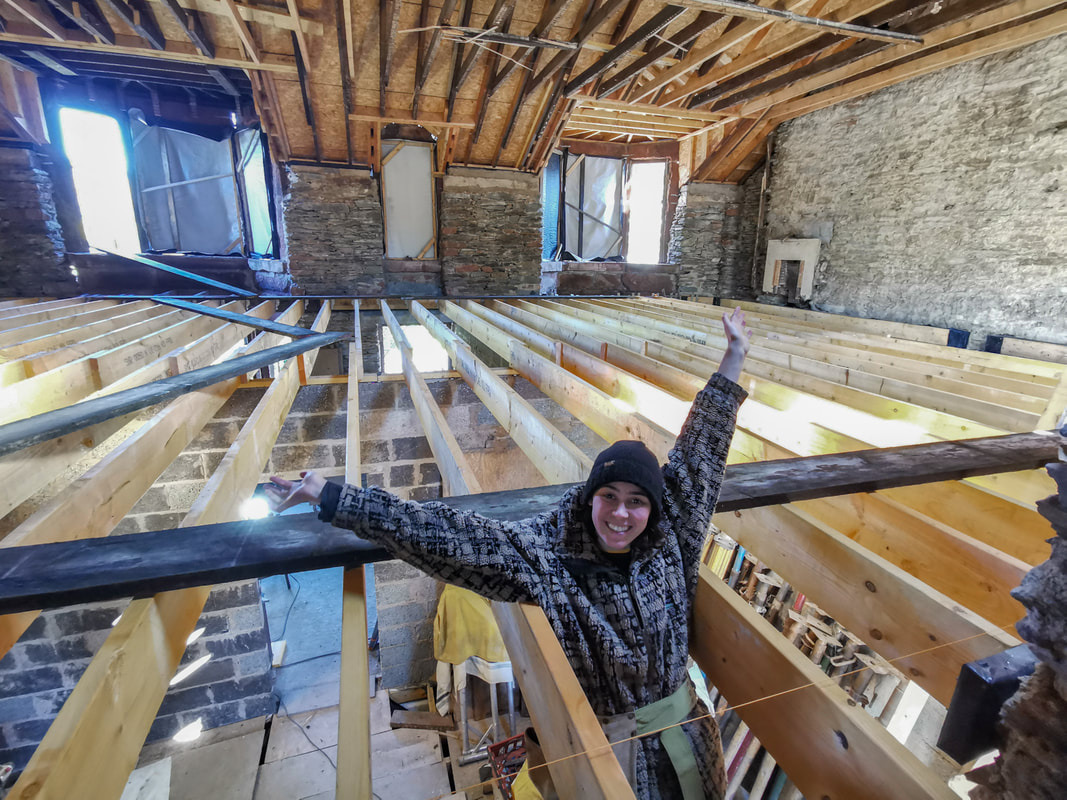
Cal decided there was no way we had enough man-power to lower the beam down as a whole. His solution: We would prop the walls at either end of the beam, and pull out the stones around it to separate the beam from the wall. We would put two props at the centre of the beam and then CHAINSAW the beam in half. The two halves would then balance on either props, until Cal and Gab pulled them out of the walls and lowered them to the floor. We didn’t know if the boys could lift even half a bressummer beam, and a balancing act that involved a chainsaw (at heights) sounded like a terrible idea. I strongly objected, but with no other idea to offer the group, Cal’s idea prevailed. 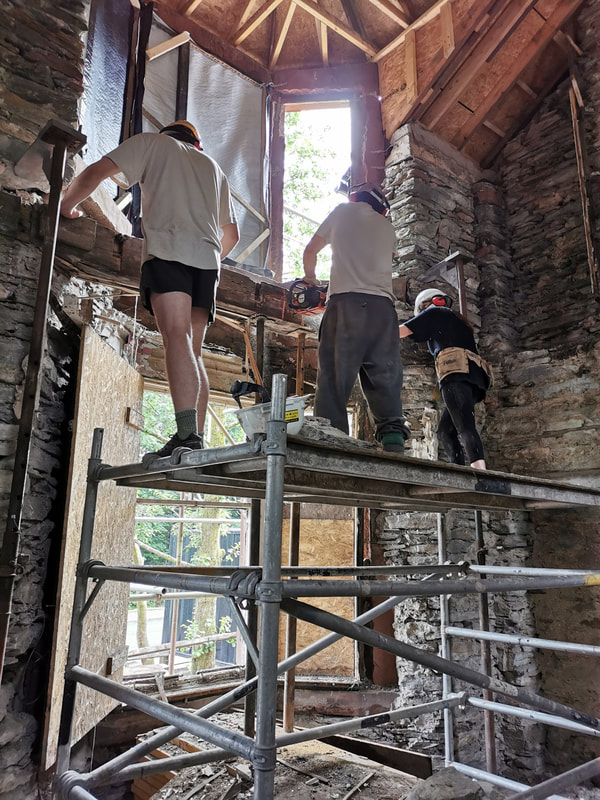 Cal's plan in action...just as described. I was behind the camera...very unwilling to involve myself in chainsawing at heights. Before the work commenced, I asked our friend Carrie, who was on hand to help, whether she thought the plan would work. She simply shrugged and said, “Today might be the day that this house finally comes crashing to the ground,” before calmly taking her place at the centre of the action, holding the prop in place for the bressummer beam to balance on. It all went surprisingly well. The beam balanced, the chainsaw only cut wood, the chunky pieces of timber were slowly lowered to the ground, and the surrounding wall stayed in its place! By the end of the day, a new steel beam spanned across the bay window, and we were all celebrating Jameswood’s (and our own) survival. 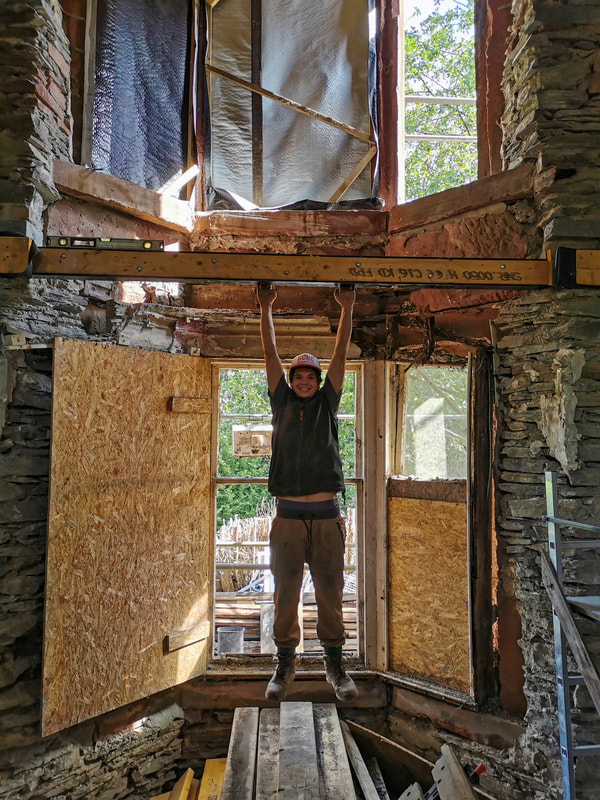 A very happy Cal testing out the new bressumer beam and showing off all his in-tact limbs. The visual progress that ensued was so satisfying. Cal, a framer by trade, was finally able to use his skills, and a new upper floor was thrown up in less than a day. Cal set a sheet of OSB down on the joists, and for the first time, I excitedly twirled on my 2.88 sqm dance-floor, in our future living room.
I pretended to sit in our bathtub and walk around our bed as we carefully mapped out the final dimensions of our home. After teaching me how to make a stud wall, we found a beautiful rhythm, cutting, *pop-popping and wrapping walls. In a matter of weeks, a real-life house – with rooms and hallways, appeared around us. *I have nicknamed our first fix nail gun the pop-pop and the second-fix gun the pip-pop
I joked that the place was starting to look too normal now, and as visitors were given a tour of the place, I found myself pulling out my phone to show them how messed up the room they were standing in used to be. It was a nice feeling. Restoring Jameswood was starting to feel like less of a pipe-dream and more of a reality, but as walls appear, new challenges face us. Clearing out and shoring up an old building is tough, time consuming work, but it doesn’t cost much money. In order to carry on with the project, we would have to get Jameswood wind and water-tight once and for all – which would require one of the largest investments in our restoration: windows! And our goal was to get them in before Christmas! Thank you for joining us as we restore Jameswood Villa! Sincerely, Claire (and Cal)
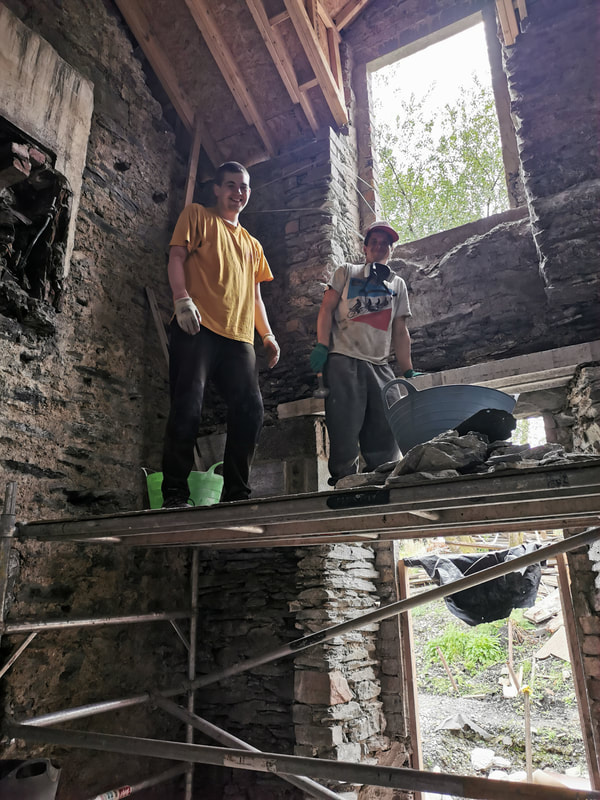
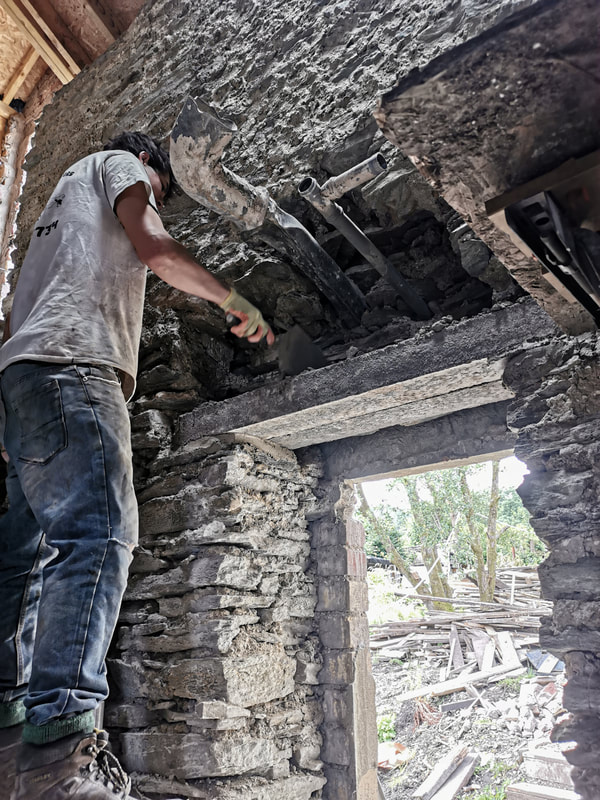
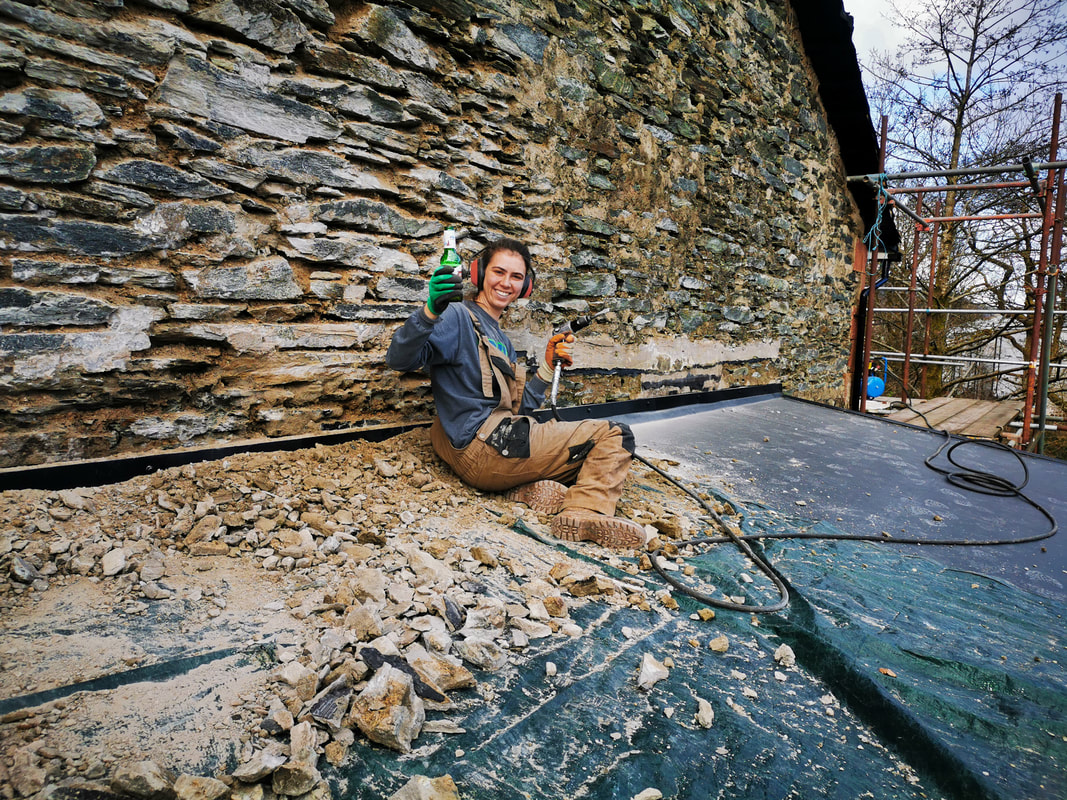
 Unfortunately for everyone, as the rain came to an end in mid-March, a different sort of storm was brewing. I have to say, we treat our social media and our blog as a bit of a respite from the ”C” word, but the fact of the matter is, COVID had changed all of our lives in a matter of weeks. So with everyone’s plans halted and changed so suddenly, all across the globe, how was life here at Jameswood? Cal and I couldn’t have found ourselves in a more privileged position when Covid arrived in the UK. We are living rent-free in a caravan that sits on our own land. Although there was no longer an income coming in from bartending, our fixed living costs were low. Neither of us were high-risk, and though we had family members who were, all our close family and friends have been able to stay at home for the duration of the lockdown. To top it all off, we have a beautiful set of hills to access straight from our backyard, which gives us an incredible escape during our government sanctioned exercise. I want to preface this post by saying that Cal and I are deeply grateful for all the frontline workers who have been keeping us safe during the pandemic. Thank you. Of course, with the shutting of major retailers, including our chosen building supplier, getting materials for the project was going to be a challenge. As rumours spread about impending restrictions, and when France declared their country was locking down, Cal and I sprung to action. We wouldn’t be able to make the large timber order needed to frame our house, but while others were stockpiling toilet paper, we were filling the van with as many building supplies as it could safely handle. The plan was to keep building during lockdown – what else would there be to do? Fortunately, we had incredible friends to keep us company and help us with the house during our lockdown. Kate and Jake had arrived to surprise Cal for his birthday just a day before a UK-wide lockdown was announced. They had lost their job in Switzerland due to the pandemic and were now living in their beautifully converted van. They decided it was best to stay put and became a part of our household for the duration of the shutdown.  This is what the back of Jameswood looked like at the beginning of lockdown... She was still very dreary looking! When Kate first saw the back of Jameswood, she described it as dingy and dank. She wasn’t wrong. The patchwork cement that had been applied to the building over the years was dark and dirty. What’s worse is cement could actually do damage to our traditionally built lime-based building! Historic Environment Scotland advises not to use cement on lime-mortar buildings because it can trap moisture in the walls and speed up deterioration. It can also contribute to damp in your living space, which can be unhealthy, and cause your house to heat inefficiently. For these reasons, we had planned to chip off all the old cement, and replace it with lime. The week that Scotland locked down, we were finally blessed with beautiful, sunny weather. Dry weather is PERFECT for repointing a building! We couldn’t have asked for better timing. With plenty of sand and lime, sunny days, and a global pandemic in full swing, there wasn’t much else to do but start chipping!
We would take it in turns chipping away at the tough cement that covered Jameswood’s walls. Underneath this envelope, a beautiful array of stonework was emerging. Following behind the loud chipper, someone else would patiently carry out the task of repointing Jameswood.
 While lockdown didn’t effect progress on our restoration, it was presenting us with an unexpected challenge… The pool had shut.
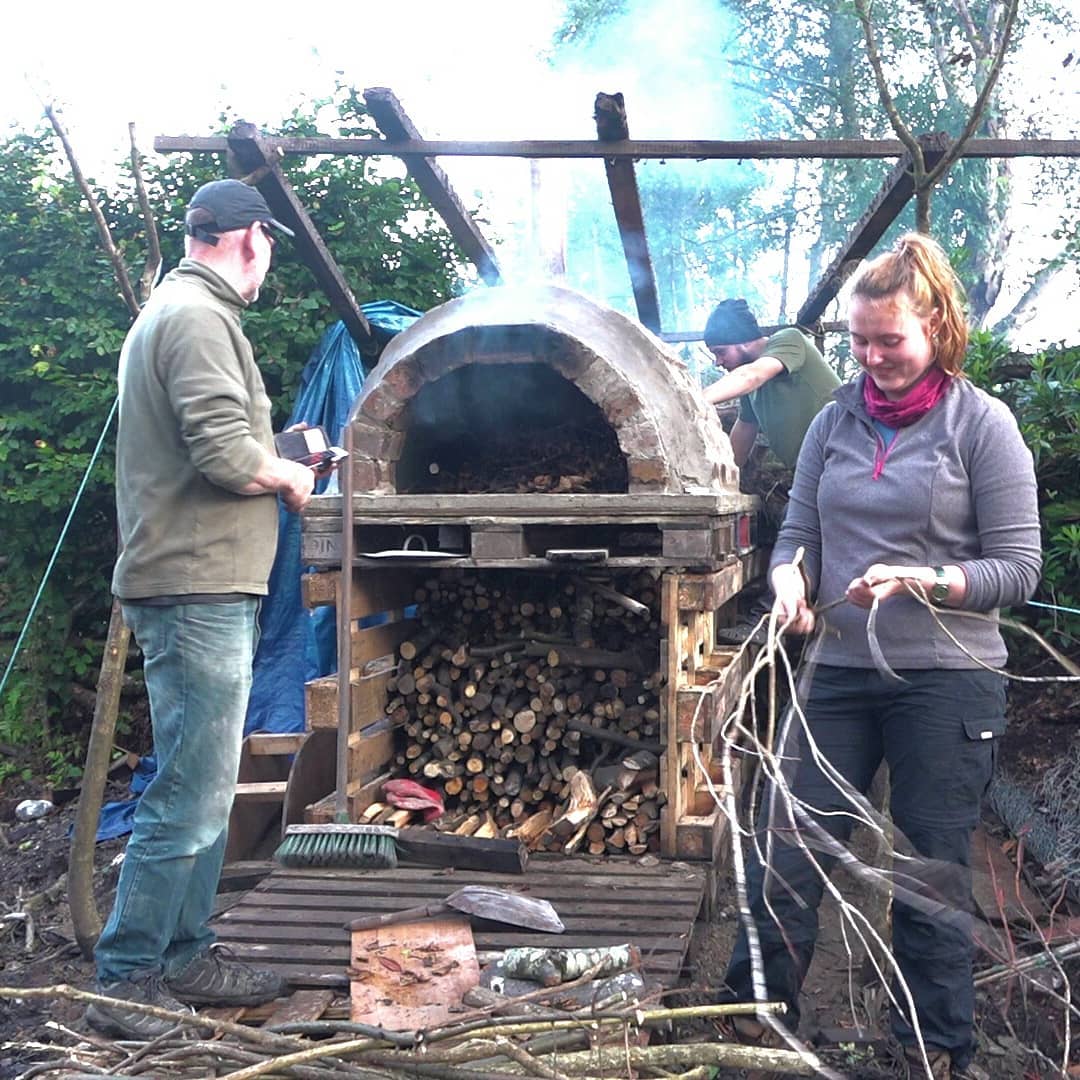
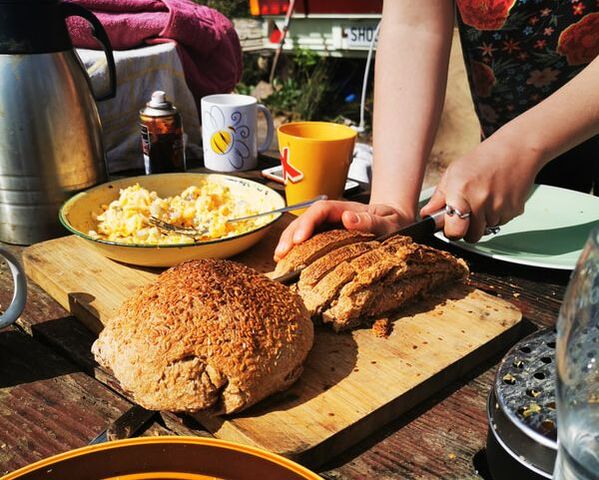
We had an old tub in the yard, and a wood burner with a built-in water tank, which a friend had given us when we first moved to Jameswood. Cal and Jake found some old copper pipe that had been harvested from our derelict home, and with some resourcefulness and clever tinkering, the two engineered us a beautiful wood-fired bathtub in just a few days! 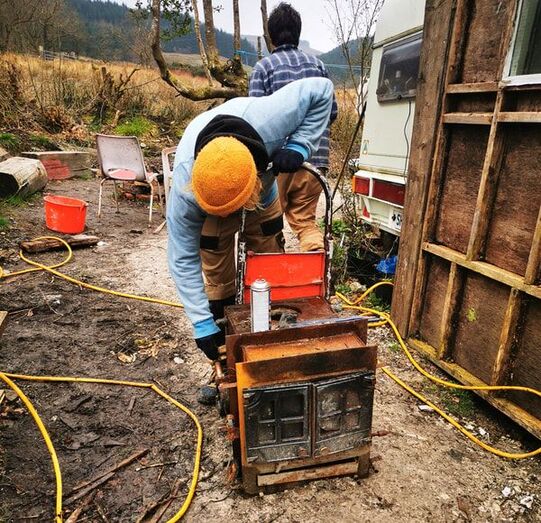 My first go in the bathtub must have been the best bath I’ve ever taken. The luxurious Victorian roll-top was filled to chin-level, and instead of cooling down like a regular tub, the fire would keep the water toasty. Even when the electric shower arrived, we continued to treat ourselves to a bath every so often. I love sitting in the water on a calm evening, listening to the birds go to bed, and watching the bats come out as the sky turns a burning orange. We have decided our tub is now a permanent fixture at Jameswood, and looking back, it probably wouldn’t have come to fruition if it wasn’t for our sudden lockdown, and a kind looking man selling us a broken electric shower in a parking lot.  Another slightly less pressing concern of ours was the absence of flour and yeast from any grocery shelves in Dunoon. Last summer, a Workawayer had built us a beautiful wood-fired pizza oven, which was made out of reclaimed bricks from the house. Cal LOVES pizza, and had grown accustomed to weekly home-made pizza nights. He was devastated that he couldn’t share this tradition with his best friend Jake.
 So, the shutdown really wasn’t all that bad for us. Since we work from home…on our home, government sanctioned lockdowns kept us busy on our restoration. We cherished the time we got to spend with Kate and Jake, who would otherwise have been off on their own adventures in Switzerland and beyond. We were blessed with beautiful, summery weather, and we had breathtaking remote places to explore when we went out for our daily exercise.
I wanted to thank everyone who has thought of us during these difficult times. Cal and I sincerely hope everyone is staying safe and healthy at home, and again, want to thank all the front line workers who are helping us get through this pandemic. Thanks again for joining us, as we take on the restoration of Jameswood Villa. Xx Claire (and Cal) |